To go with a chocolate bunny, how about some peeps? Sure, you’ve seen crochet peeps before, but these peeps are the original shape by the amazingly talented Crochetverse. In case you couldn’t guess I’m a huge fan of her work, and I’m sure you’ve probably seen memes of the crochet Halloween costumes she has made for her kids.
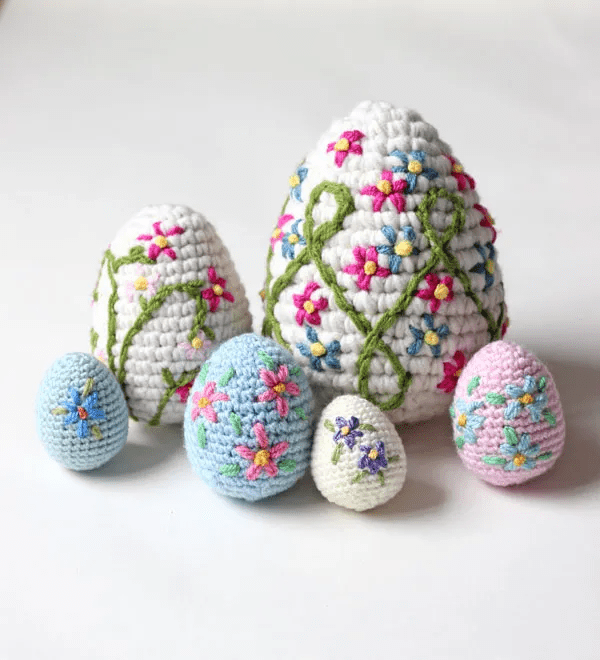
If you’d like to make an Easter bouquet, try these crochet tulips by Hookok. If you like flowers, this site is filled with crochet flower patterns. This site includes video tutorials as well.
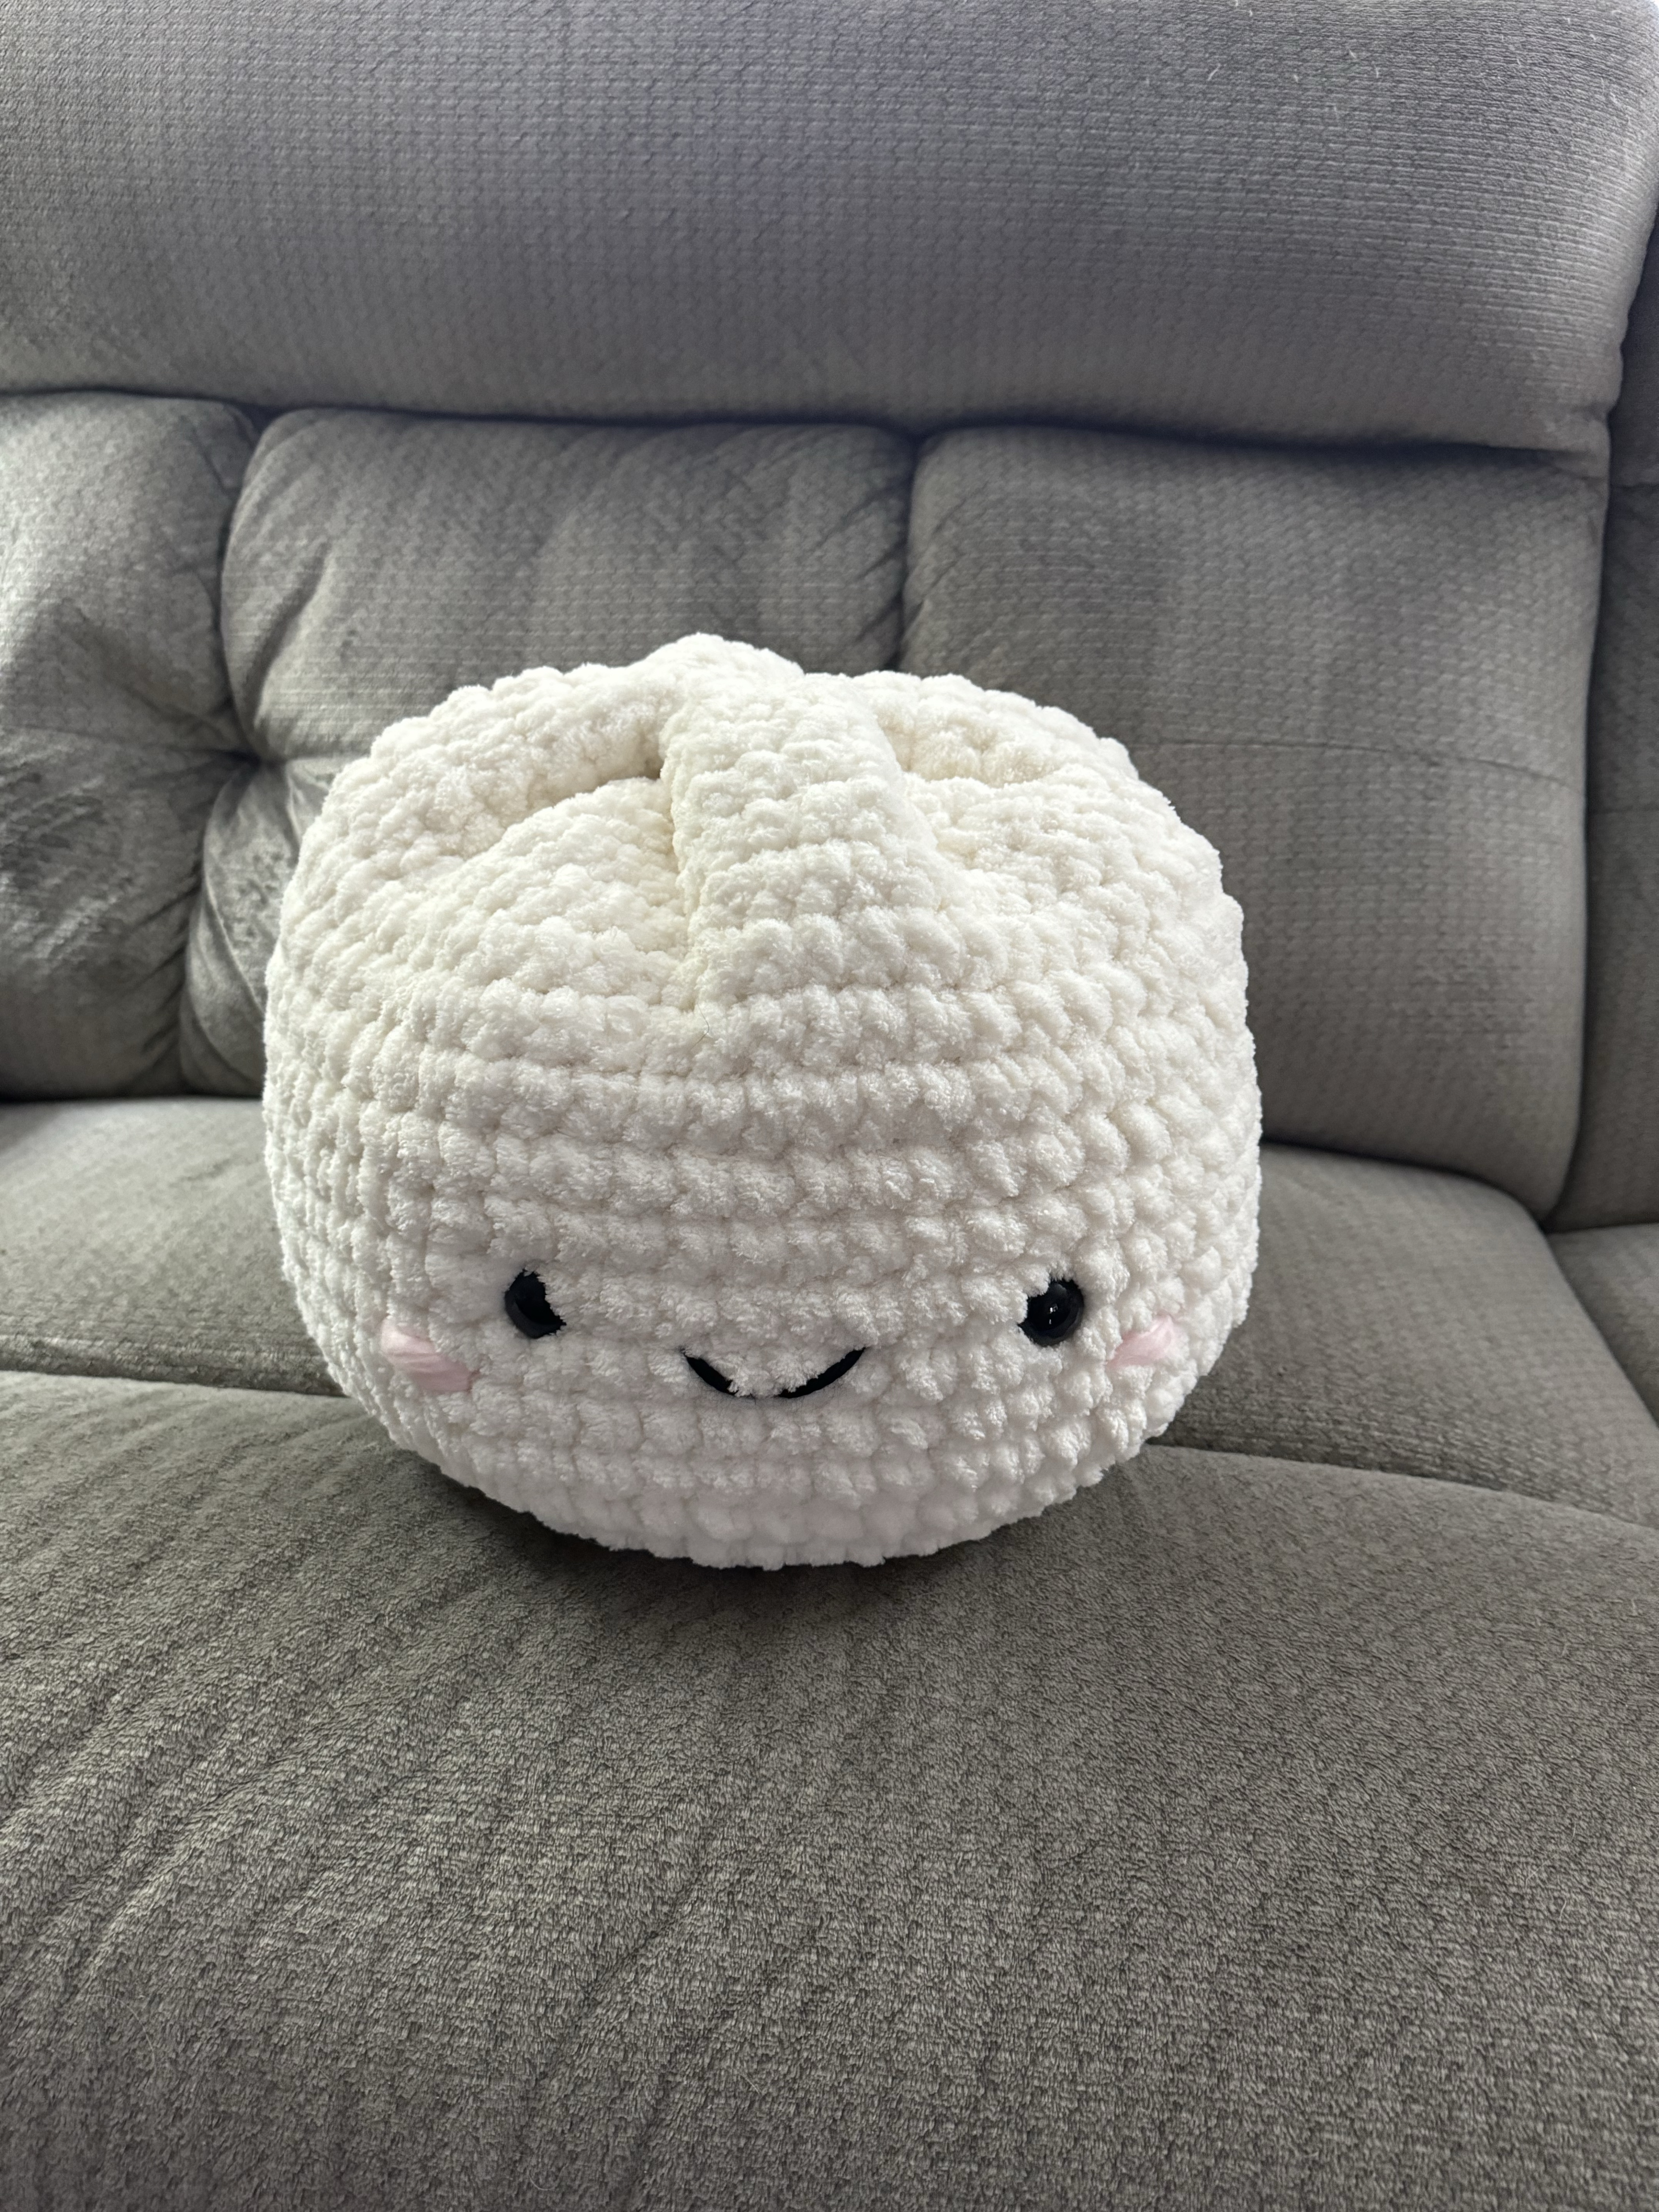
Last summer while I was at the Pittsburgh Knit and Crochet Festival, my boss texted me a photo of some Crab Rangoon pillows that she thought her daughter wound love. I searched around a bit and found the pattern on Etsy, by Vandallorium. I also looked around for some other food inspired crochet and found the bao pillows pattern too by curiouspapaya. I also purchased one more pattern for Giant Kimbap, but I ended up not buying materials for this one and didn’t make it.
The Crab Rangoon pillows are ridiculously easy to make. The instructions are very easy to follow. My only issue, as always is gauge. My gauge came up a bit small, so I thought I could block it to size, but that didn’t work out too well. I used Yarn Bee True Colors yarn for the crab rangoons and duck sauce bowl. I bought these pillows to stuff my rangoons and duck sauce bowl. Since my Rangoon gauge was a little off, I ended up needing to open the pillows up and un-stuff them some. I added my tag to one of the rangoon pillows, I didn’t want to overdo the pillows with tags on them all.
The giant bao is probably my favorite. In fact I purchased more materials to make another one for myself. For the Giant bao I used Yarn Bee Perfectly Plush yarn for the body and Yarn Bee Showstopper for the blush. The safety eyes came from Etsy. This one was also very easy to make. The pattern was well written and the creator also offers video help as well, but I didn’t need that. One tip, since this yarn was super plush and hard to see, I used stitch markers for where the increases happen. I’d count out to the increase locations and add markers before I crocheted the round. This helped me to keeps my counts accurate. and prevented me from continually frogging the rounds. Isn’t he cute?
This week I packed up the pillows and shipped them off. They arrived for my boss and her daughter on Valentine’s Day. Her daughter loved them. So glad they are being enjoyed.
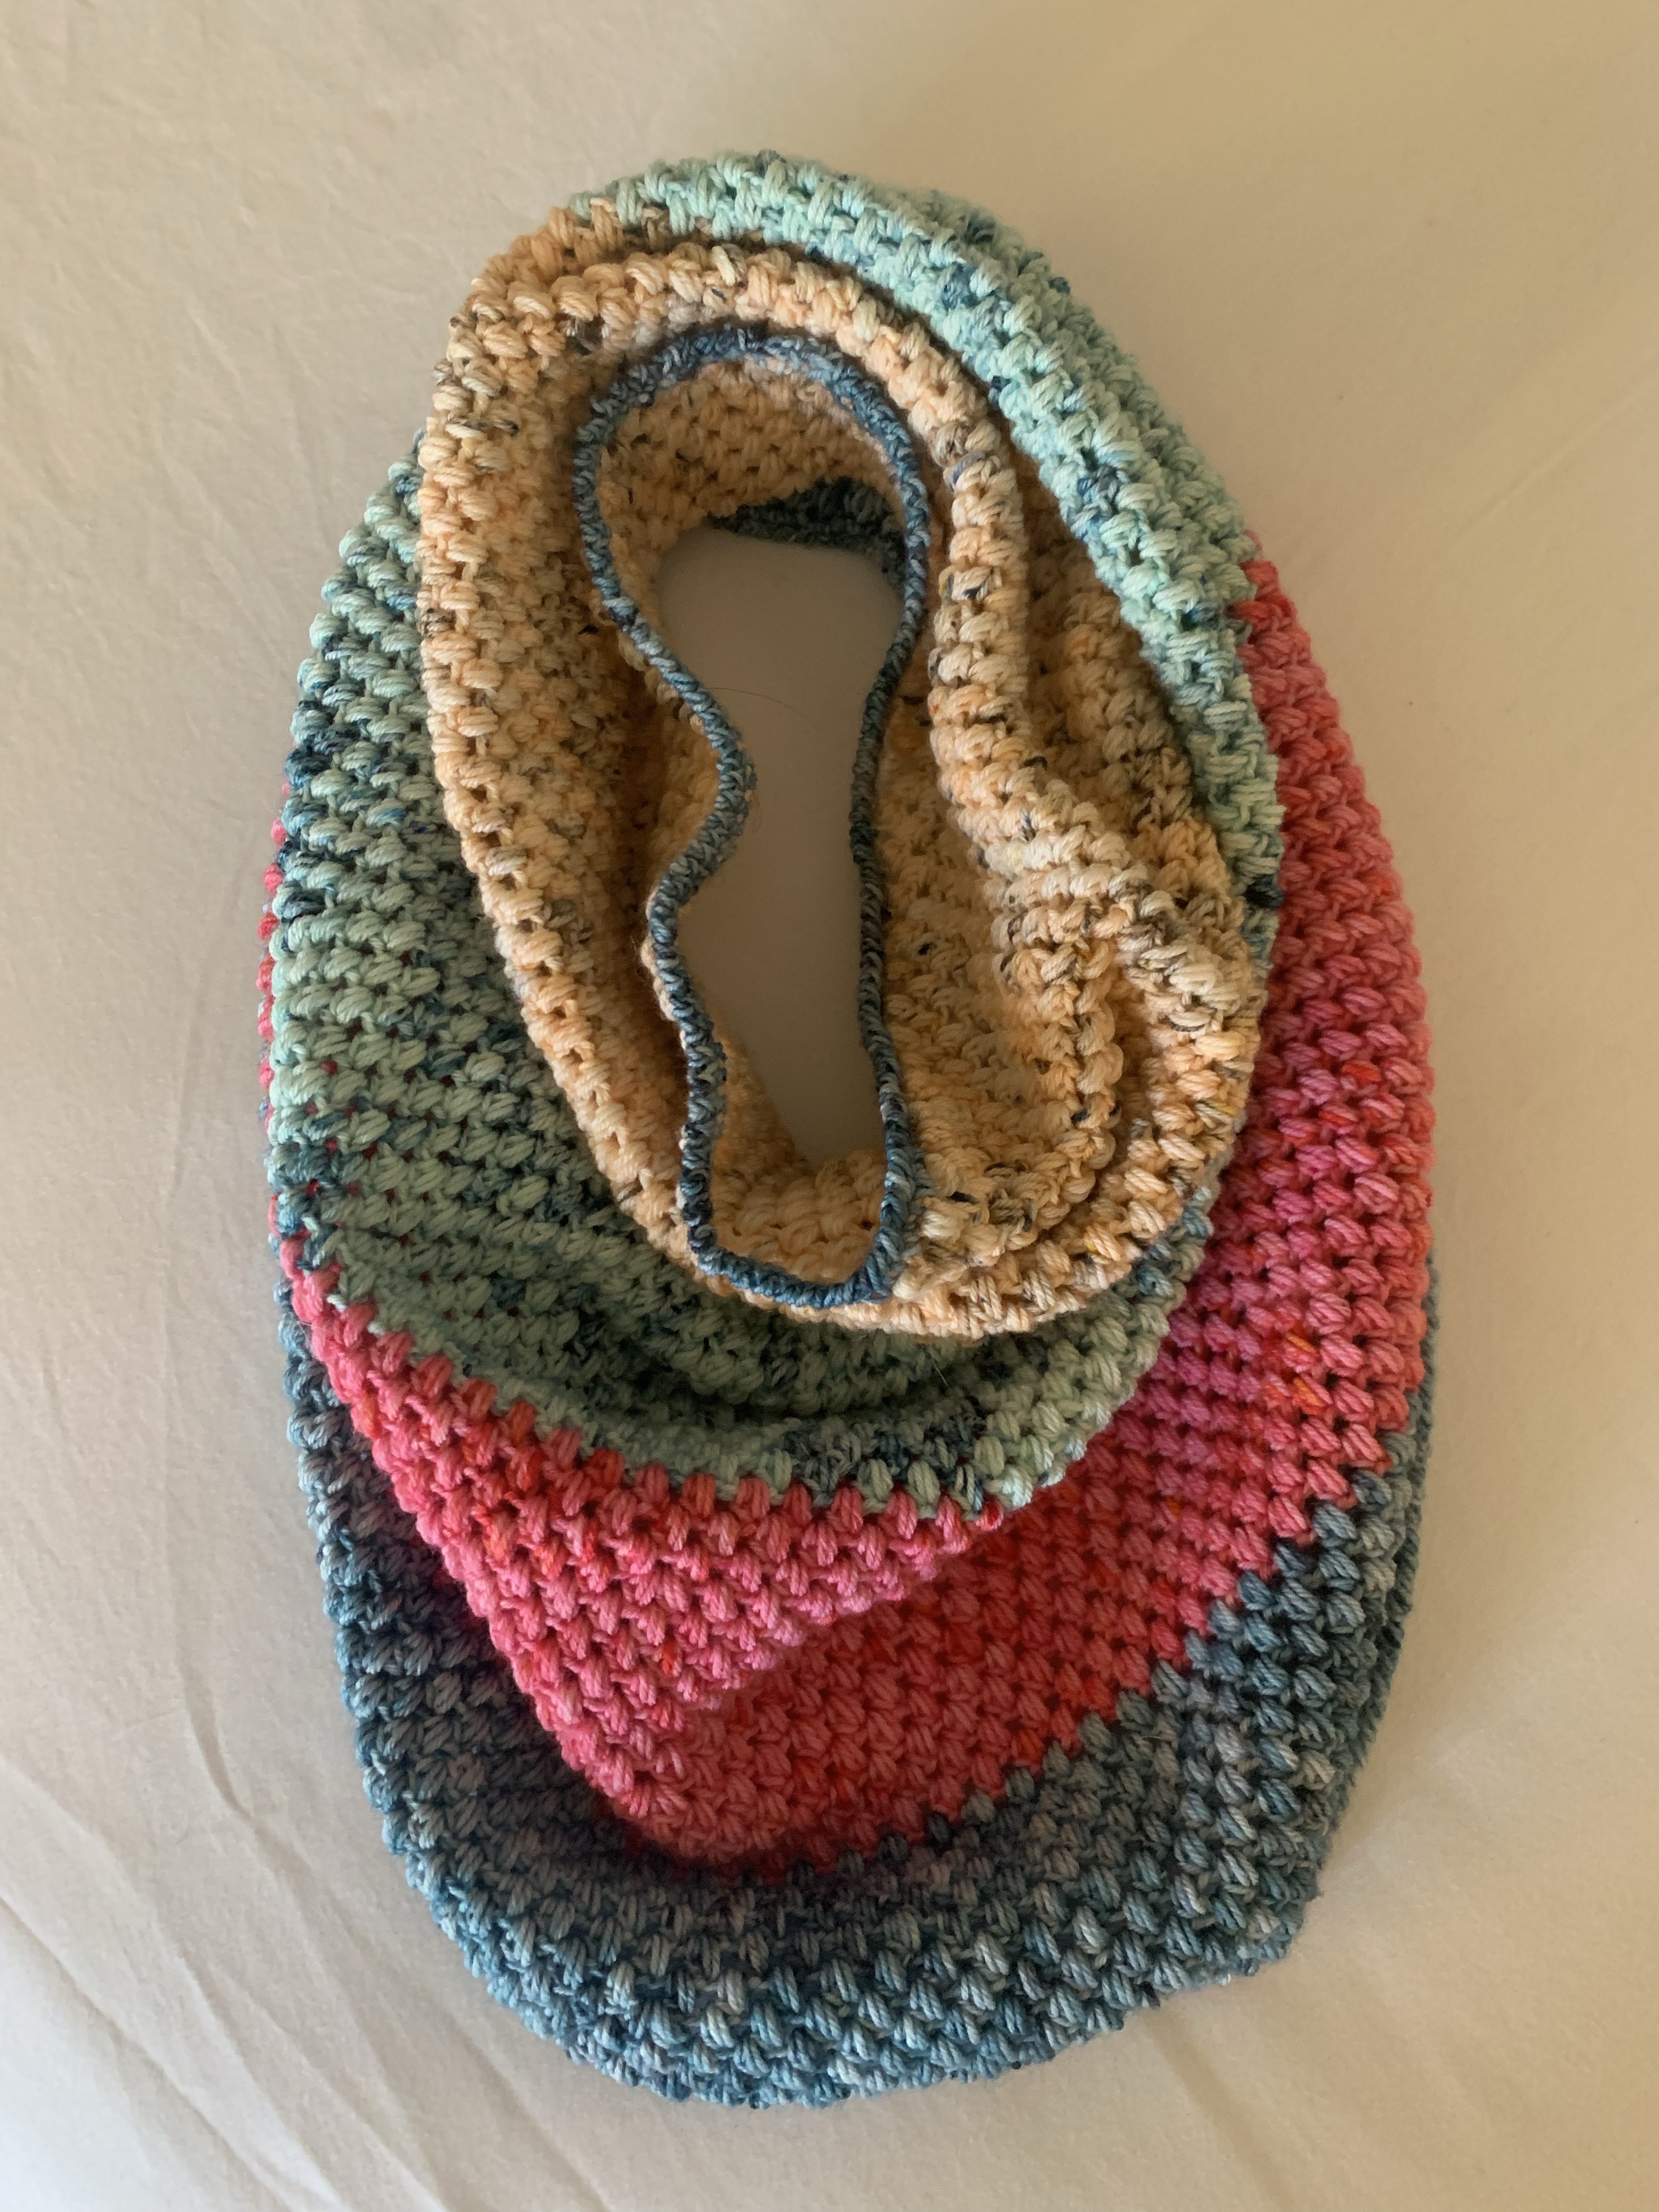
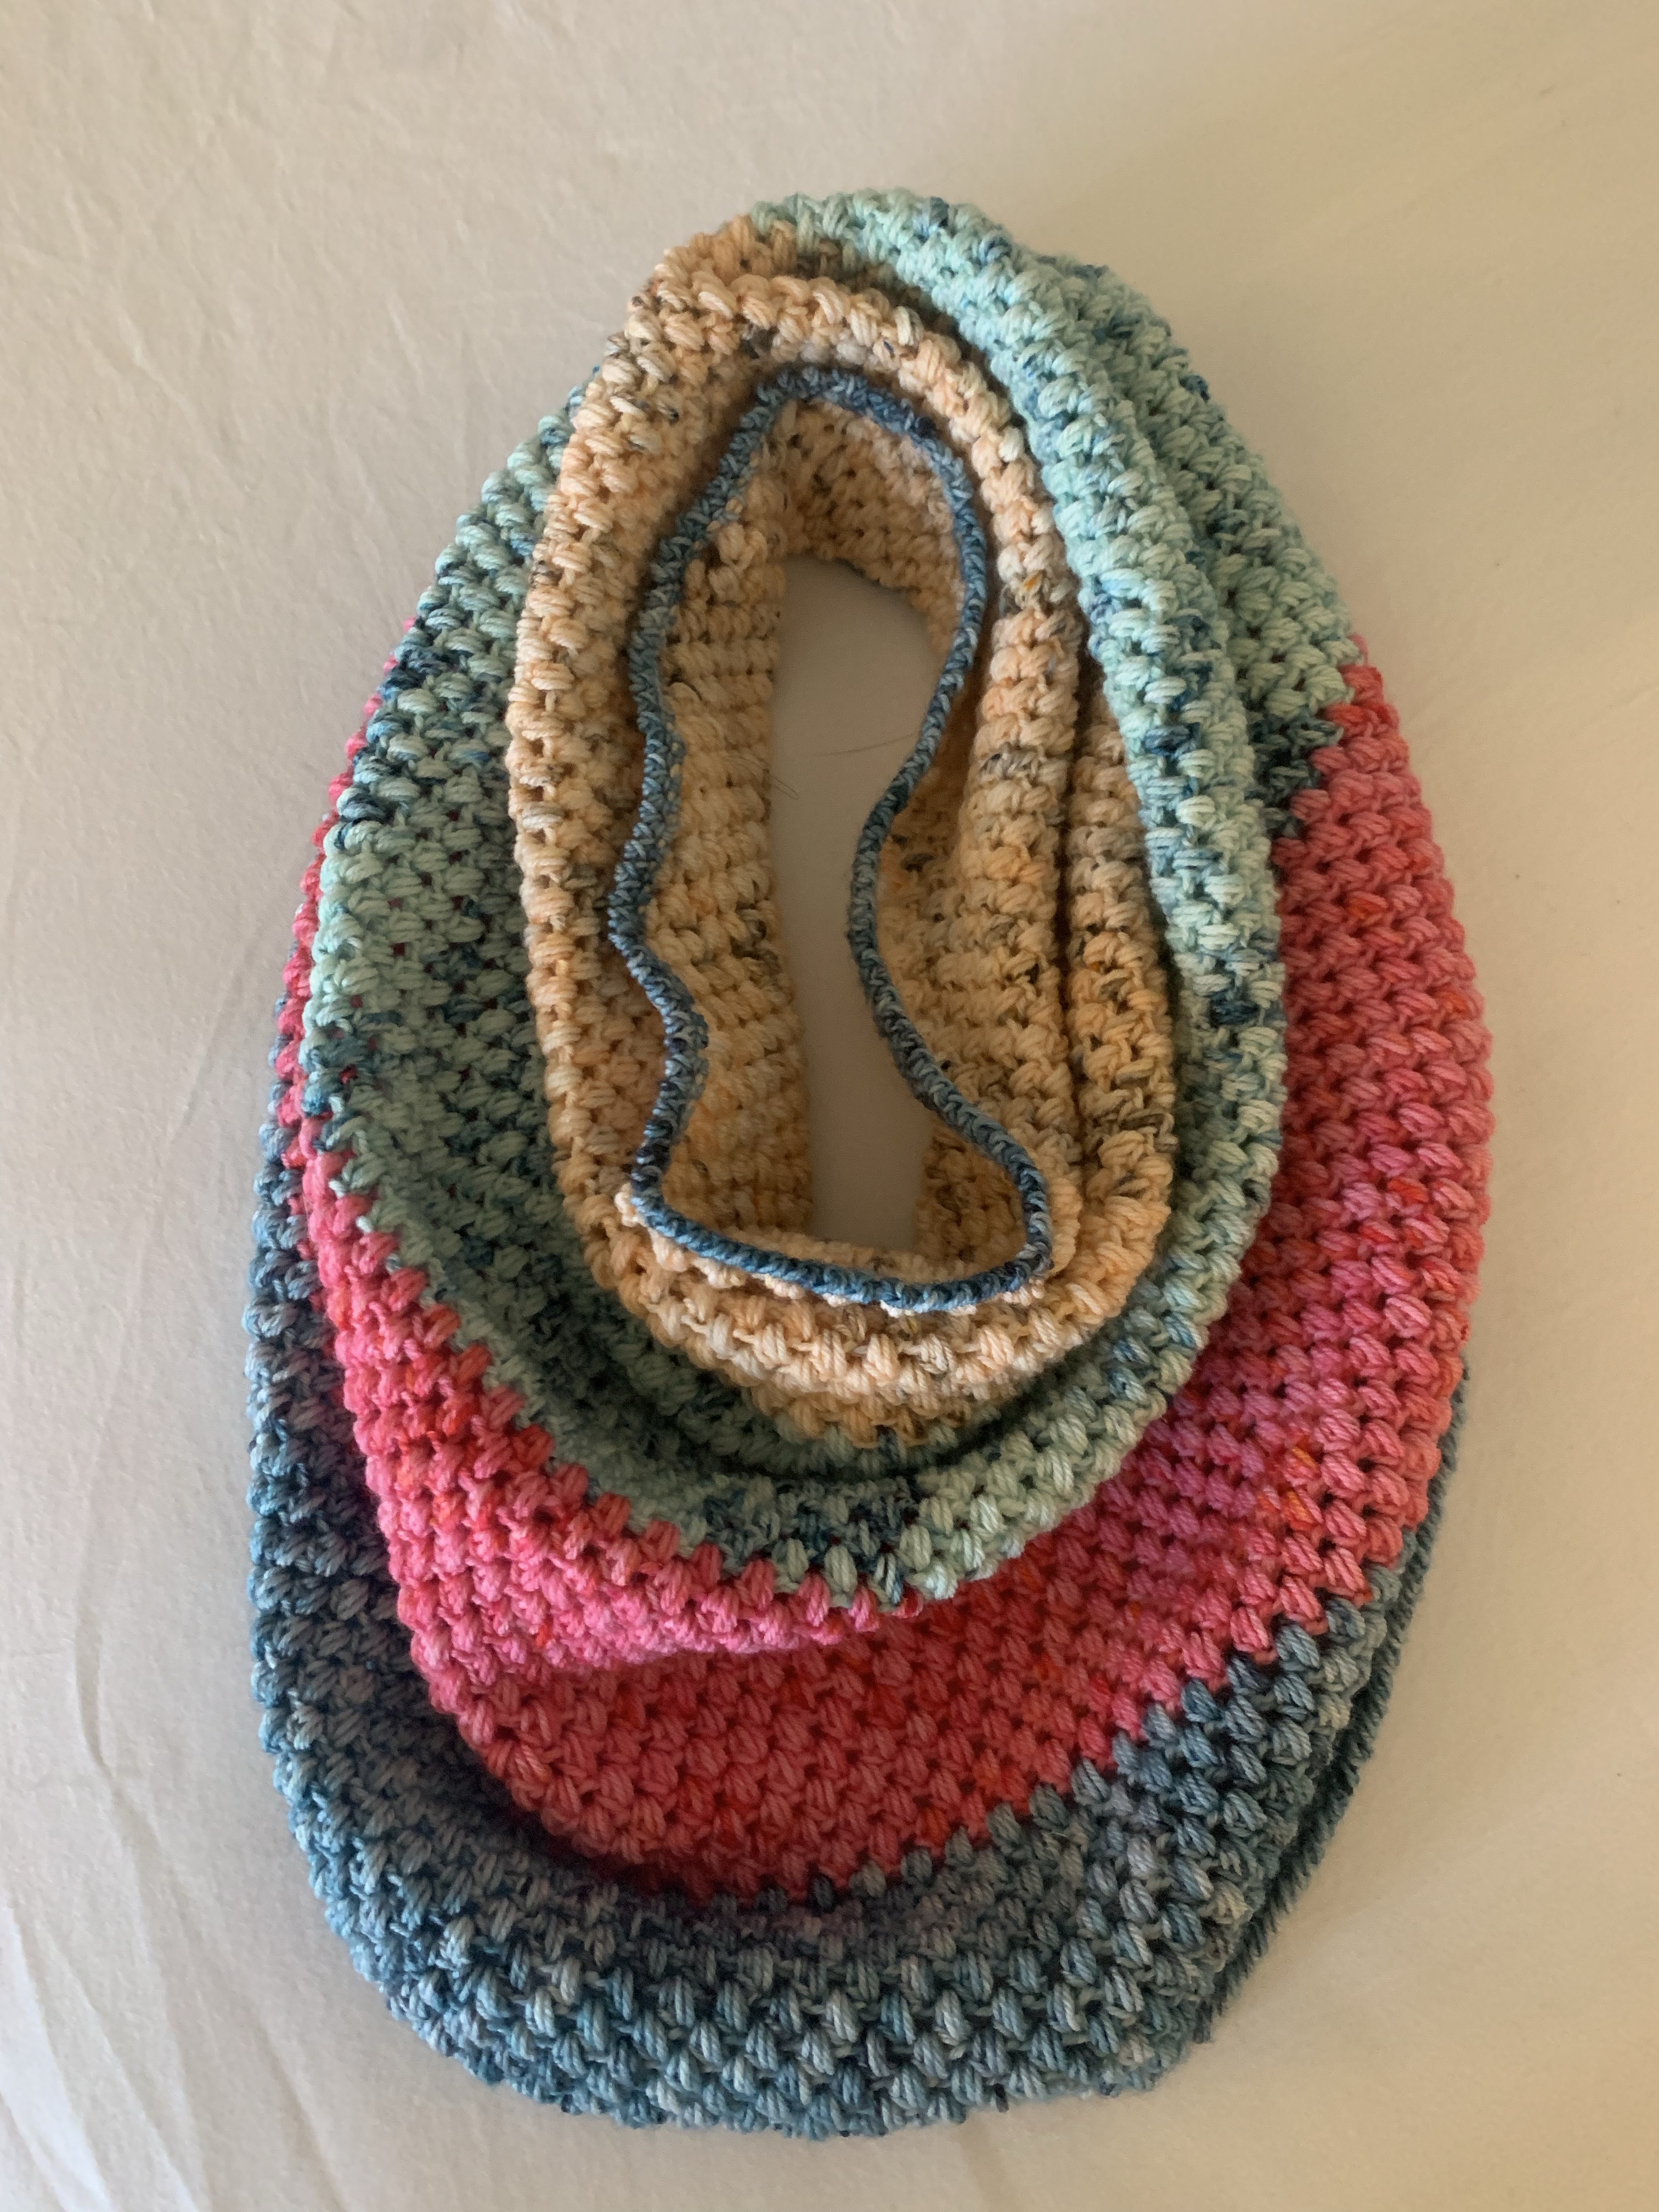
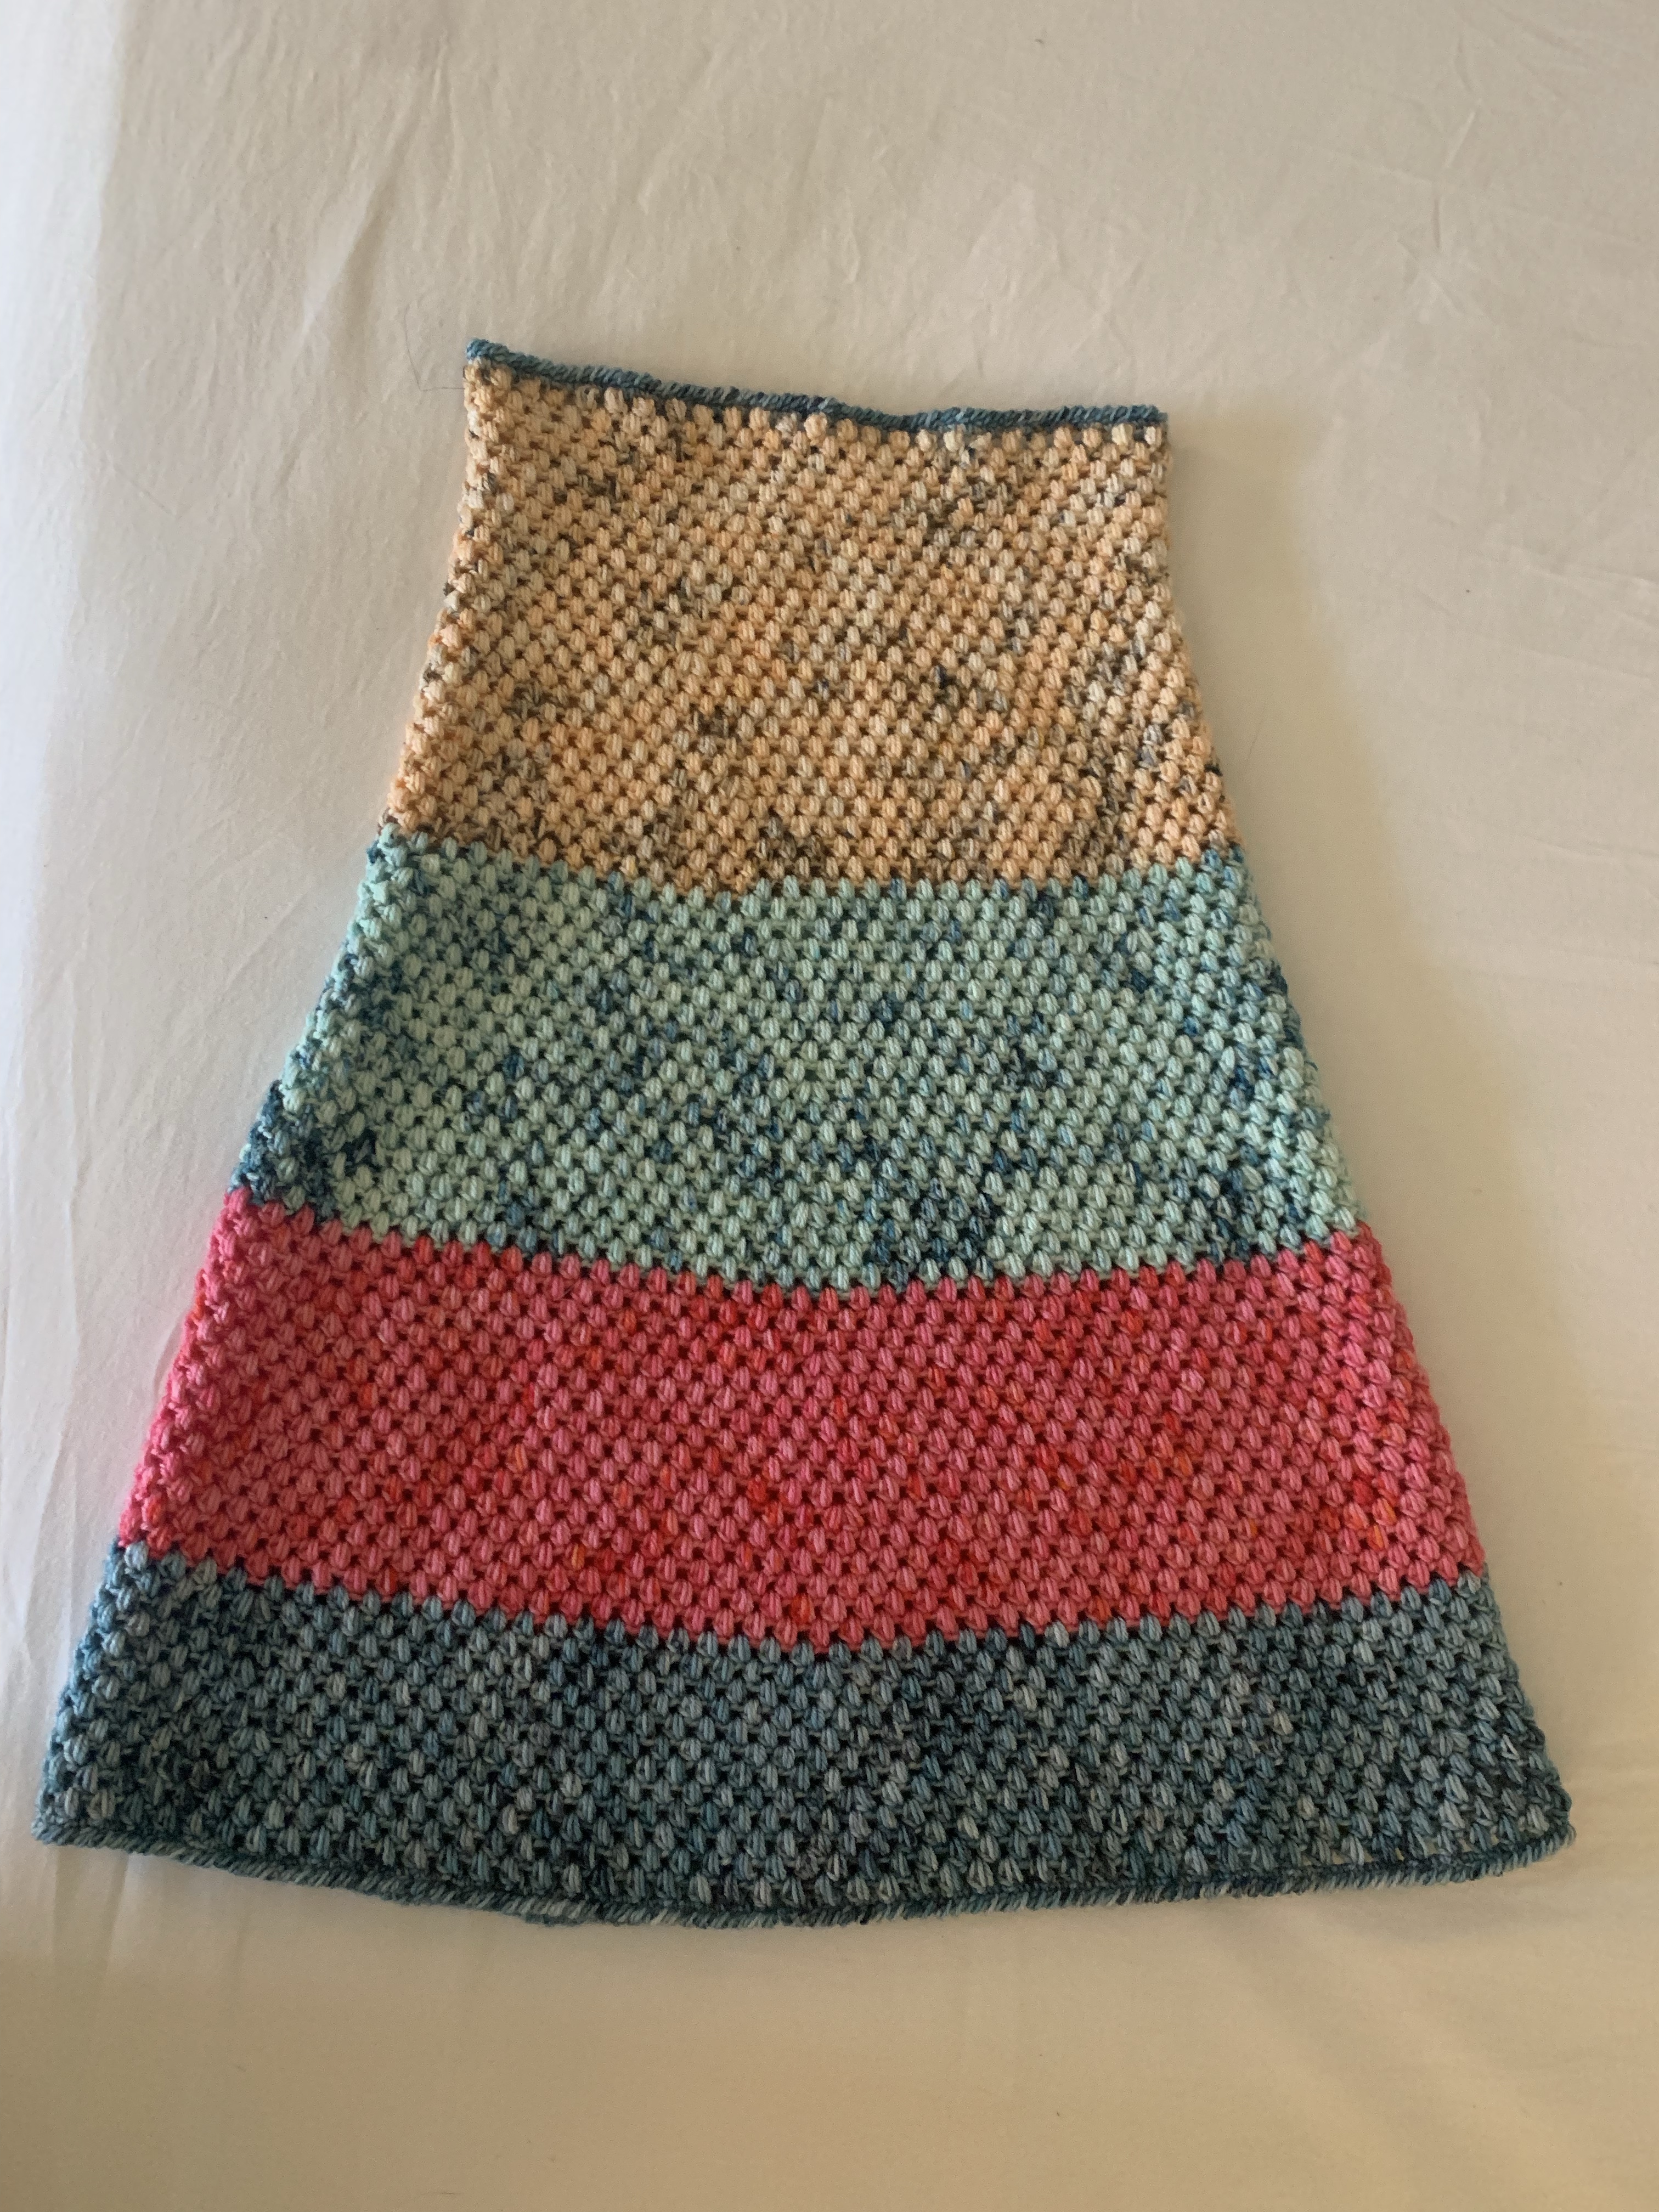
Last year I was working on some pretty big projects, and I also travelled a bunch, which meant I couldn’t take my projects on trips with me. So I had a couple of plane projects to bring along. These are small projects that I can put in a project bag that will sit on my lap during a flight. For me this meant I worked on two cowl patterns that I got at the Pittsburgh Creative Arts Festivals in 2022 and 2023.
The first project was the Juniper Cowl by Toni Lipsey. She came to the festival in 2022 and I got to take 2 courses with her. I bought a yarn kit from Created 4 U at the festival. This little project went on a few plane rides with me. I finally finished it off in Jamaica last fall and gifted it to my sister-in-law for the holidays.
My next plane project is another cowl pattern I picked up at the Crochet festival this year. I took a couple of classes from Valerie aka the Knitting Fairy Godmother. She had her own booth and was selling a yarn kit for the Valley Vista Cowl. The pattern is currently free on her website. It uses a mosaic crochet technique. That was not the class I took, but I still thought the pattern was pretty easy to follow after I looked up how to do a Mosaic Double Crochet (mdc) stitch. This one I finished by December and shipped off to one of my employees as a holiday gift.
So the next time you get little yarn kits for cowls, hats, scarves, whatever. Remember that they are nice small projects to take on a plane, train, passenger seat of a car, etc. I always like to have a project on me and I allow these to break my “Not to many WIPS in progress” rule.
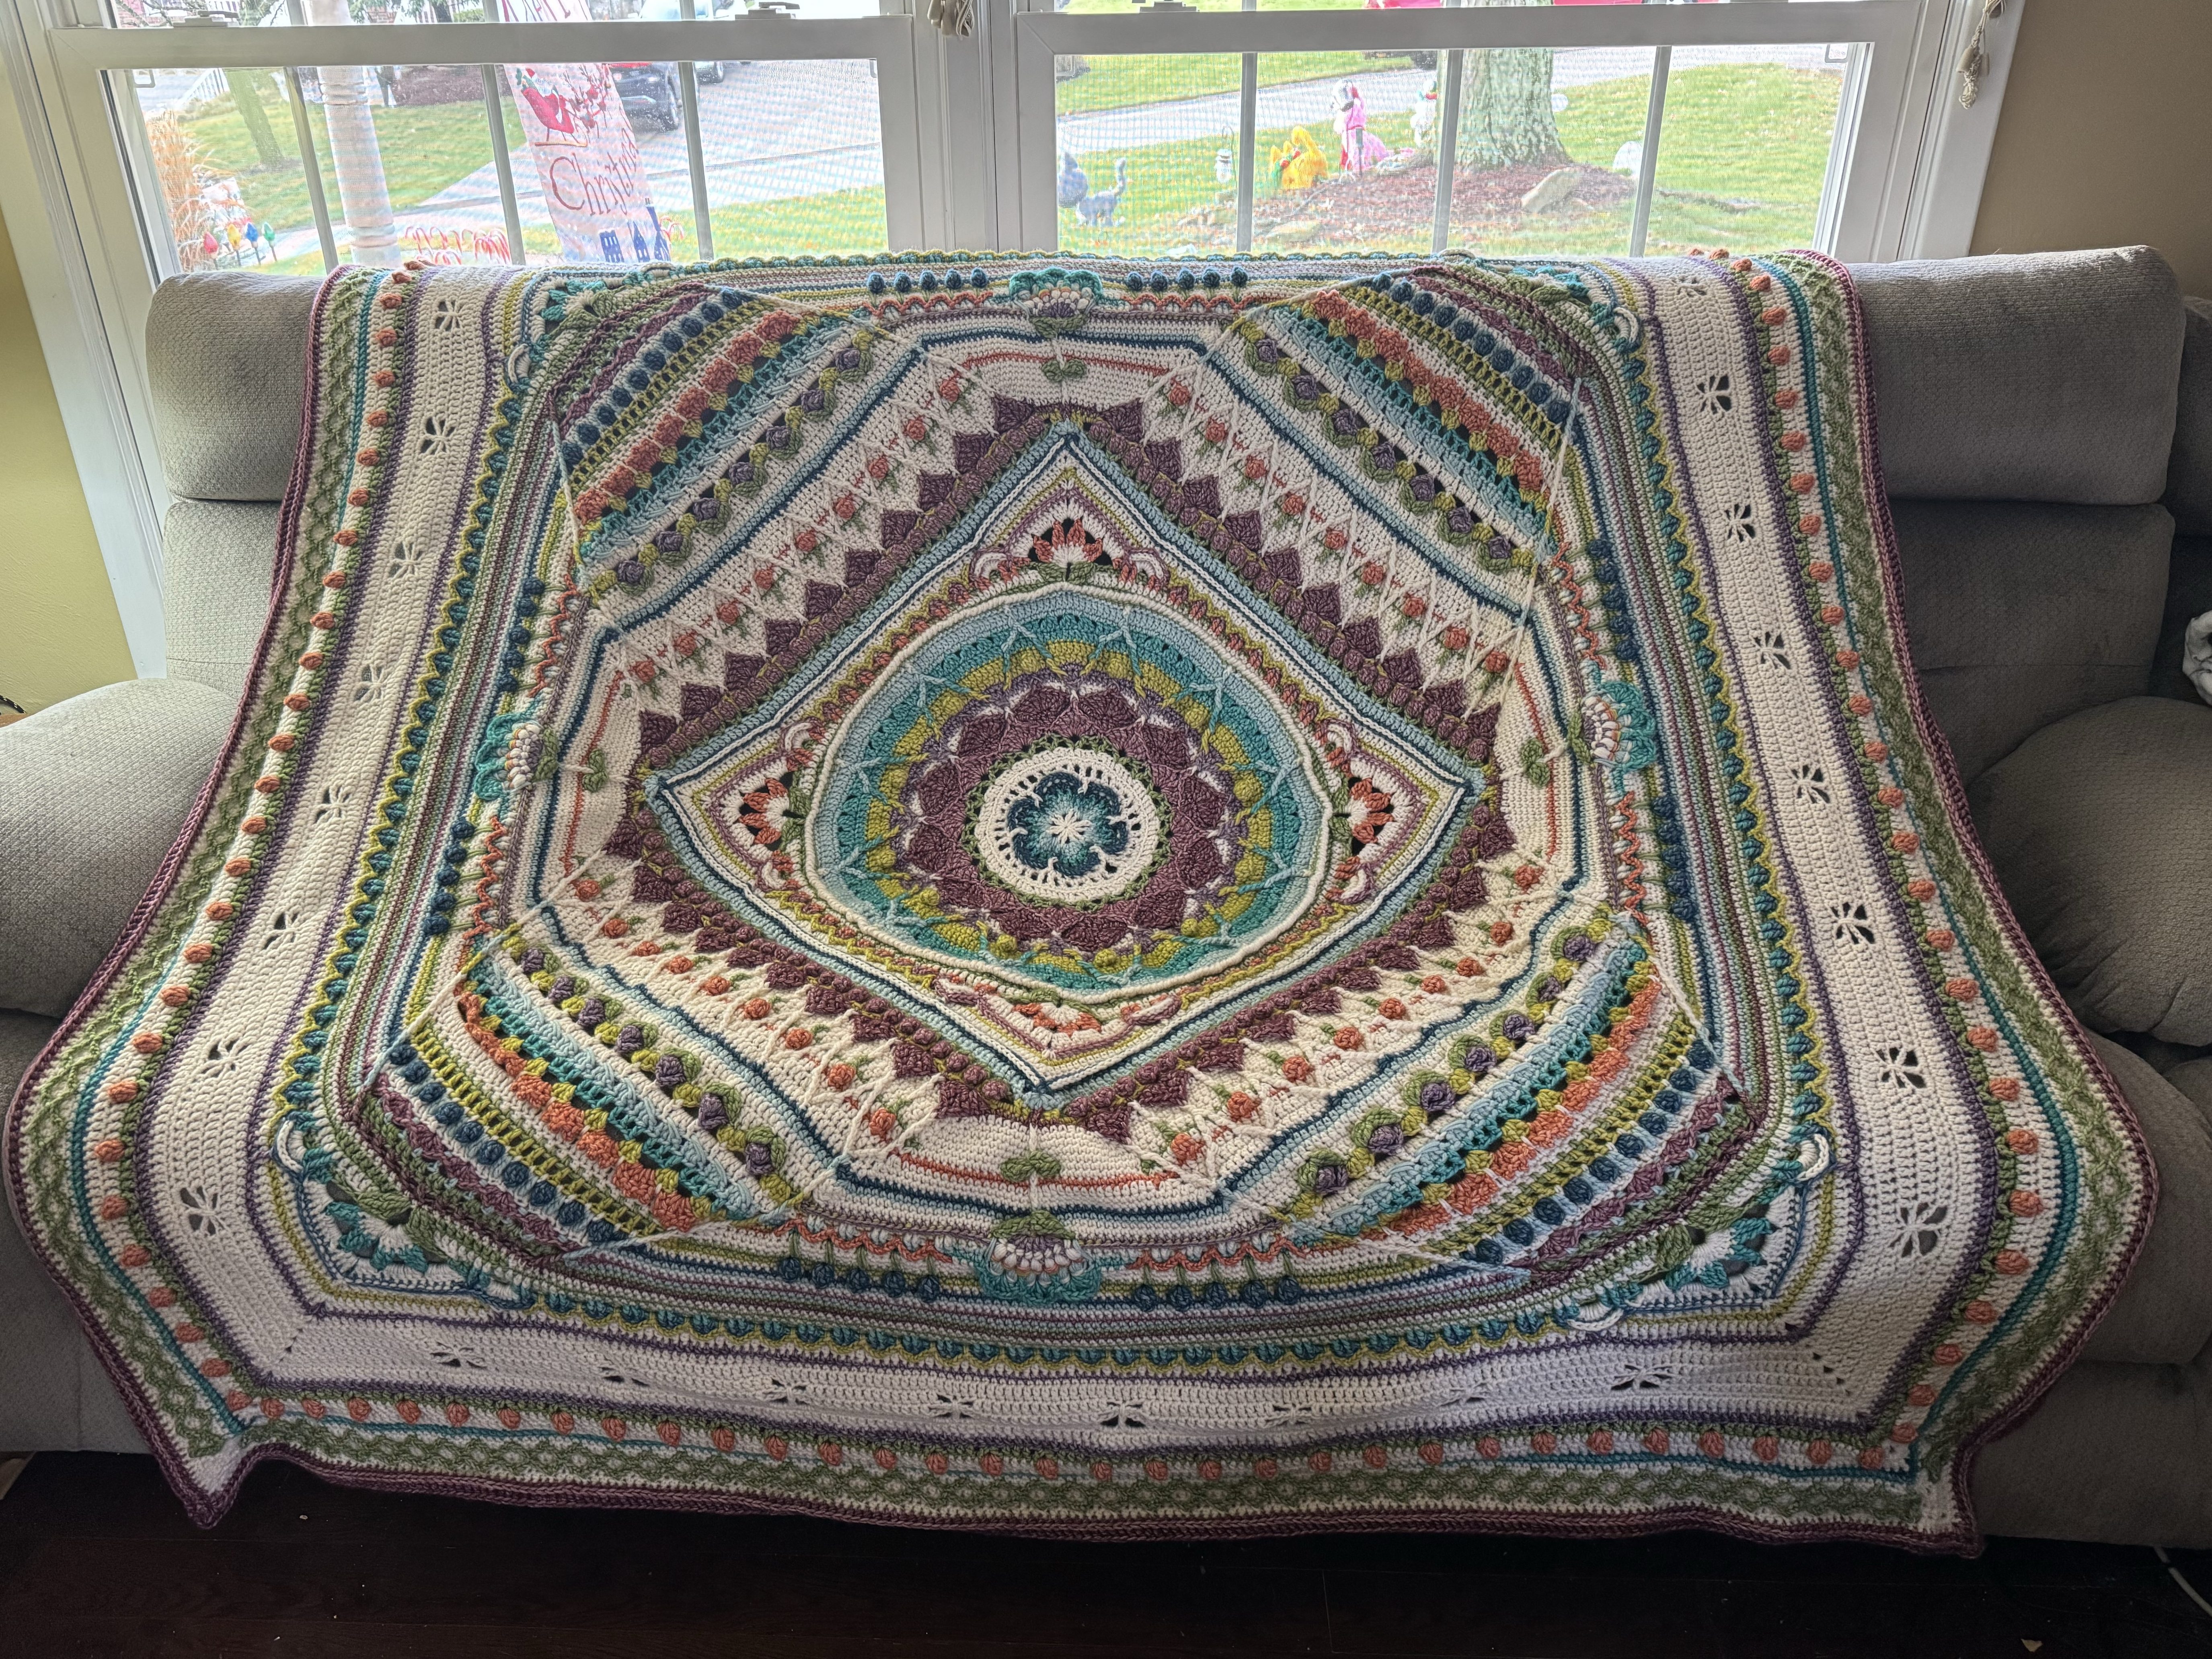
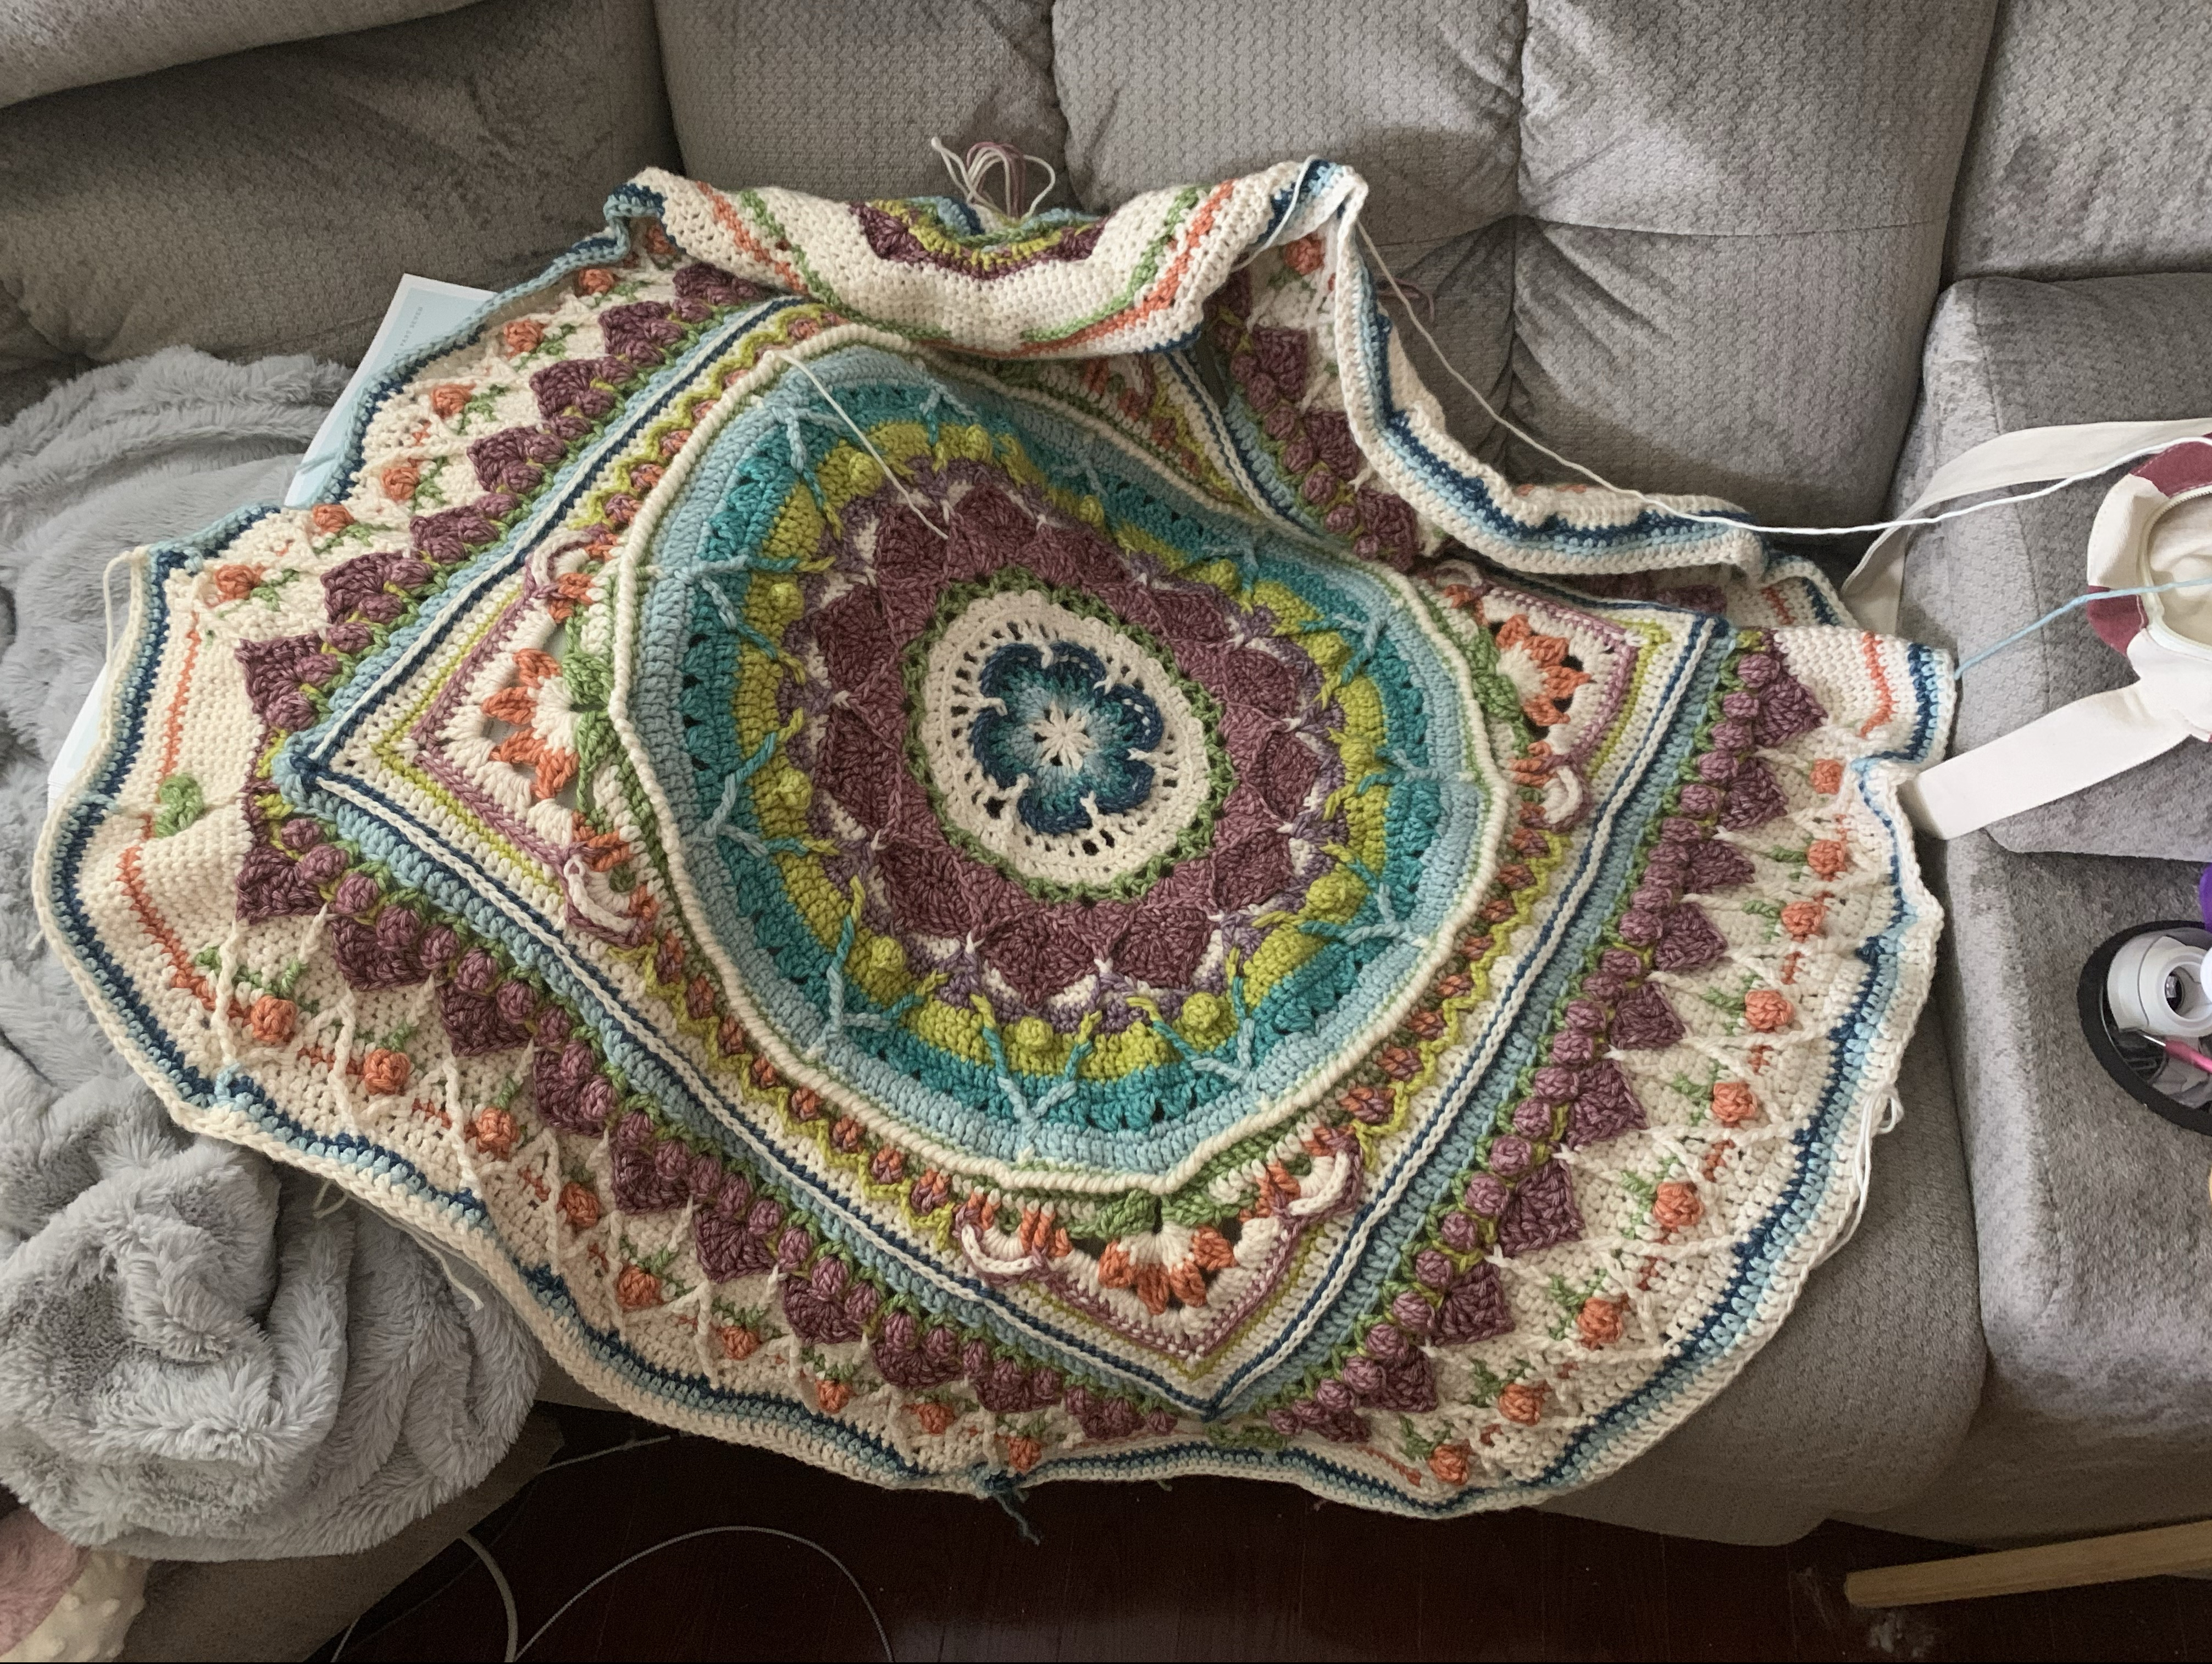
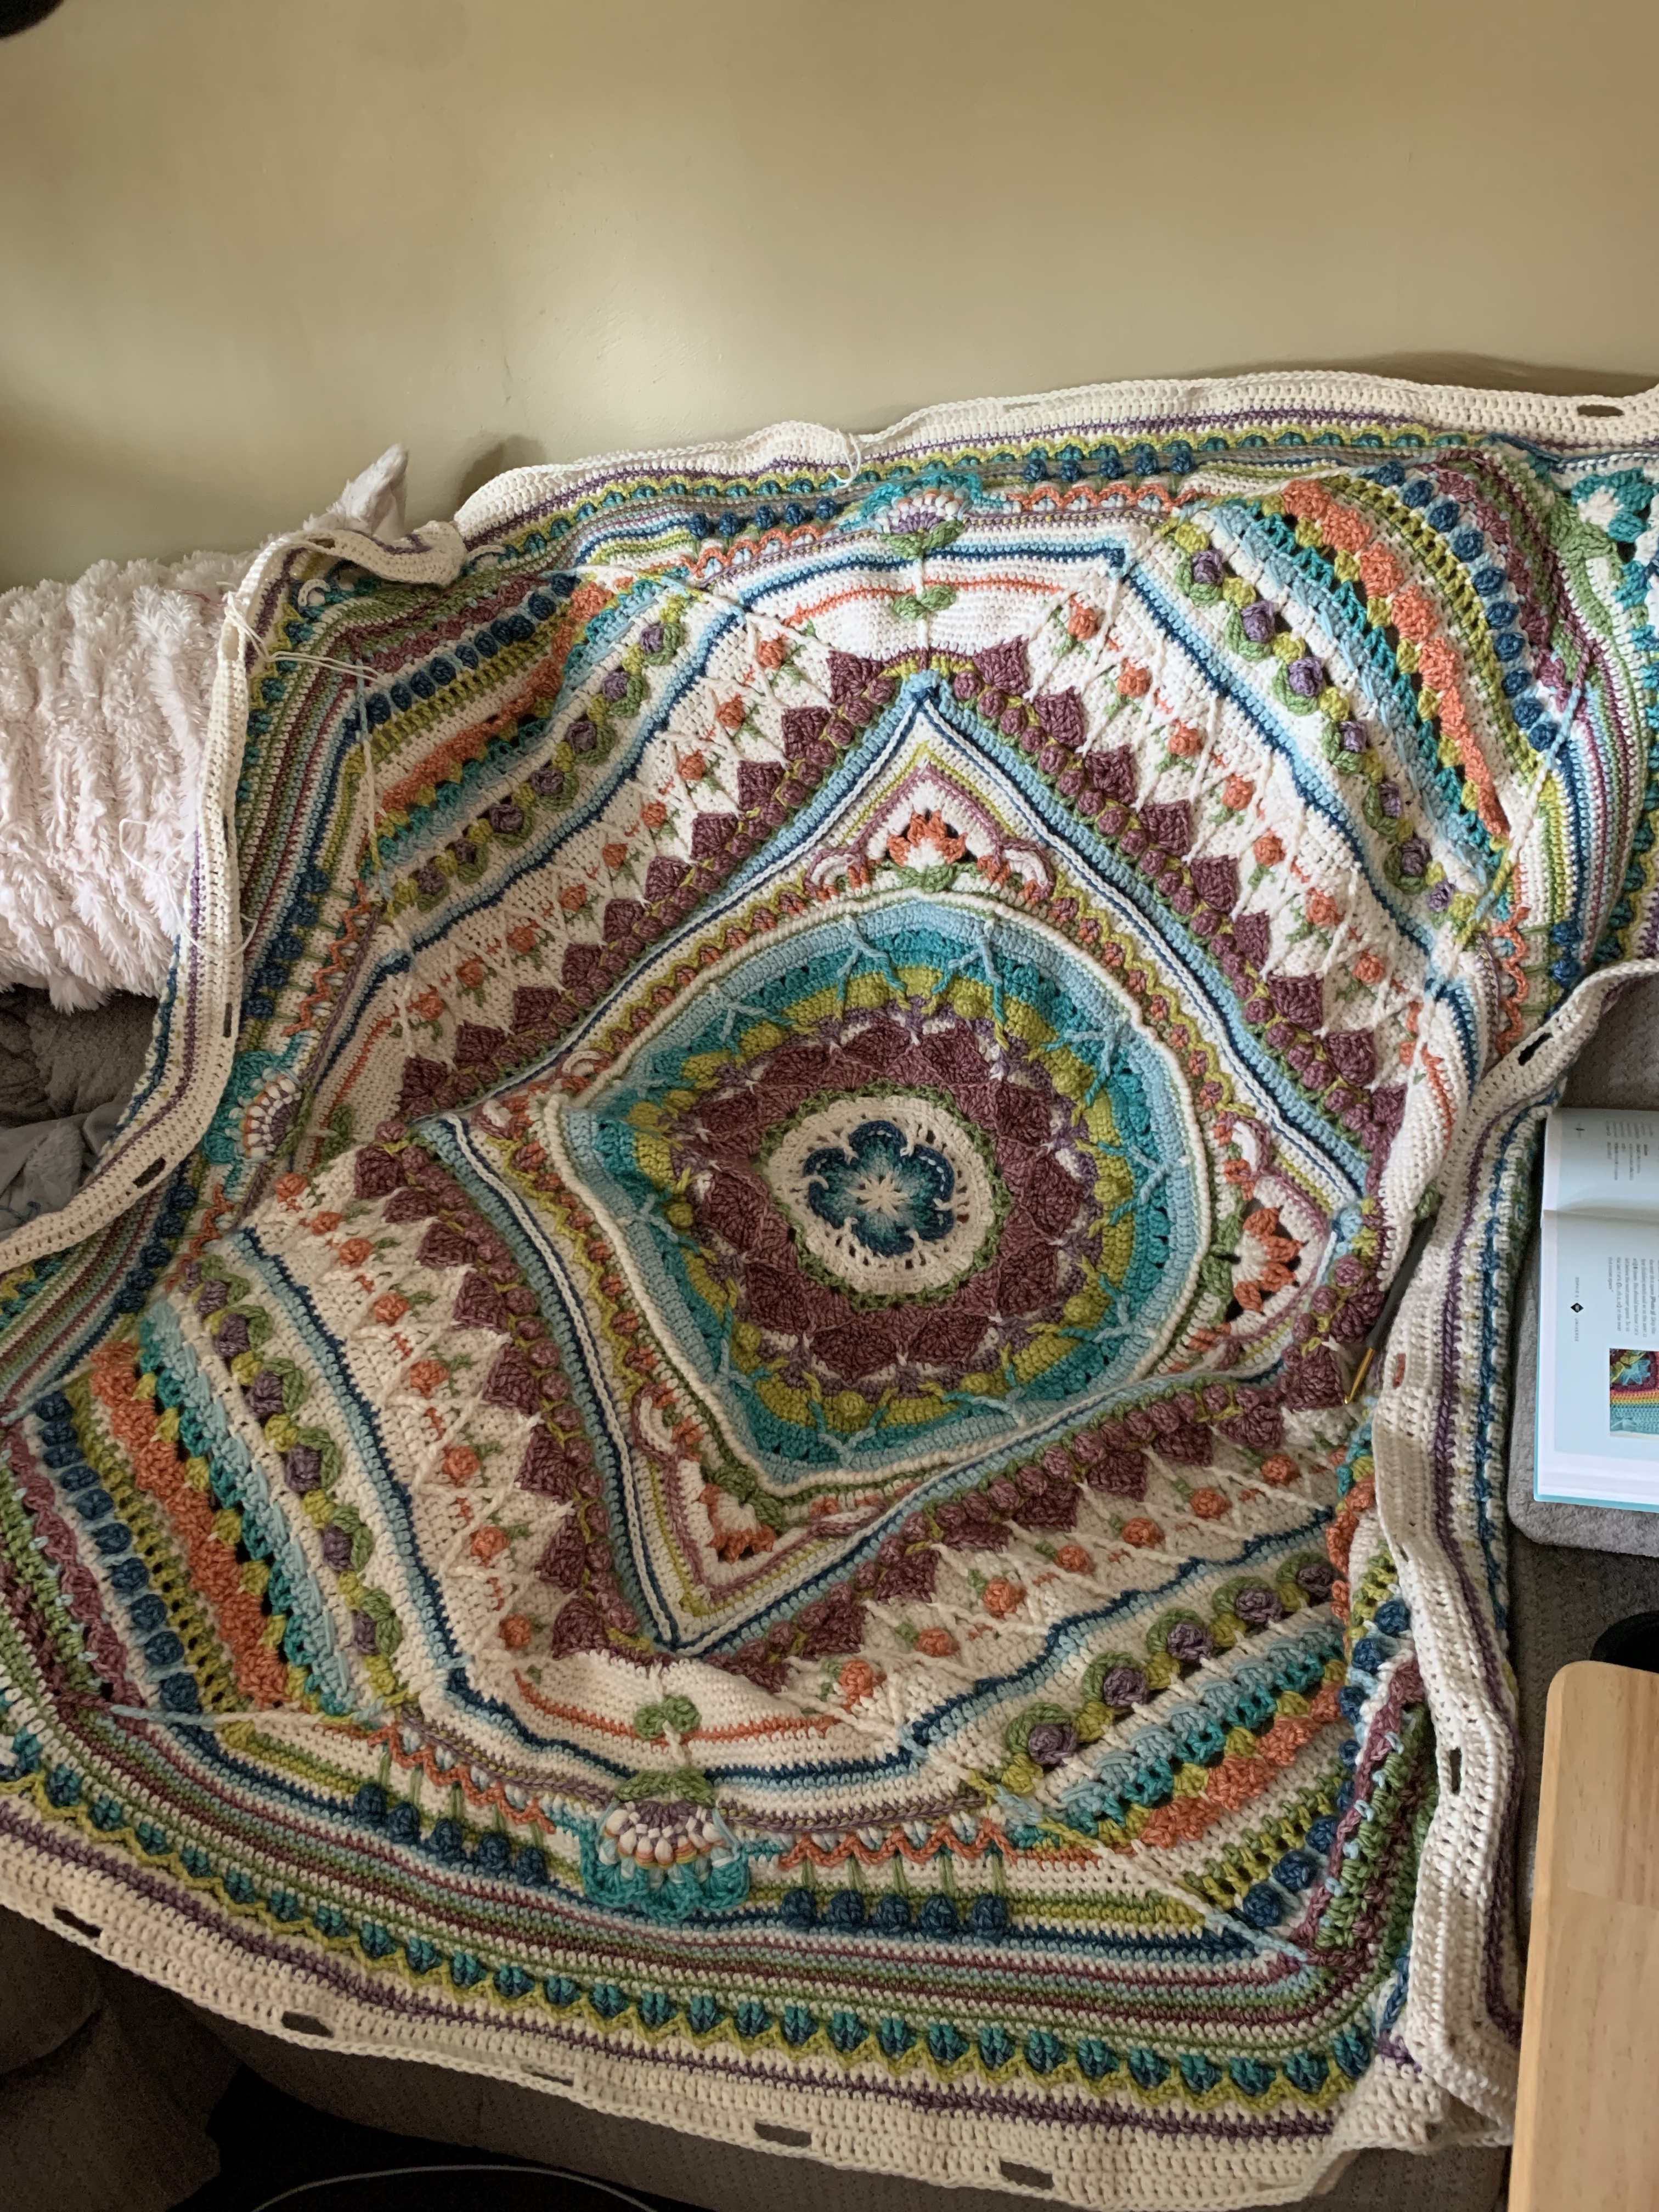
Last year for Christmas I asked for the Sophie’s Universe book, by Dedri Strydom Uys, on my wish list and Mom got it for me. At the time I just wanted to make this blanket, I didn’t really have anything in particular to make it for. Fast forward a few months and I found out that a long time friend was getting married! So I decided to make this for her as a wedding gift.
I was already making a large scale project, Jean Jacket. So I tried to speed that up so I cold start working on Sophie. I ordered a yarn kit from Jimmy Bean’s Wool. However, I usually have a very tight gauge, but for whatever reason, I flew through this yarn. I ended up having to buy more yarn, twice! I suggest buying at least a few extra skeins per color, so you can get them in the same colorway. Note: This blanket is not cheap to make. The original yarn was about $350, then with all the extra yarn I ended up buying it probably ended up close to $450 in yarn. I used the Scheepjes Stone Washed XL colorway. Also, note the XL, because the second time I tried to order more yarn I ordered Scheepjes Stone Washed, which is not the same weight. Lessons learned.
Be Careful when buying more yarn. Thankfully Sophie’s Universe has many color changes, so the difference in dye lot isn’t noticeable if you use that color in a different round. Just make sure when buying more yarn you but enough for those rounds.
I have to say, this book is the best pattern I have ever read. They have really idiot proofed this pattern with so much documentation and notes. And all that time that I was waiting for more yarn, I should have been weaving in ends. Don’t wait till the end to do that, because it’s no fun.
I also learned that this is a very difficult pic to block. I bought a few more packs of blocking mats for this blanket, but even 3 packs was too small. To block something this big I would have needed 4 packs of blocking mats. I also didn’t have enough space in the house for that so I used a spot in the garage, but even that spot wouldn’t have been big enough to stretch this out to it’s fullest size. I did it in sections for the most part. Speaking of which, the book does recommend when to block the blanket throughout the process, so I should have followed that suggestion to make it easier in the long run. I was too focused on getting the blanket done in time and rushed that step. Don’t rush, do it right.
So lessons learned for Sophie’s Universe:
Buy enough yarn in the same dye lot
Read all of the Notes in the book, they are really helpful.
Block when they tell you to block.
Weave in the ends every time you block, so you don’t have to do it all at the end.
In the end I finished in time and just shipped it off yesterday. This took me about 5 months to make (late August to late December plus blocking into January). Good luck finding a gift box big enough, so instead I bought a Fabric Storage bin for it. The wedding is in two weeks and I really hope she enjoys it.
Oh boy, I’m out of it this year. I never published this post? Guess not. But the good new is that I won best Halloween decorations from my ward for my town.
This year for Halloween I did a Nope scene, so I had to make a Jean Jacket prop. I decided that the easiest way to do it would be to just crochet it. So I got some very large wreath frames and some grey and black yarn and did a freeform version of Jean Jacket.
I was a bit inspired by Crochetverse and the costumes she makes for her kids. So I wanted to do a large scale crochet freehand Halloween prop. I have a long way to go to catch up with her talent, but I did learn a little bit about shaping. I also learned that I’m very impatient and that I don’t want to go back and reshape when I’m working on something this big.
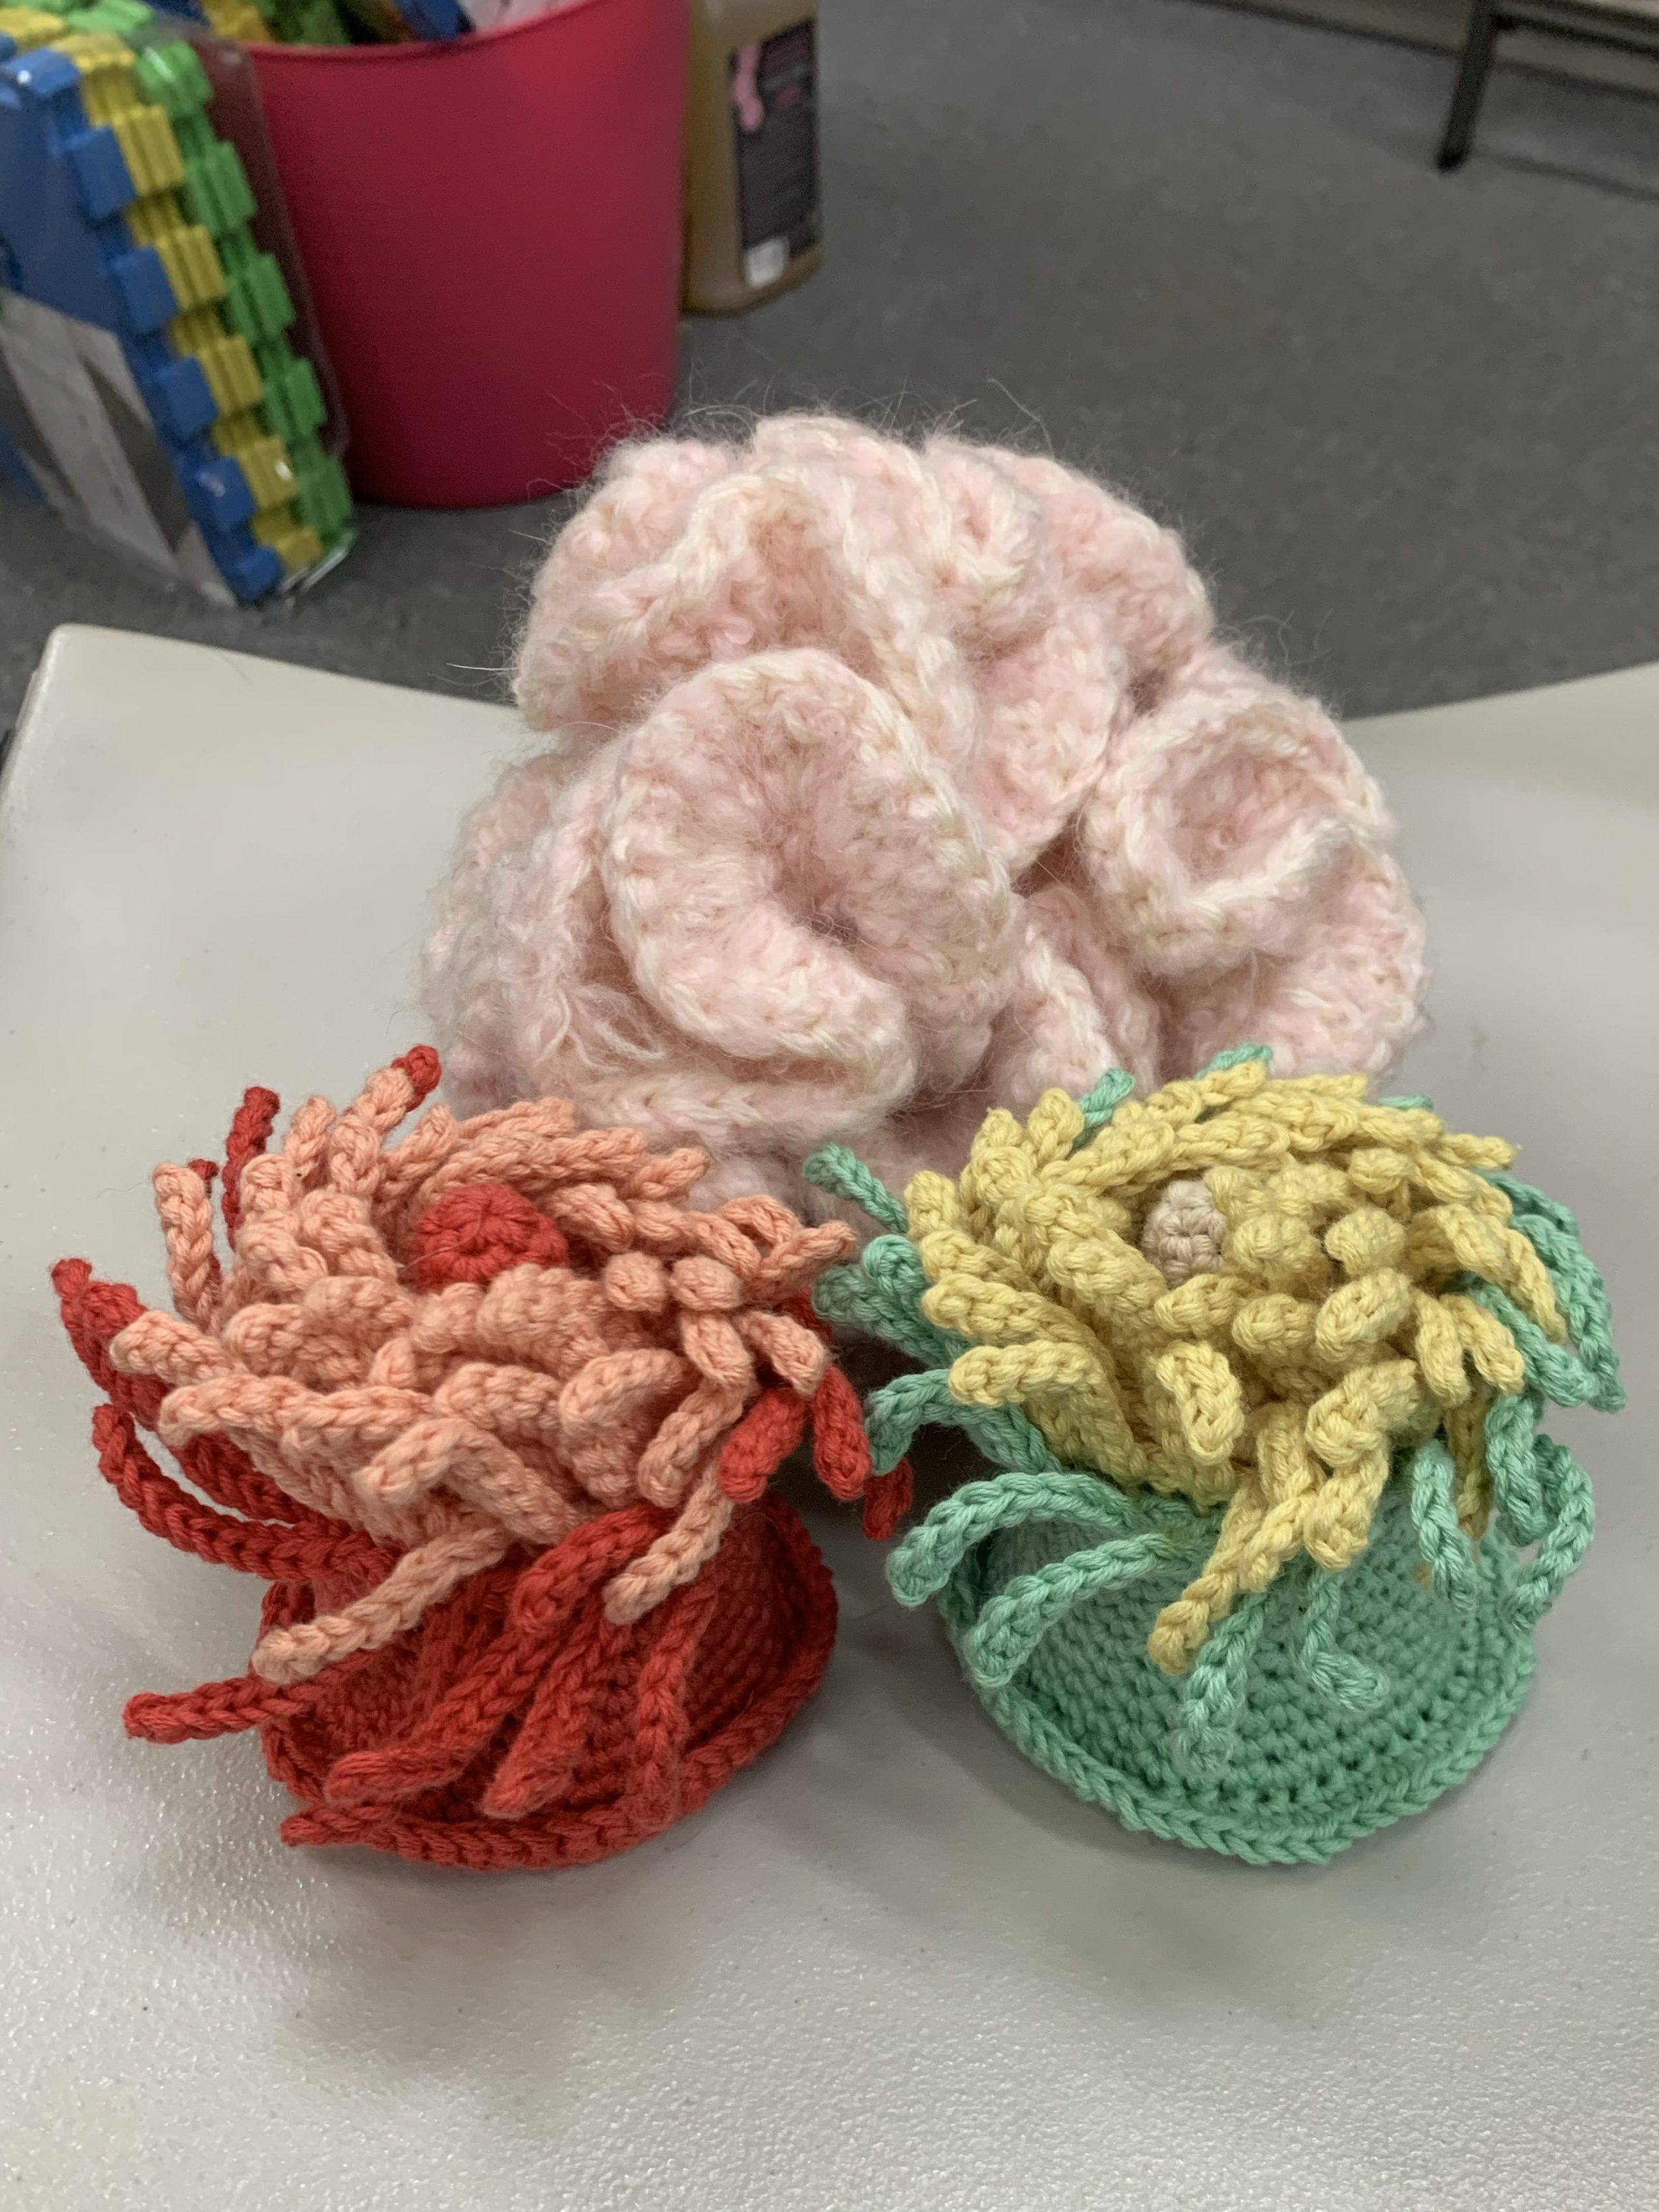
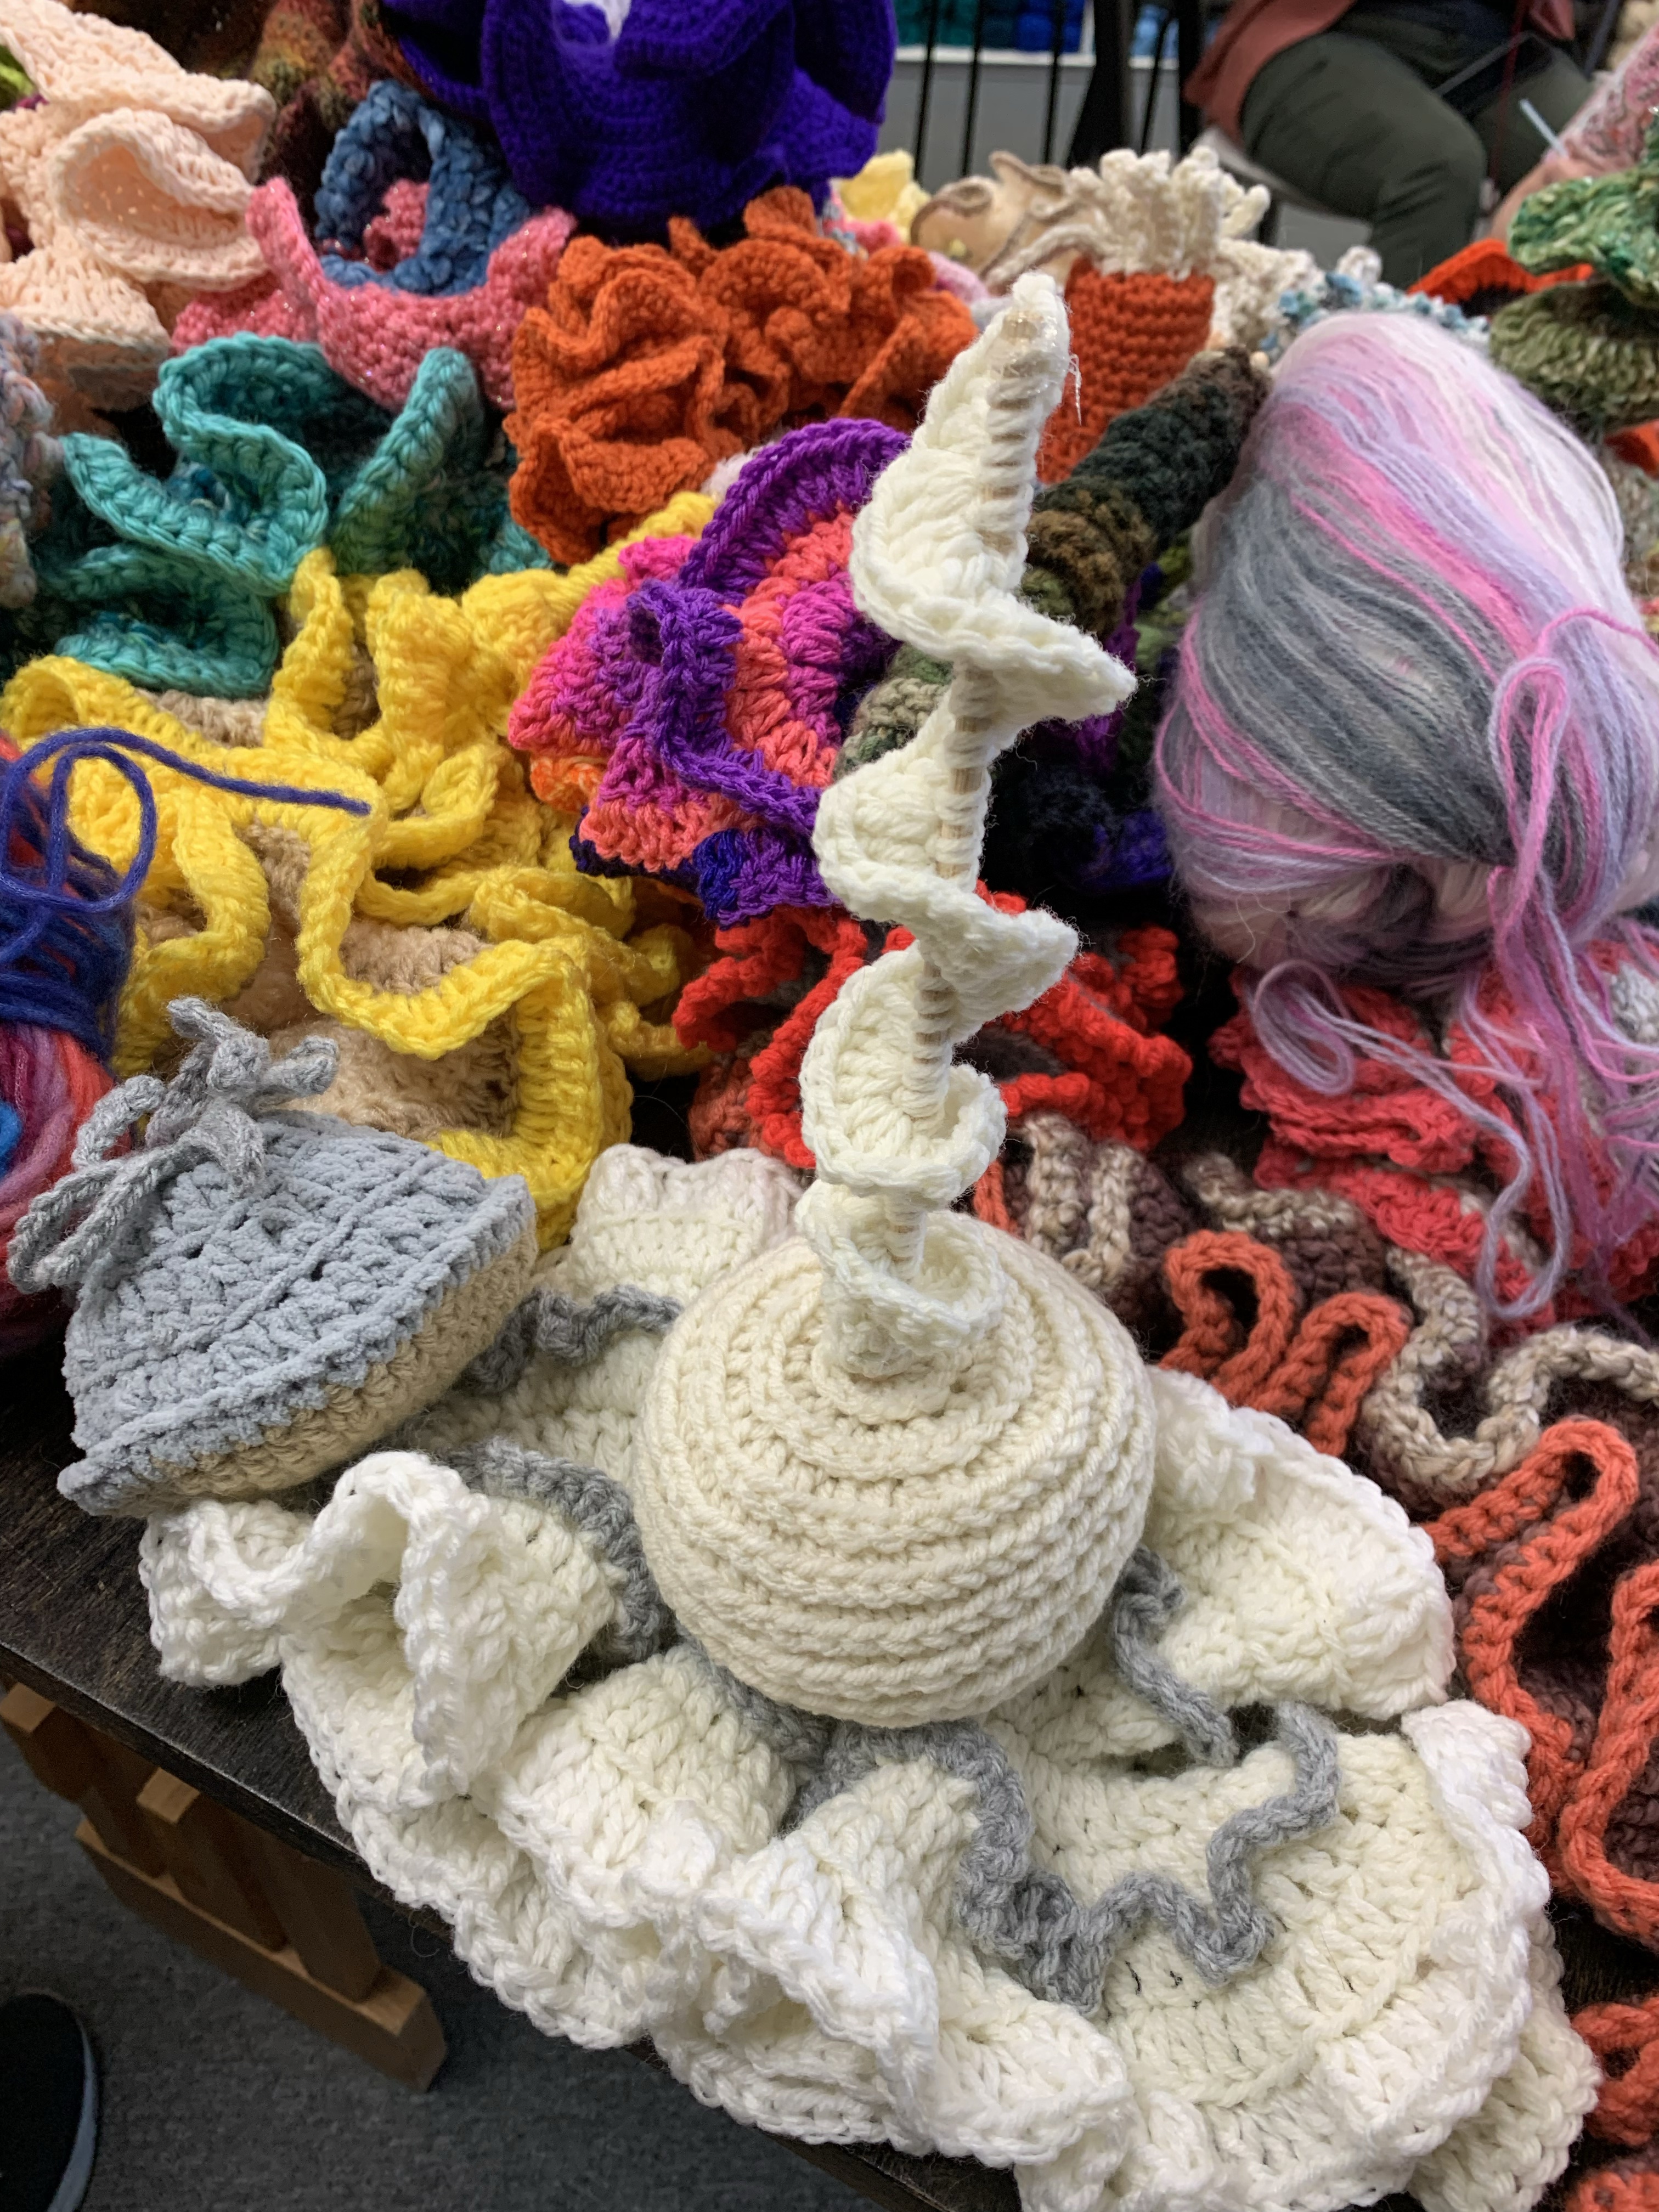
My LYS, Kid Ewe Knot, is a partner for the Pittsburgh Satellite Crochet Coral Reef project. All summer they had event to create crochet corals to add to the exhibit. I waited until the last minute and made a few small projects to add to the project in the last few days.
The Crochet Coral Reef is an international project that has spawned 50 community-based Satellite Reefs worldwide. It “is an ever-evolving nature-culture hybrid created by Margaret Wertheim and Christine Wertheim, that resides at the nexus of art, science, mathematics, community practice, and climate change.”
Kid Ewe Knot collected many contributions to our Satellite exhibit that will open November 4 at the Carnegie Museum of Art. Additional contributions at Kid Ewe Knot are pictured below.
My sea anemones were made with a free pattern by Fat Cat Patterns. My brain coral (model 2 brain coral) was made with a free pattern by Golden Lucy Crafts.
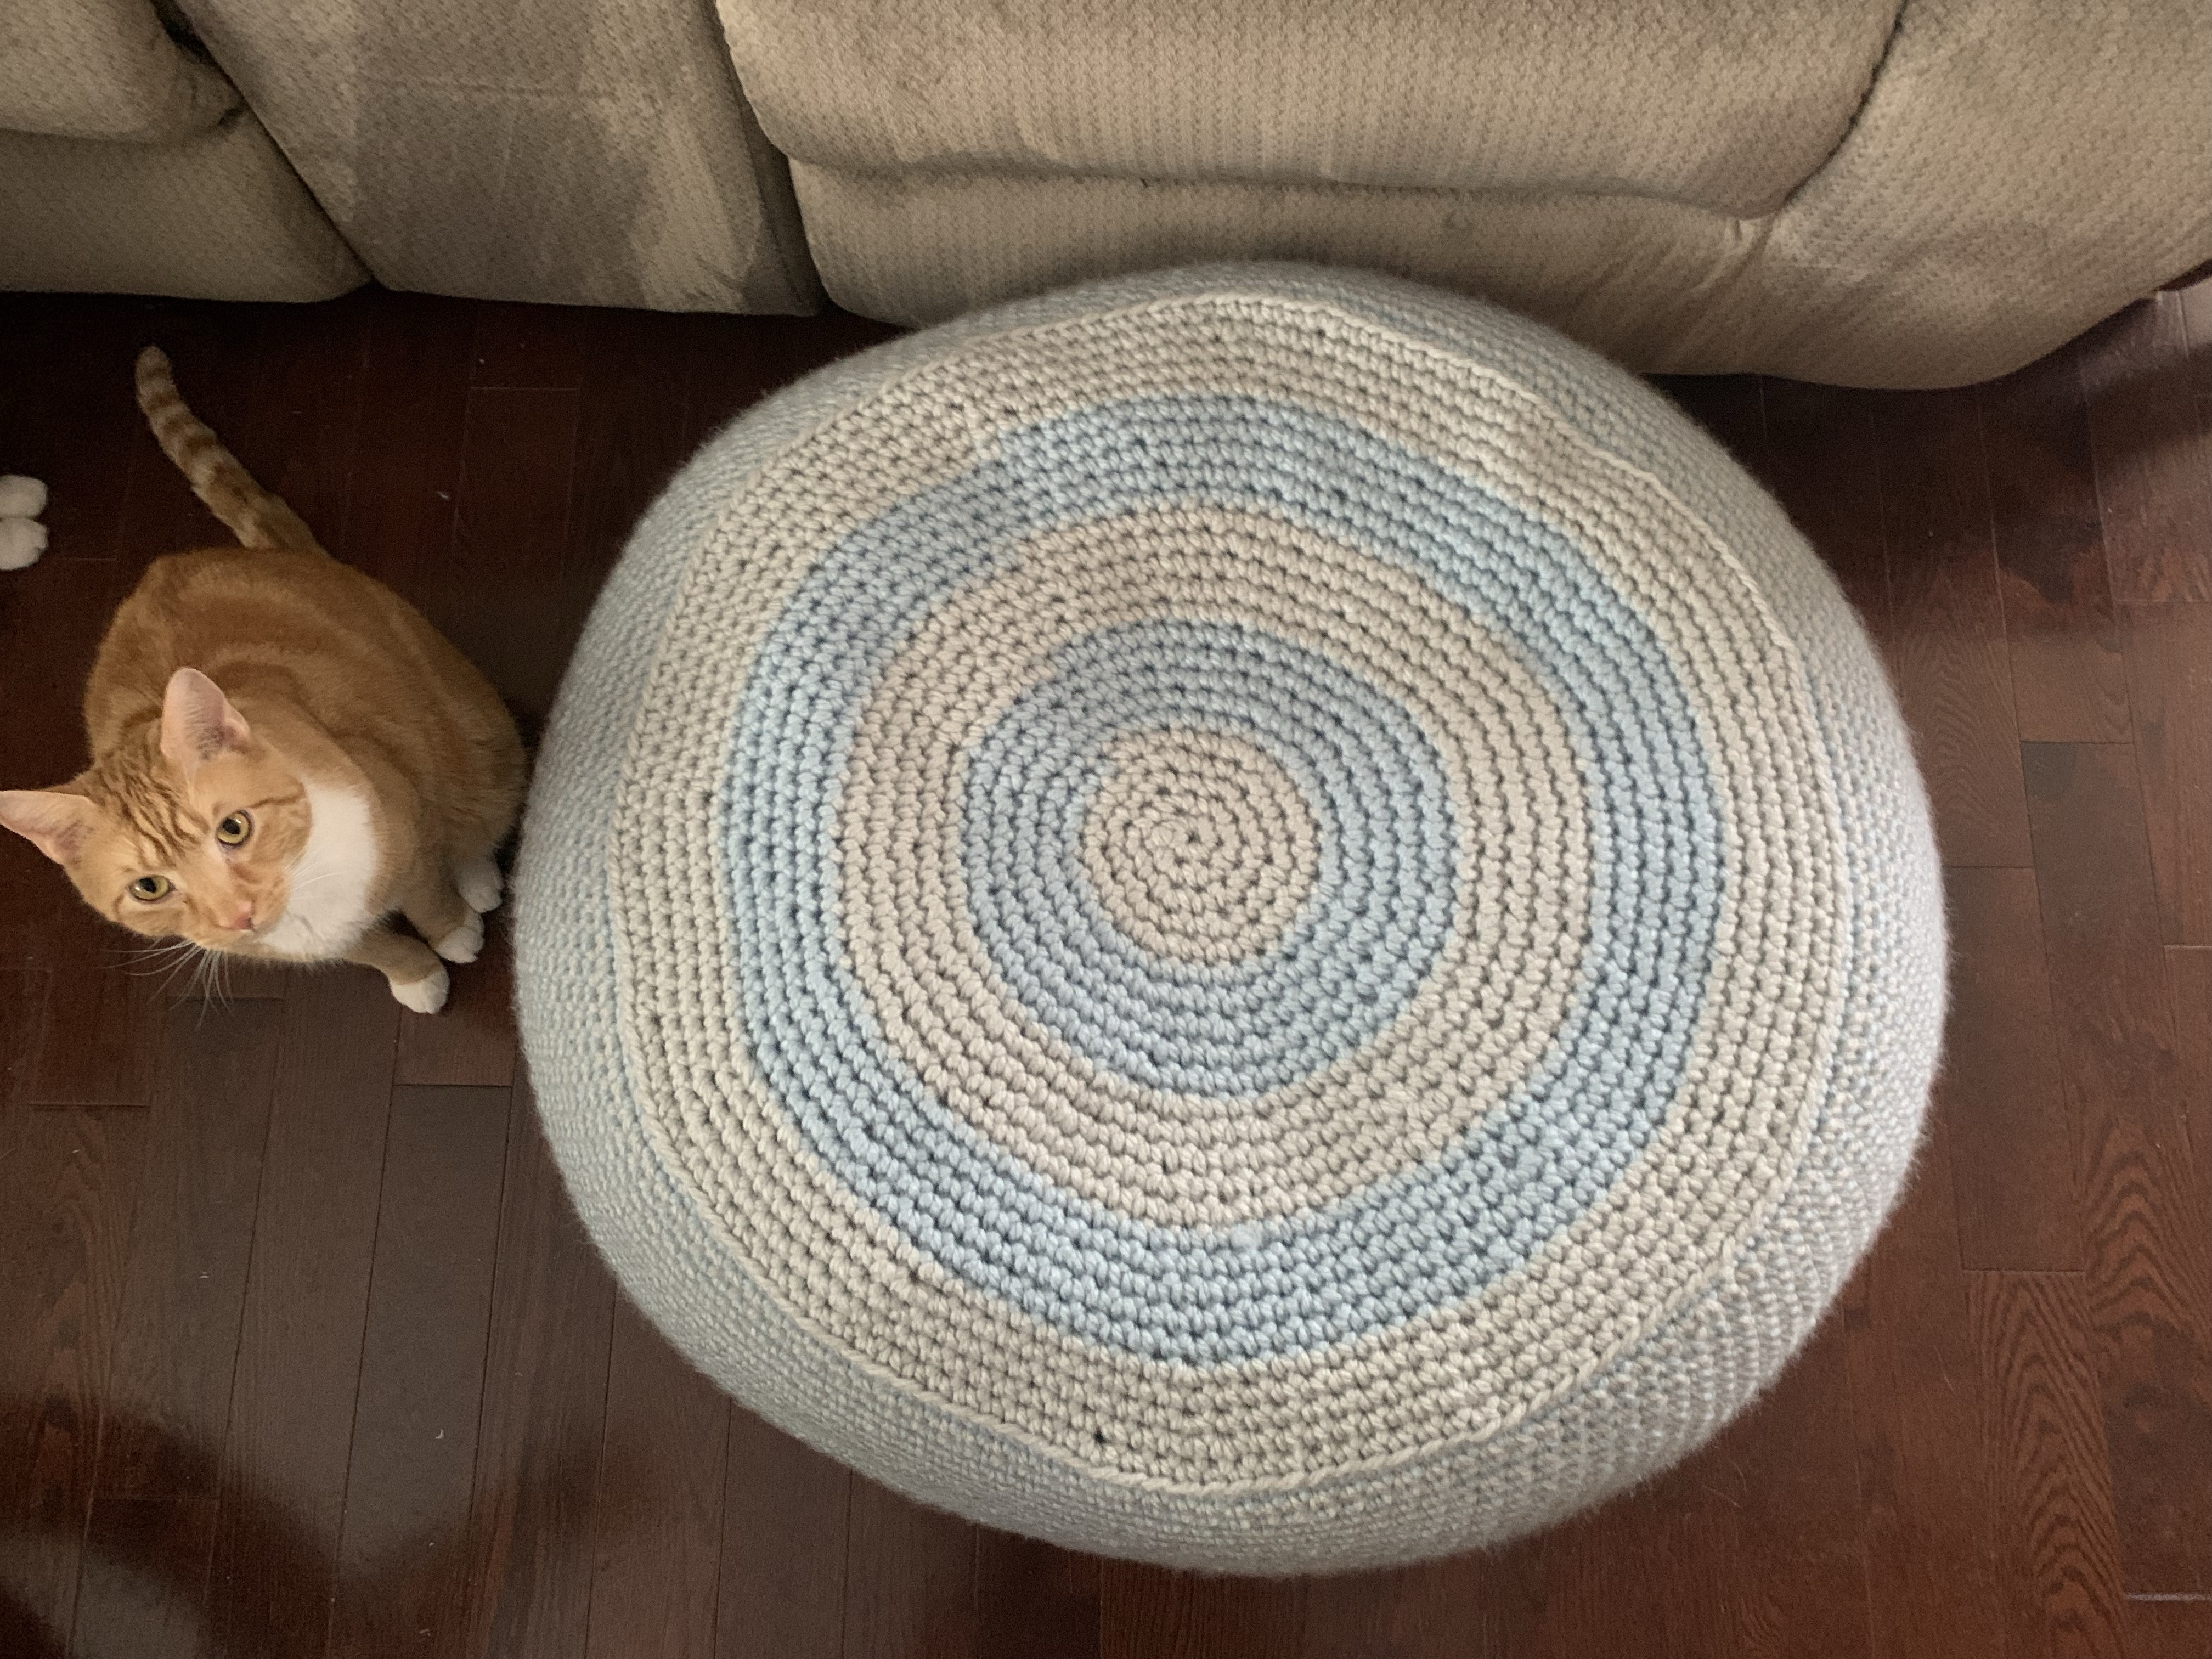
Our local Interfaith ministries was looking for some stools and cushions for their new yoga and mediation room, so I volunteered to make them a pouf. I found the Red Heart Stylish Pouf pattern for free online. The yarn was no longer available so I found some super chunky Paintbox yarn from LoveCrafts. I chose a light blue and light grey, which really didn’t have a lot of contrast. If I could do it again I’d go for more contrast with the colors.
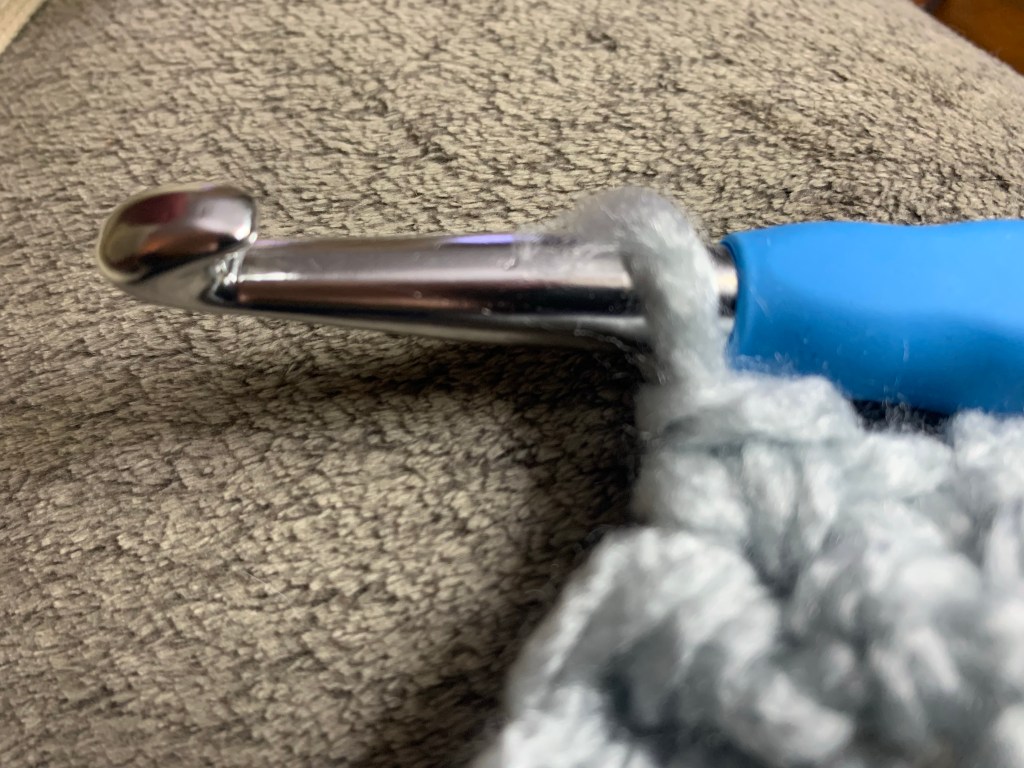
I bought a 10 mm hook for the pouf, but this hook was really disappointing. There was a rough ridge under the hook that kept snagging the yarn. But my swatch was too small so I ordered this 12 mm hook instead and it was so much better to work with. The pattern calls for filling the pouf with a bean bag. Instead of just buying a bean bag to fill it I decided to make a bean bag. I bought the bean bag liner and filling on Amazon. The Styrofoam beads are horrible to work with. They are filled with static so they either stick to everything or repel against each other. They spilled on the floor and trying to pic them up was a big mess, especially trying to keep them away from the cats. The pouf wasn’t full enough and I decided to fill it with more filler, but this time I chose shredded foam. I still wish it was fuller, but I already spent $50 in filling and didn’t want to spend more.
Rough ridge on hook snagging yarn.
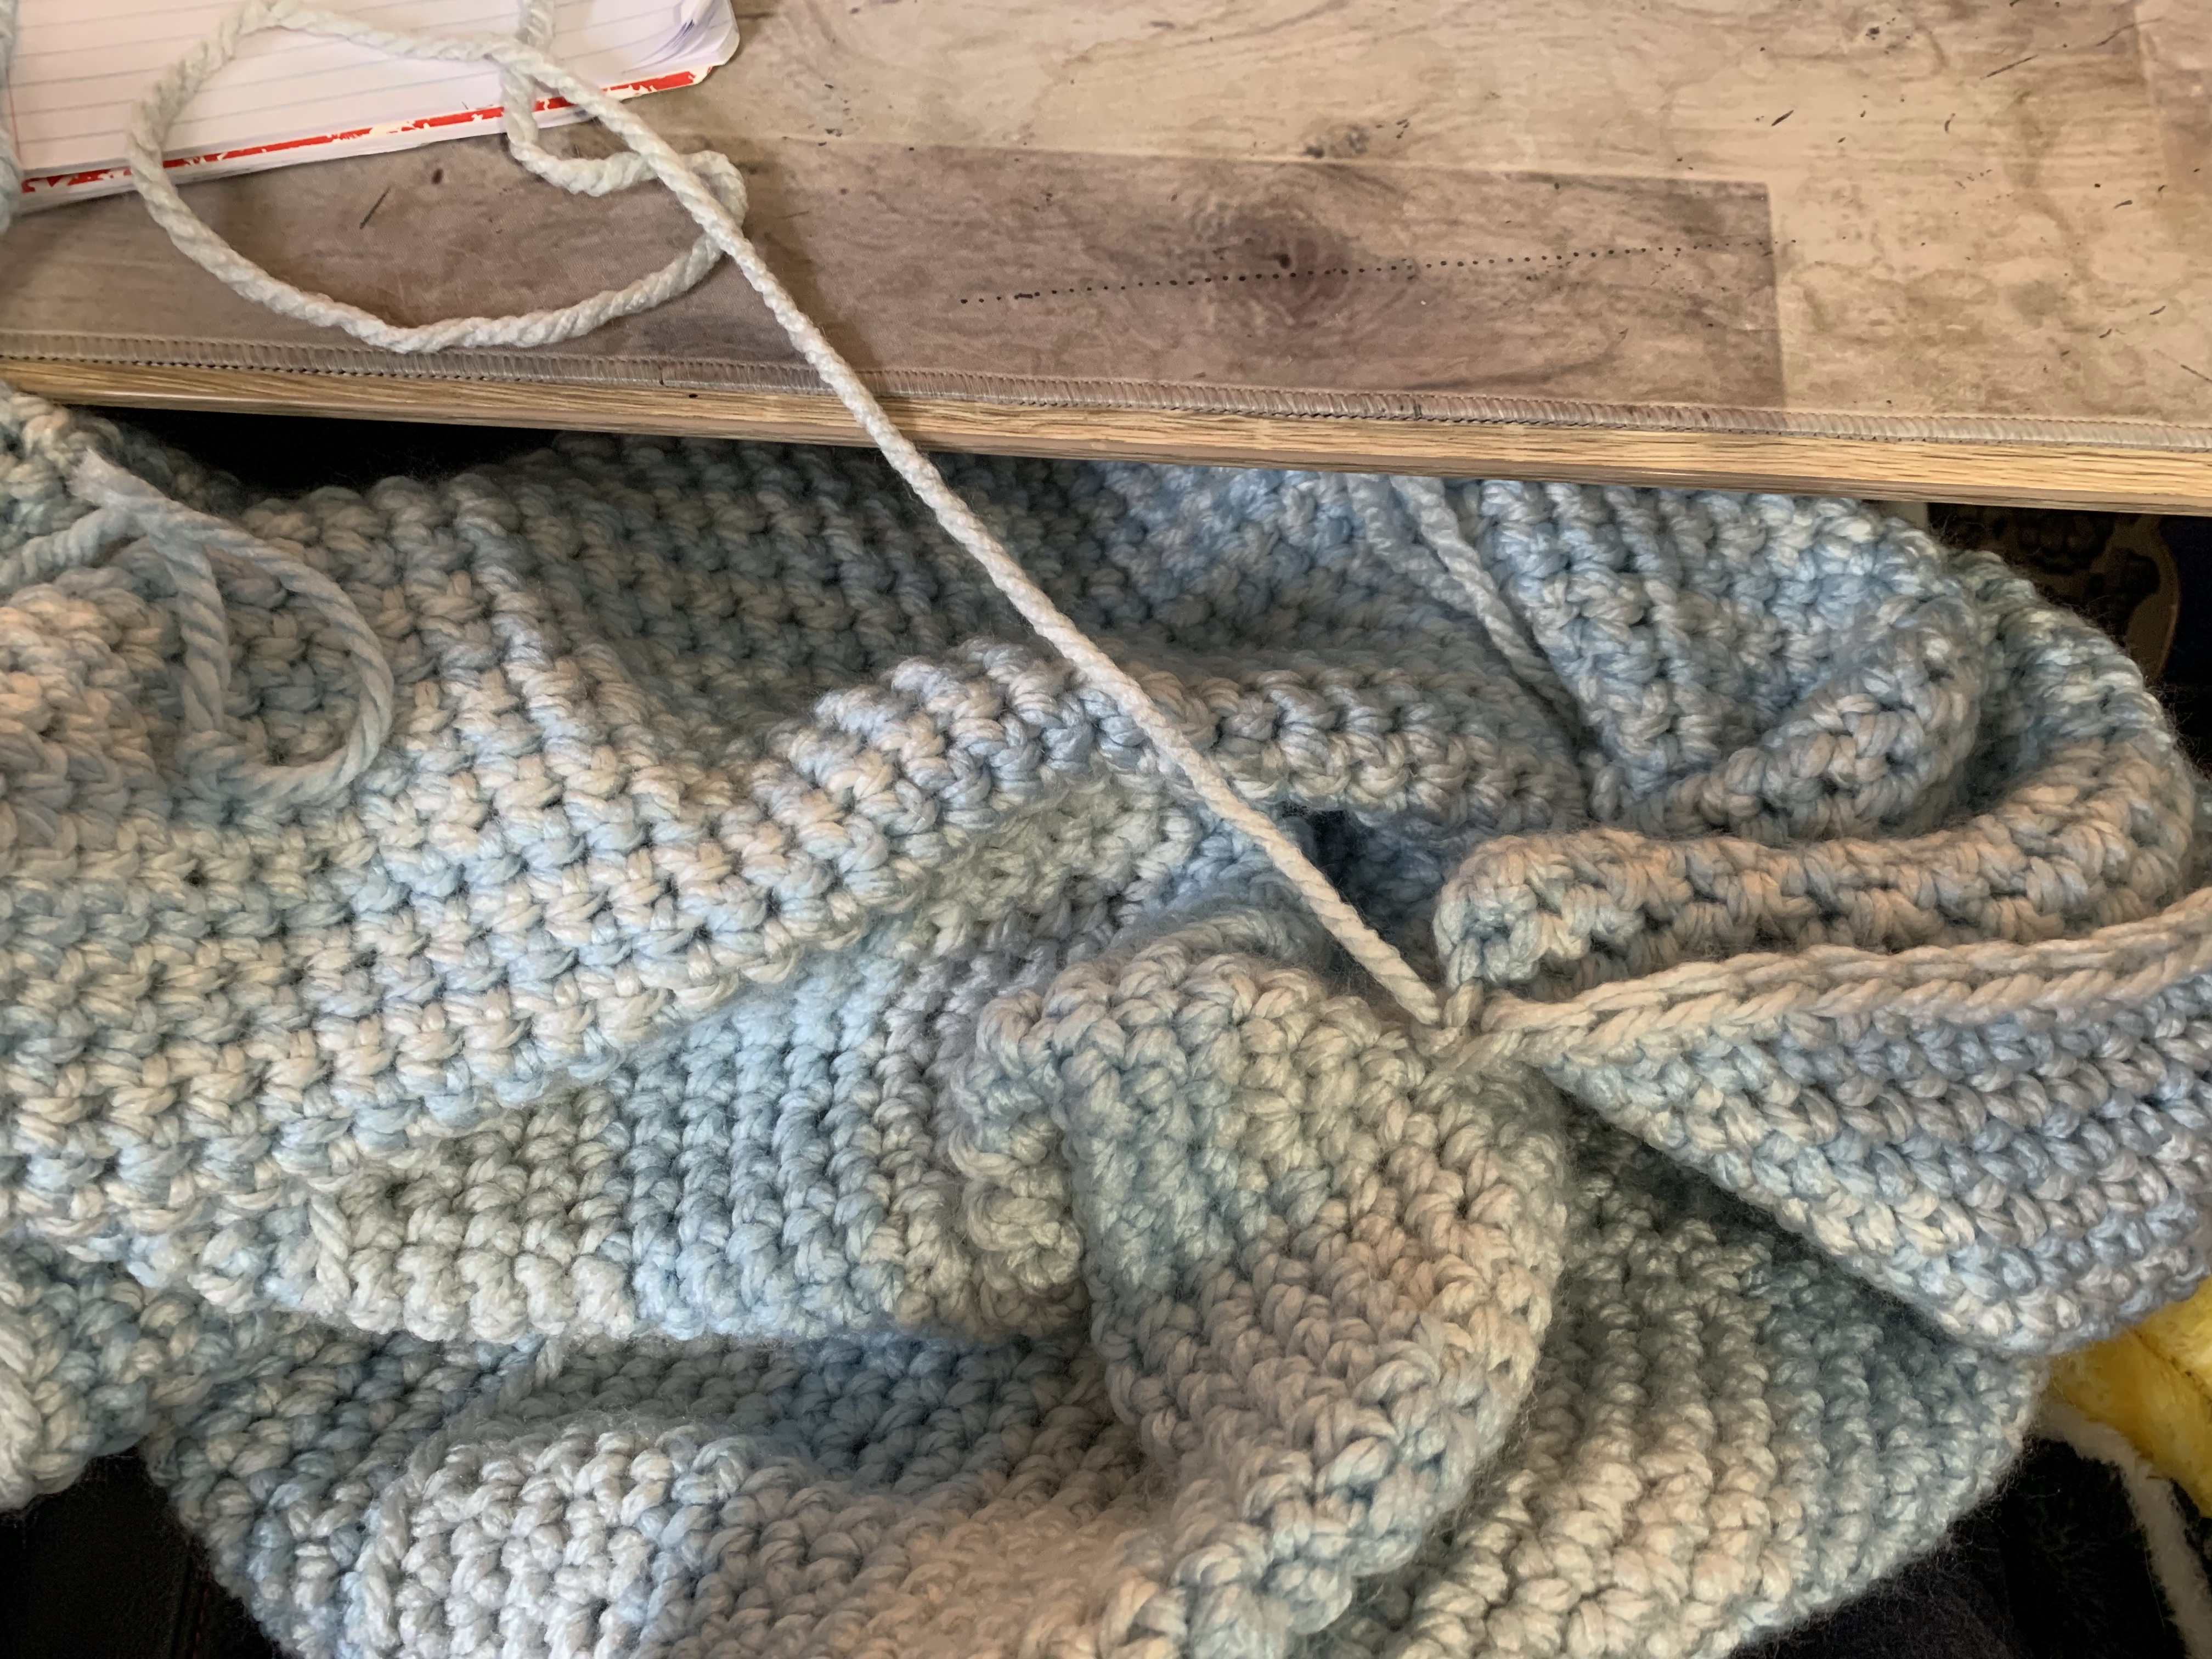
I also decided to add a zipper to the pouf so the cover could be taken off and washed or refilled if needed. This was my first time sewing a zipper on my work and overall it was ok, the hardest part was lining up the two sides of the zipper, so pinning the zipper to the work helped to keep the zipper sides even.
Sewing on my first zipper
I was able to donate the pouf along with some baby blankets before Christmas. I hope they are able to enjoy it in the new meditation space.
I decided I wanted to make Santa hats and scarves for my gargoyles. I had some extra yarn around. I searched for a Cat Santa Hat pattern and found one. I got to round 12 before I got lost in the pattern. The counts and instructions stopped lining up, so I fudged the rest of the hat.
The scarf was just freehand. I made two of each for my little gargoyles all in one day.
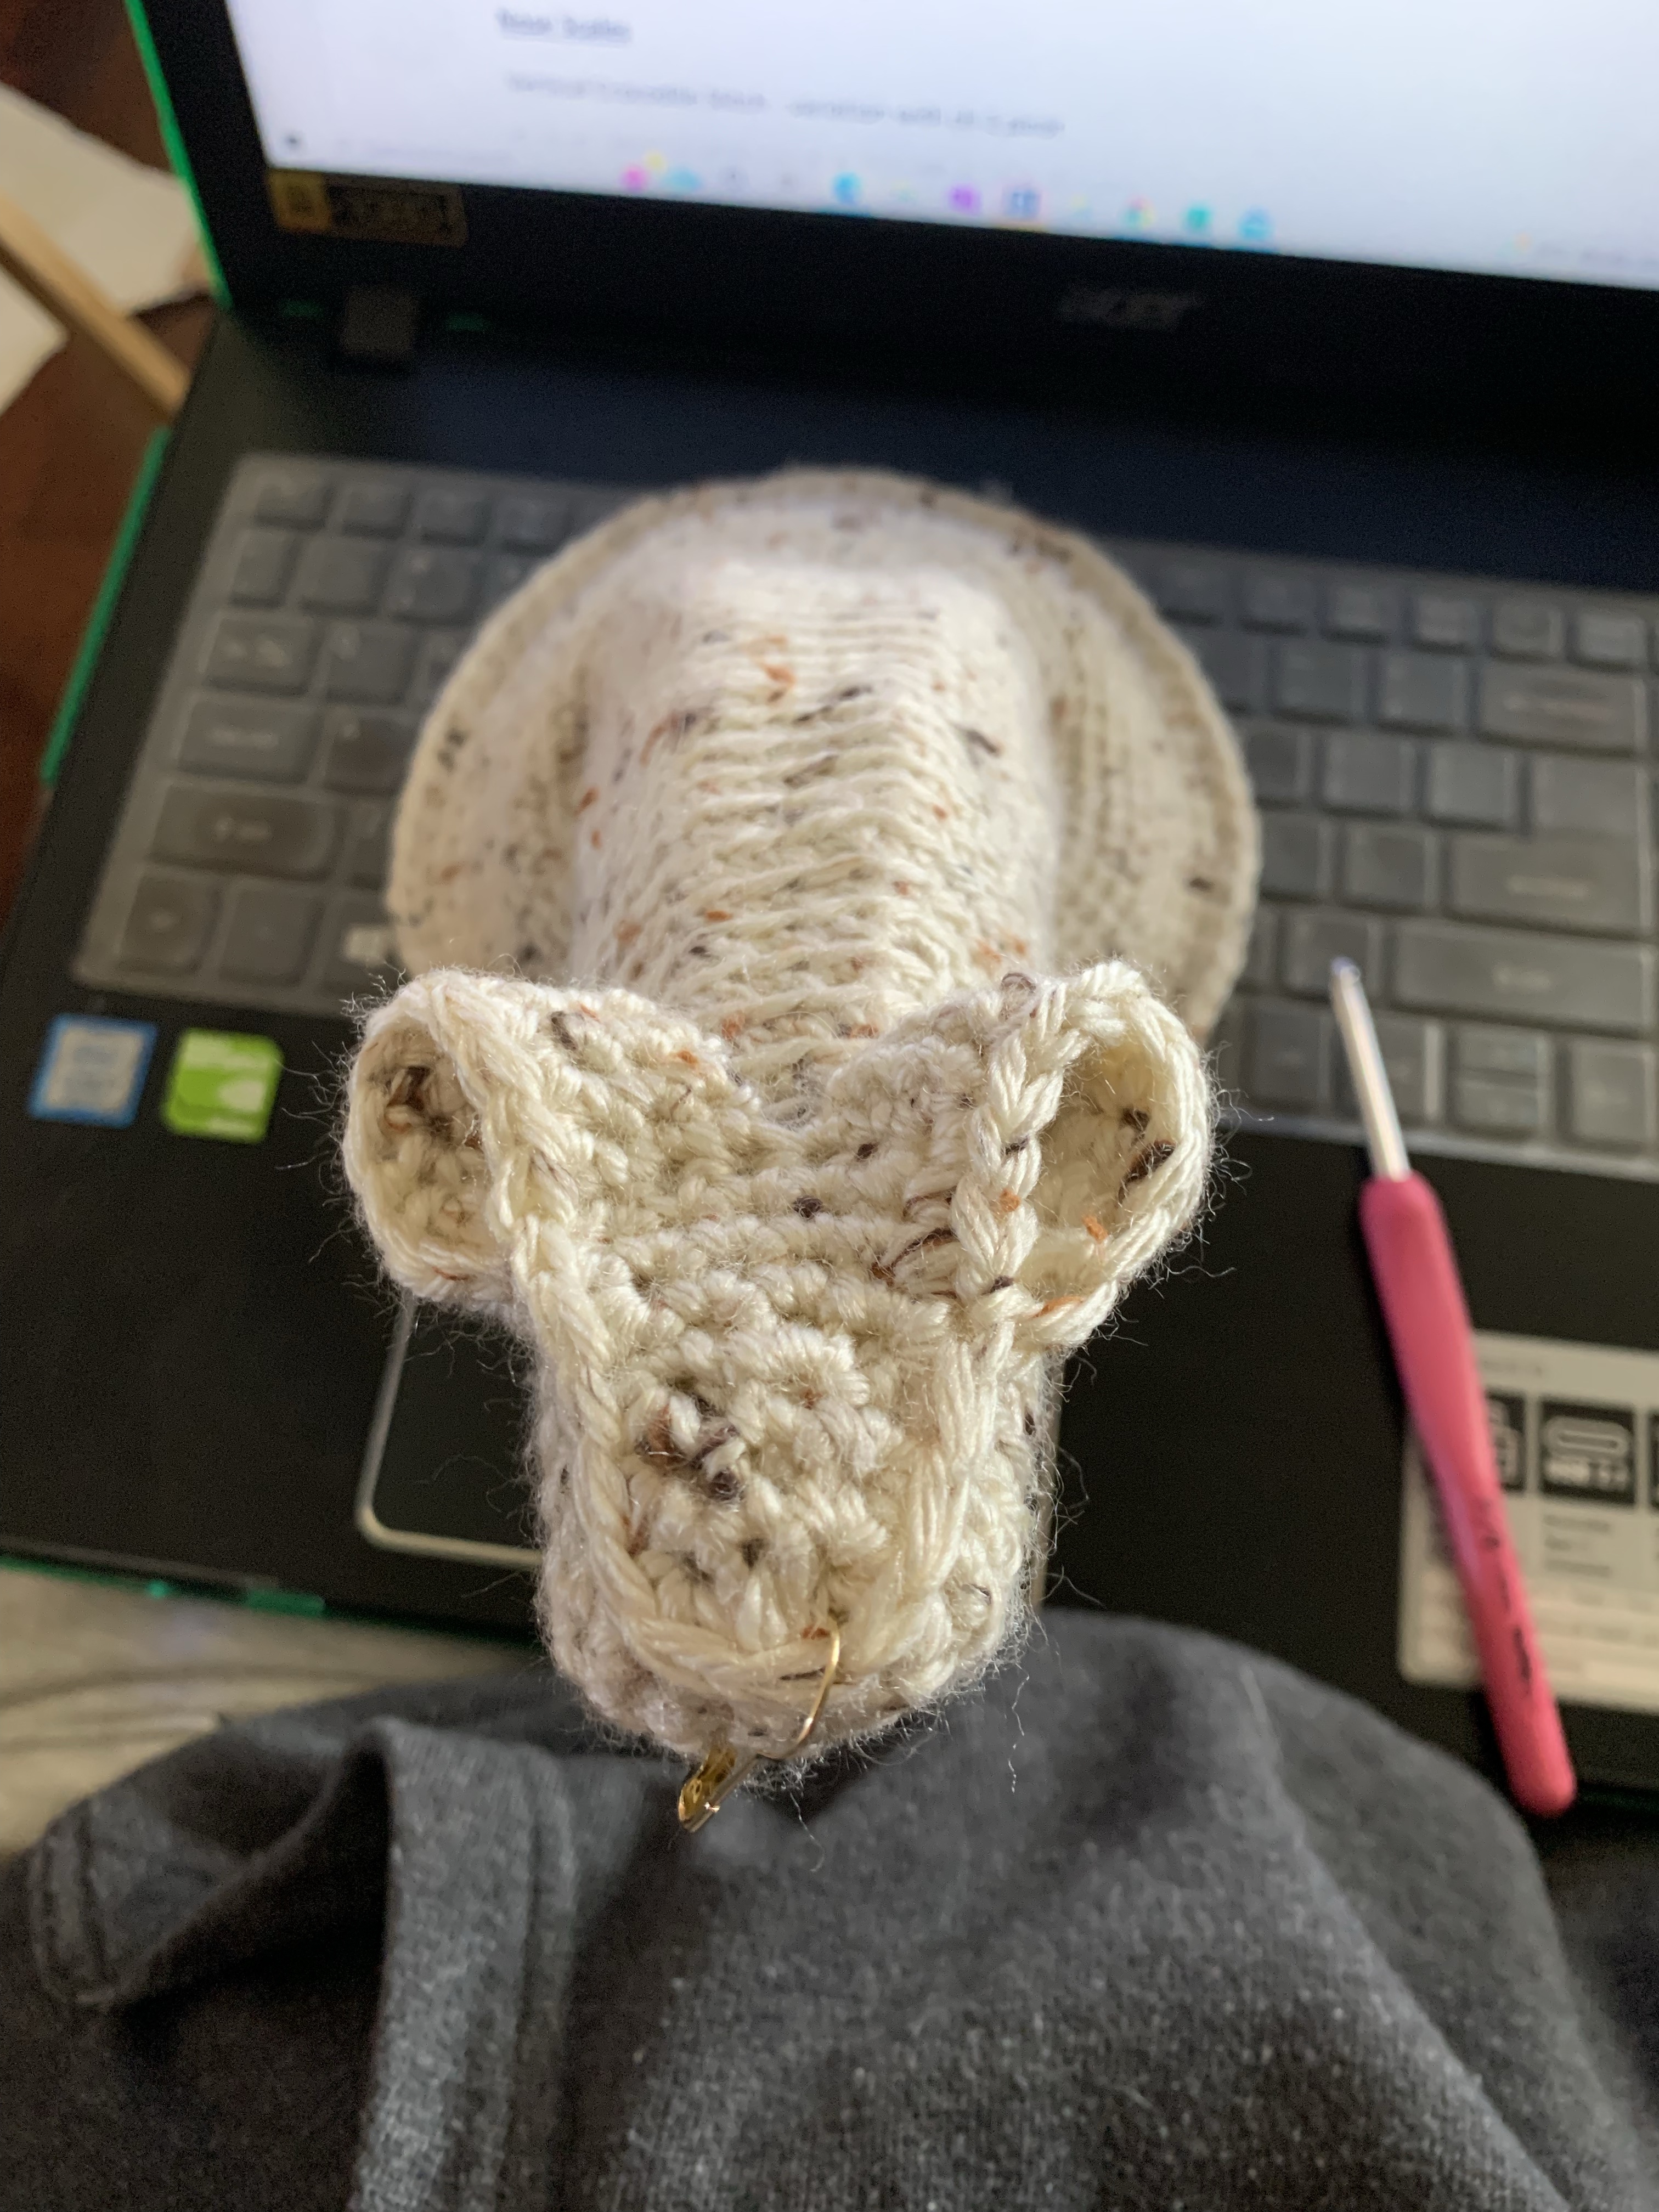
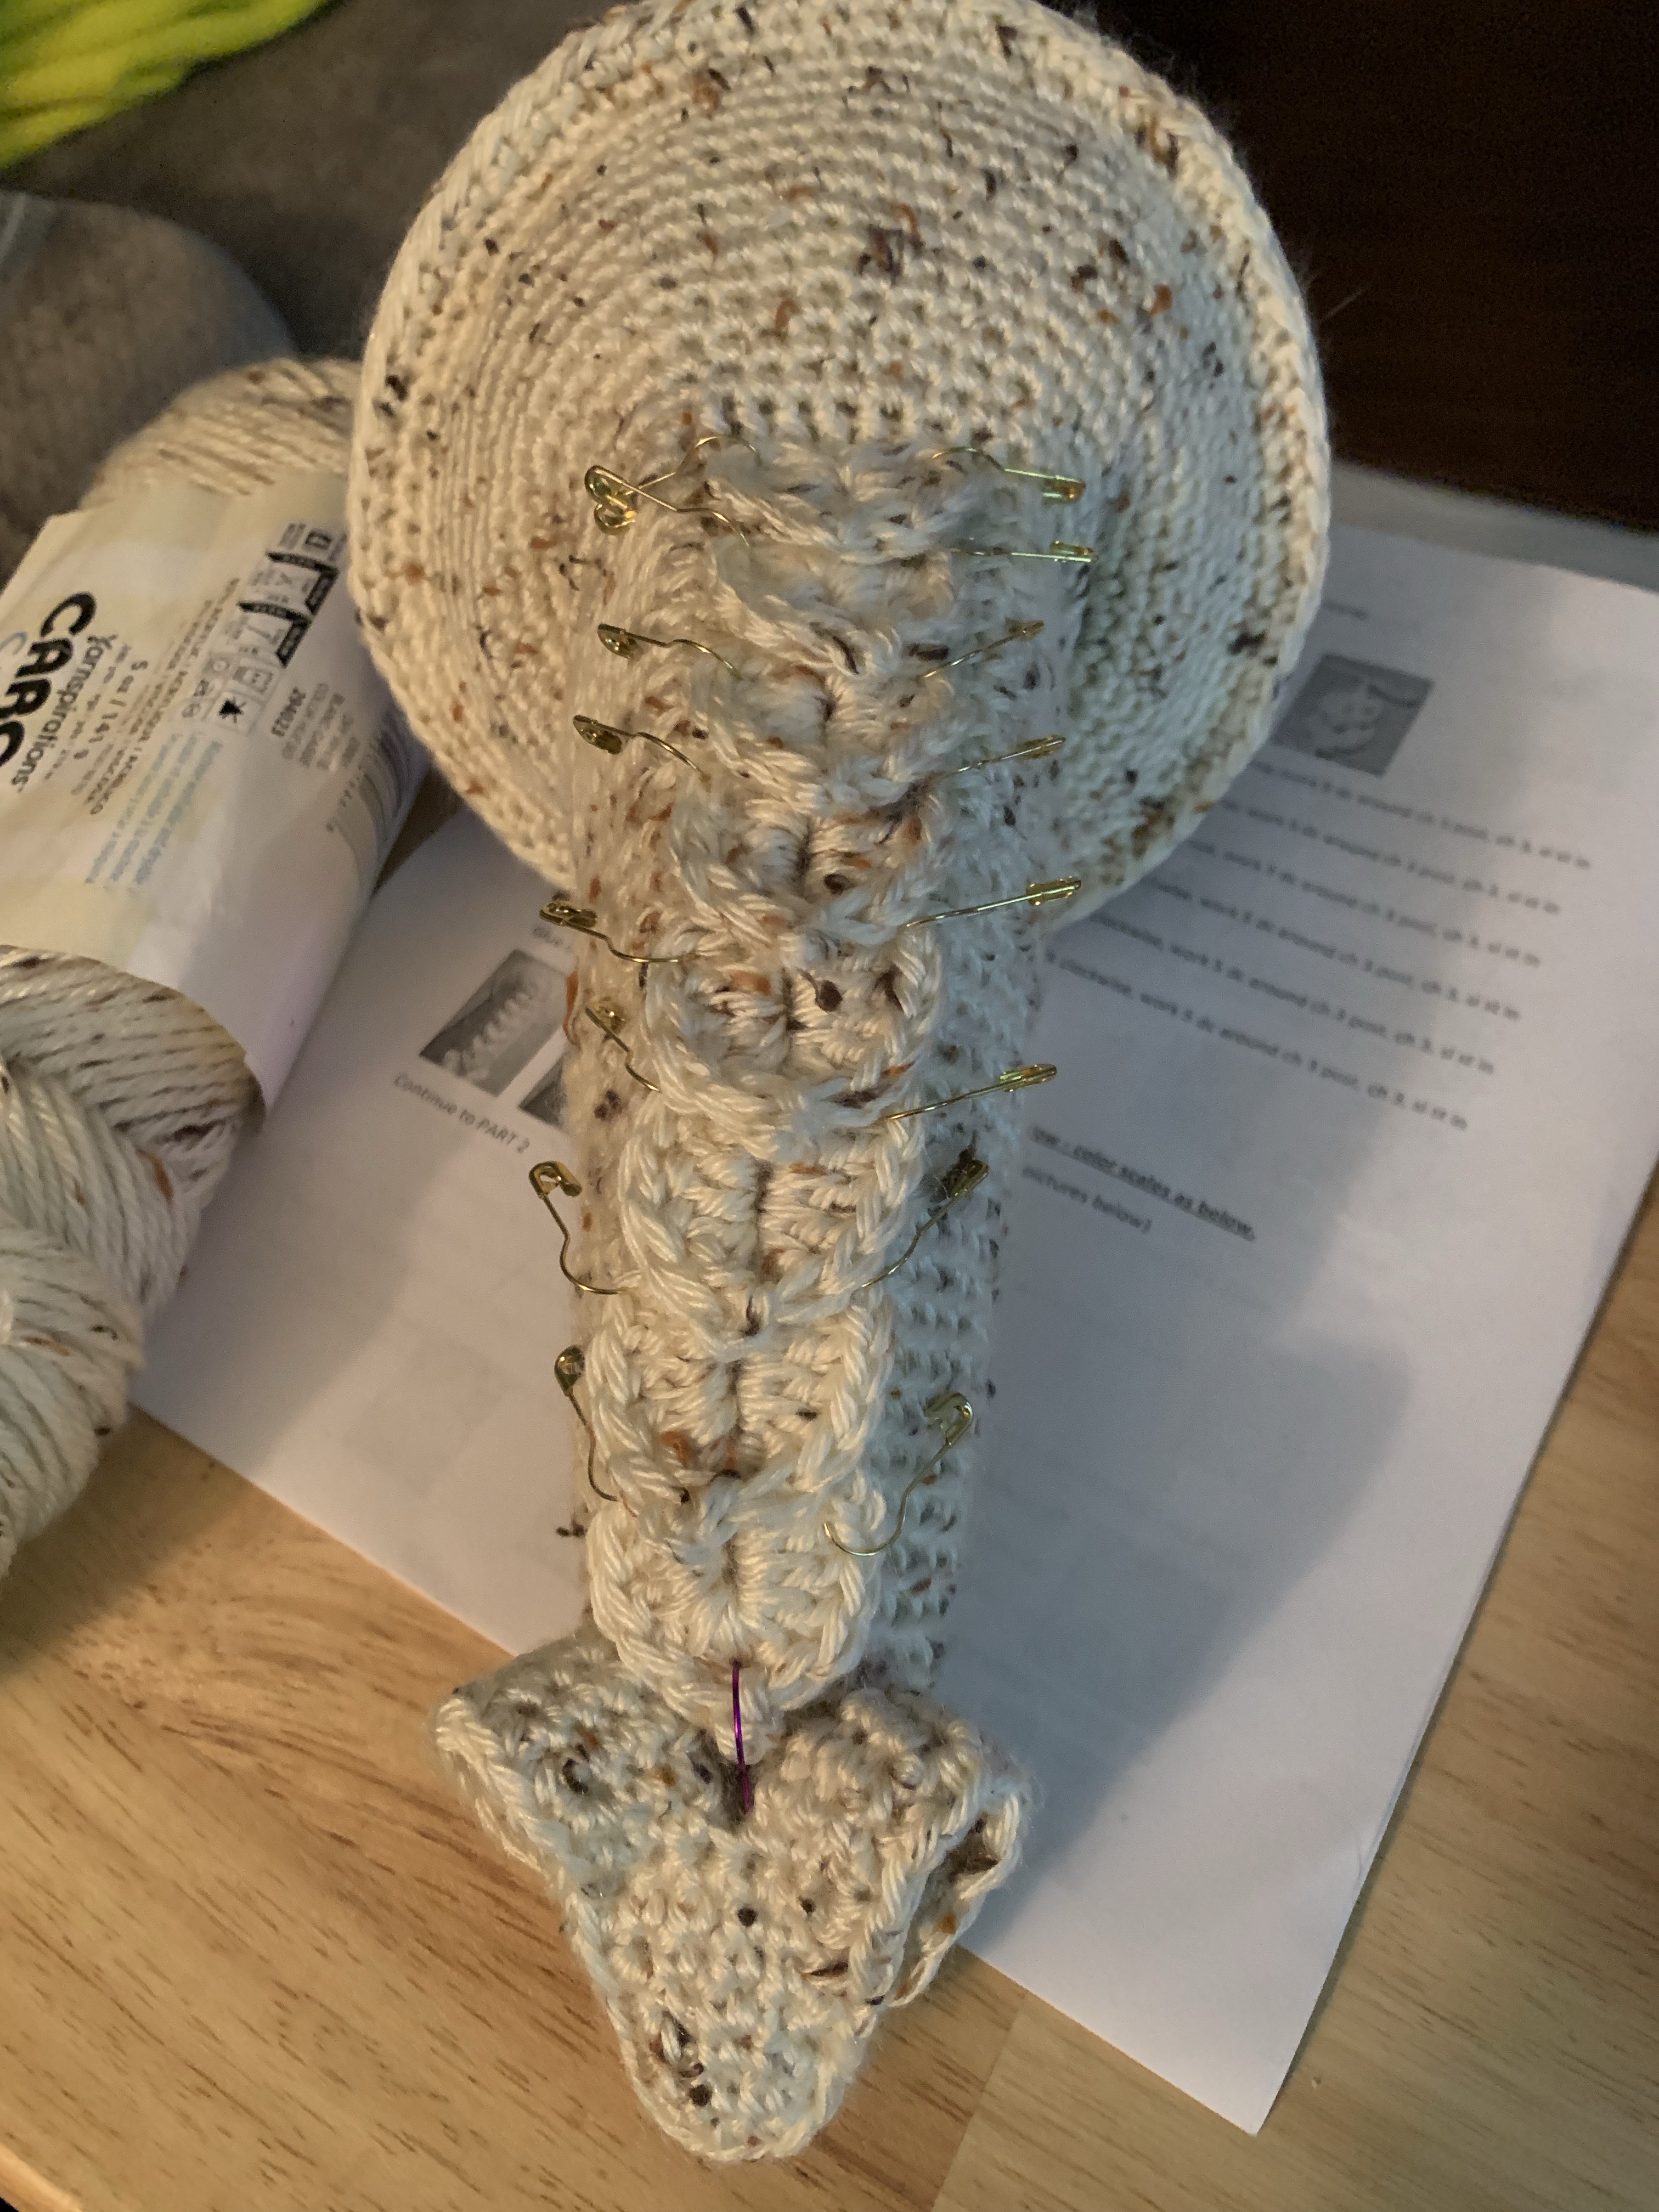
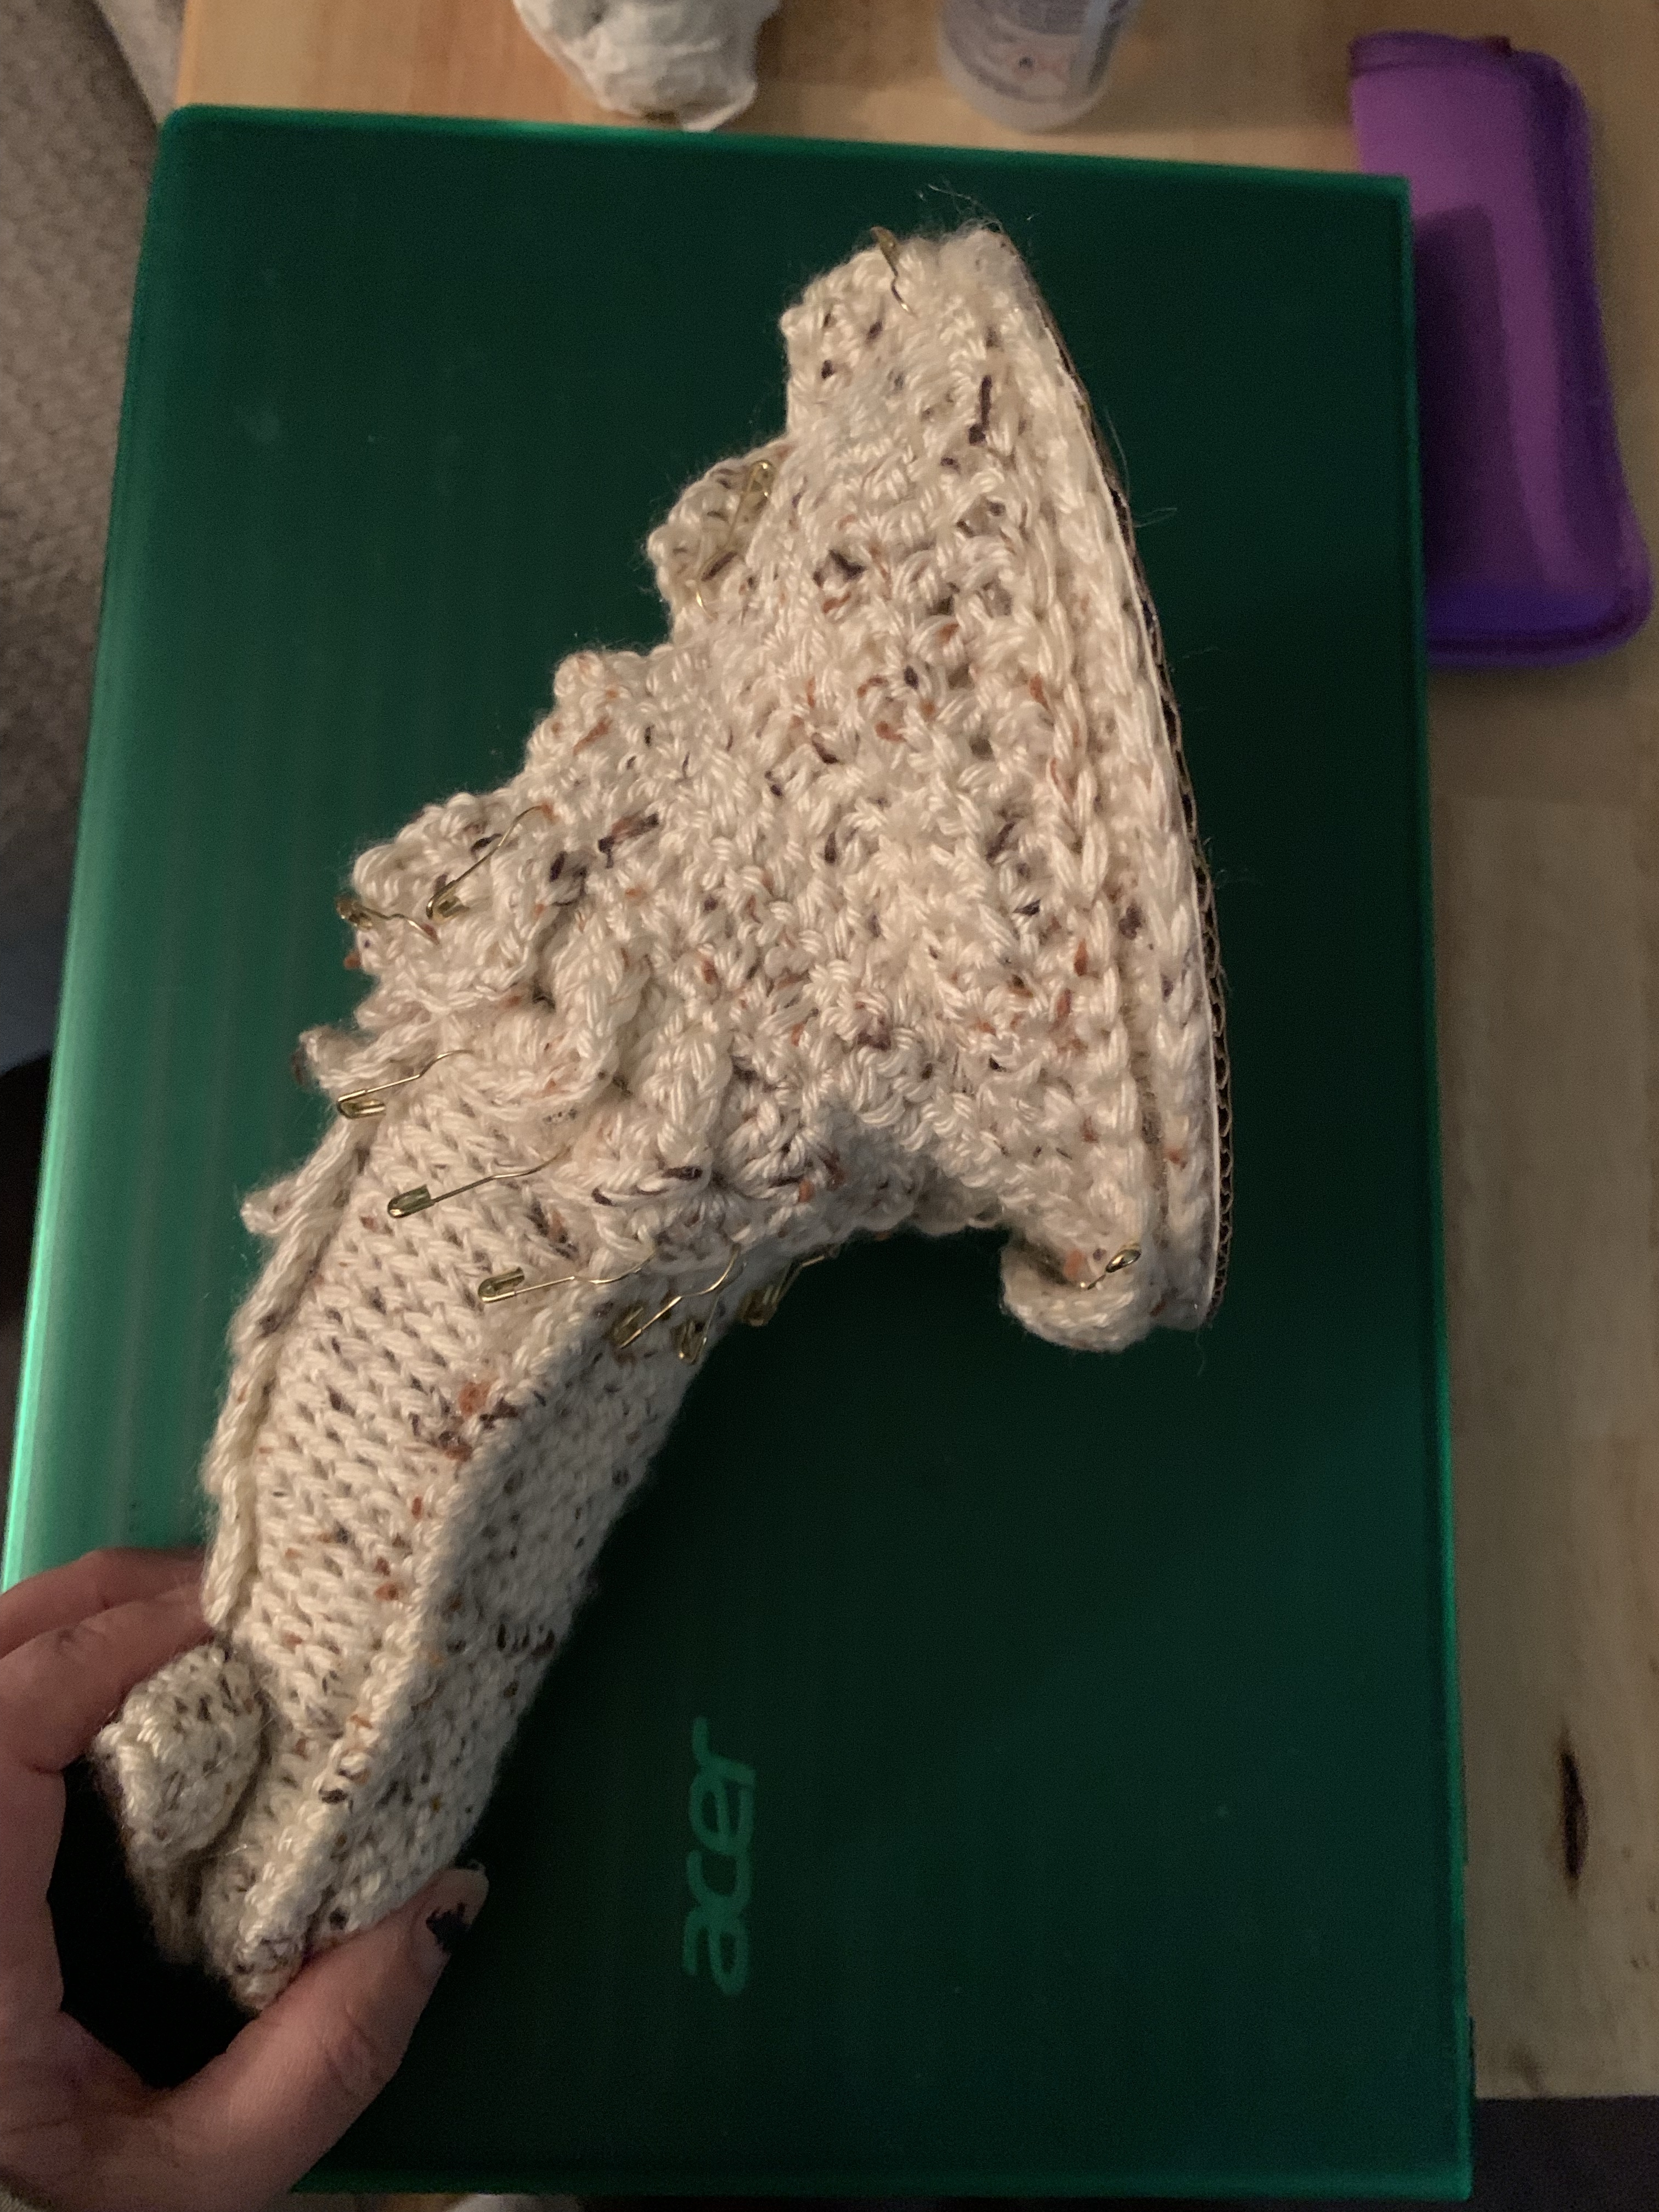
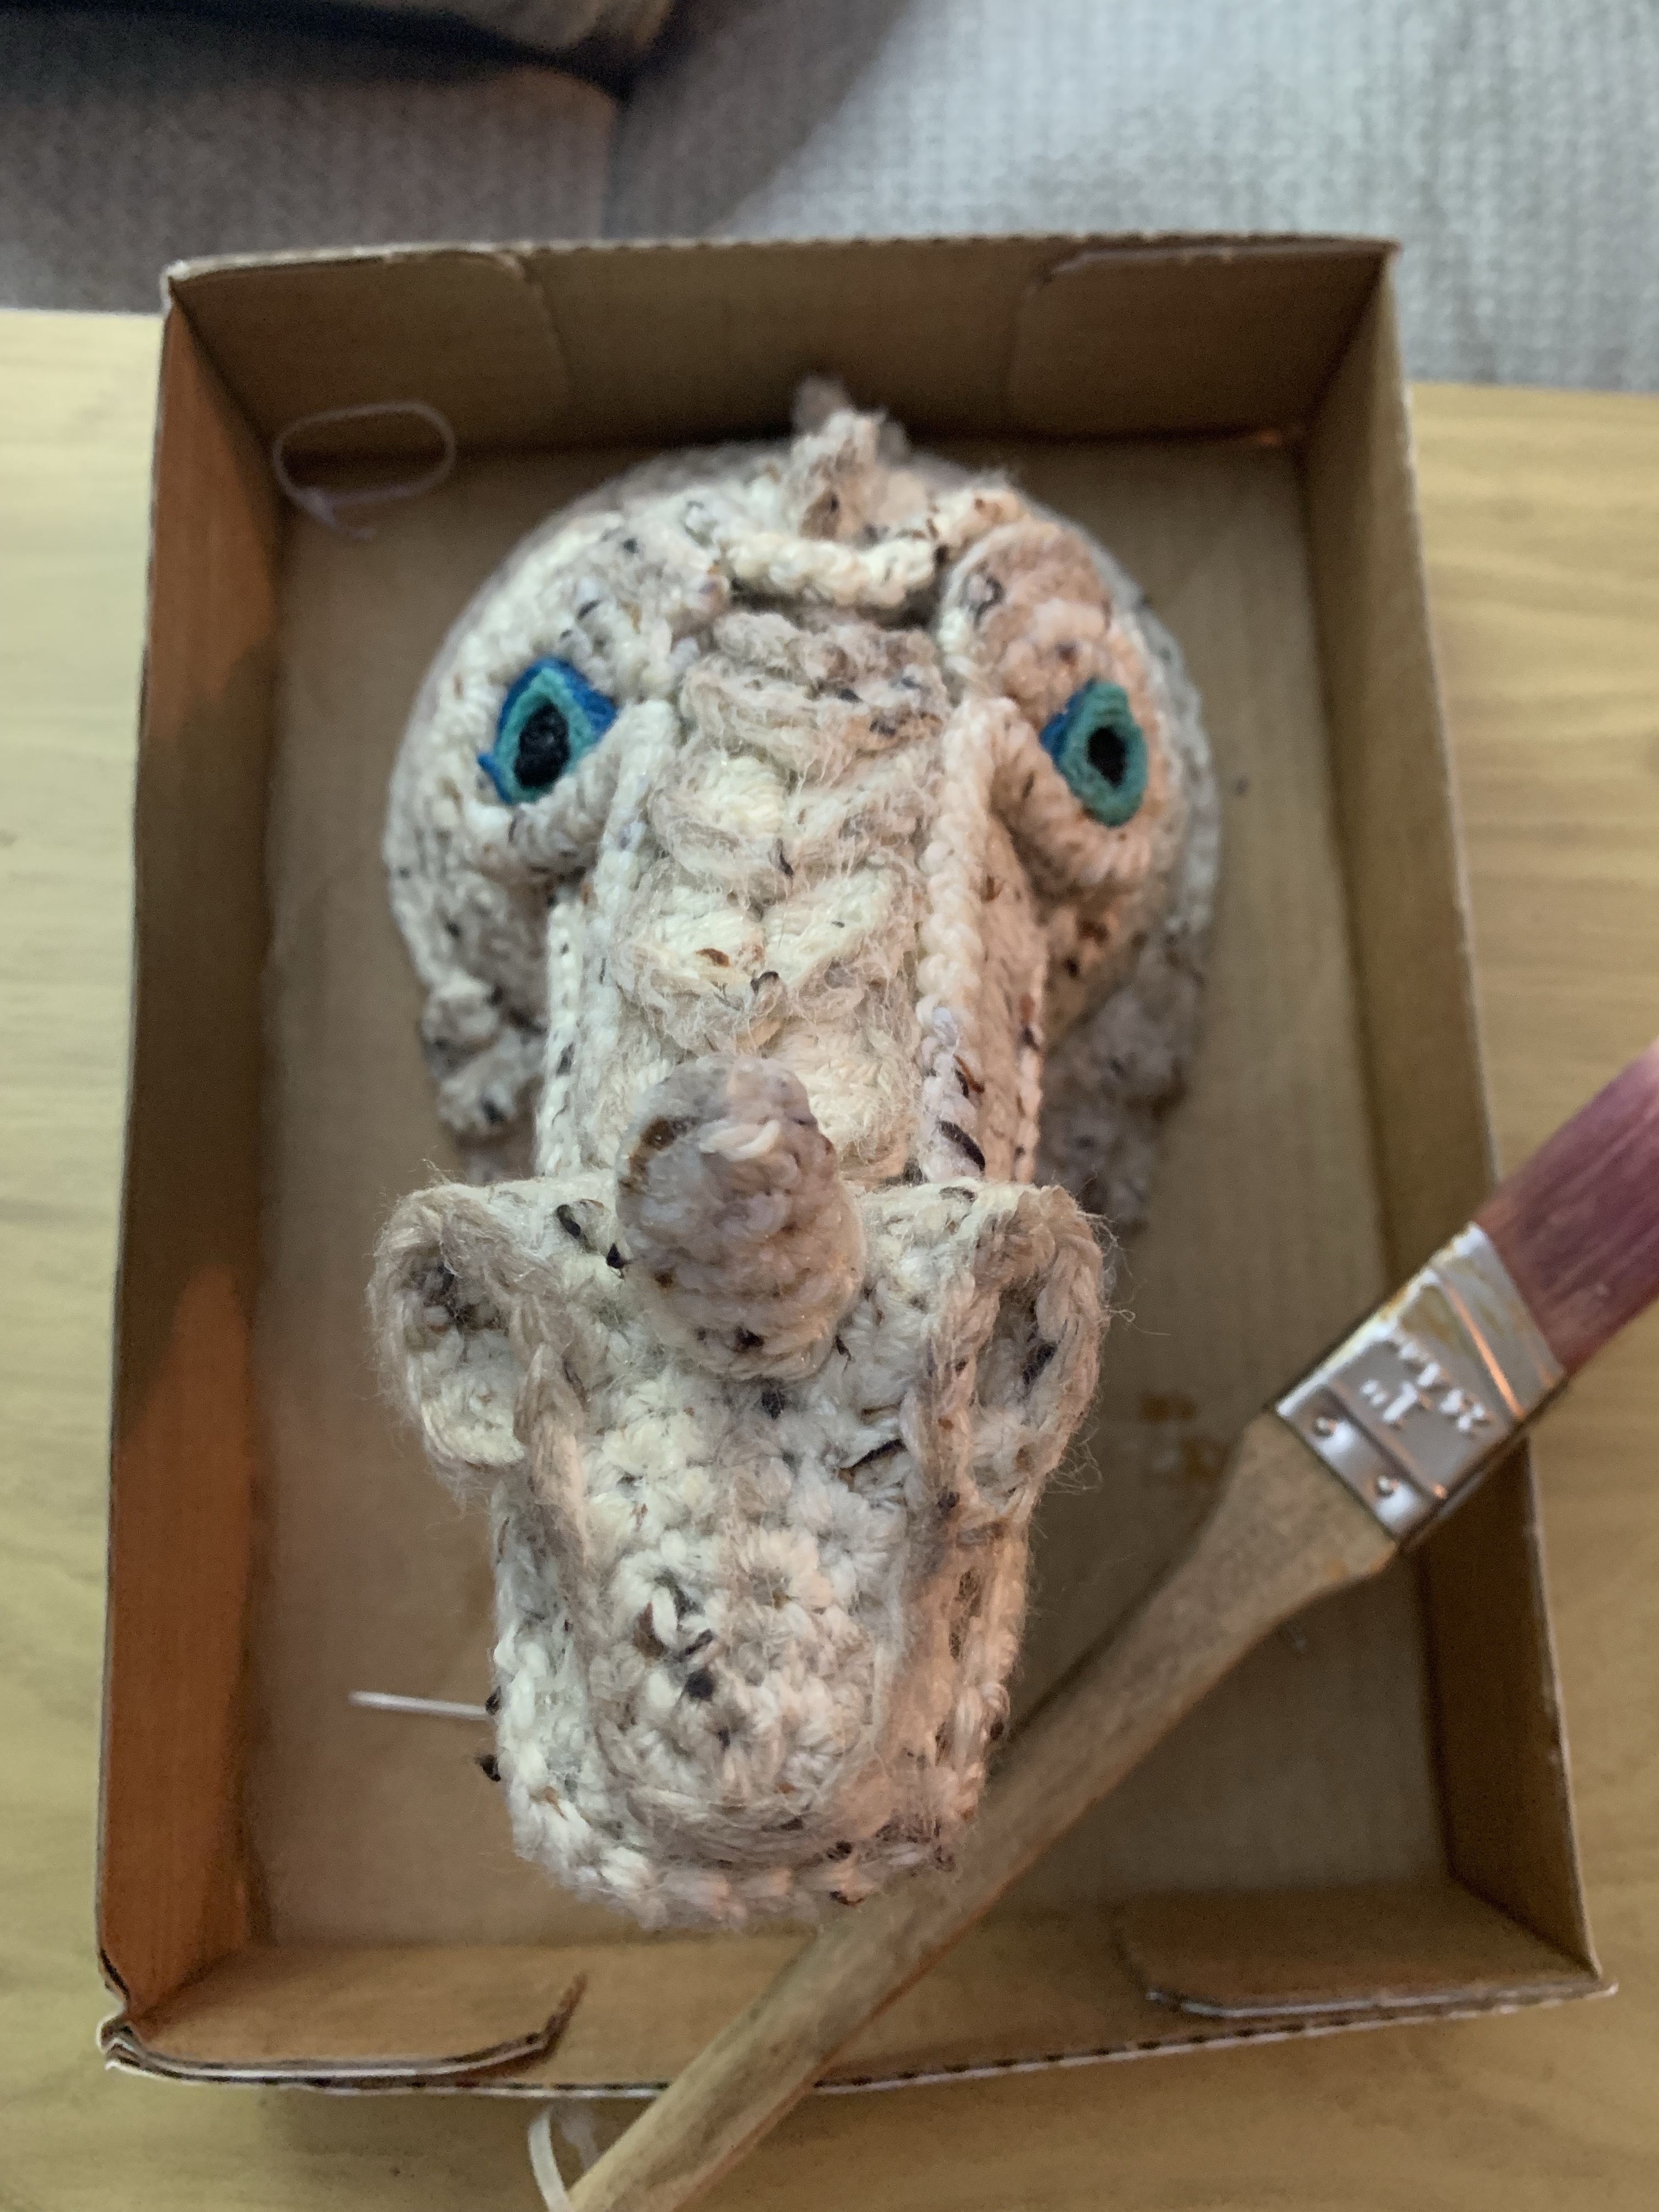
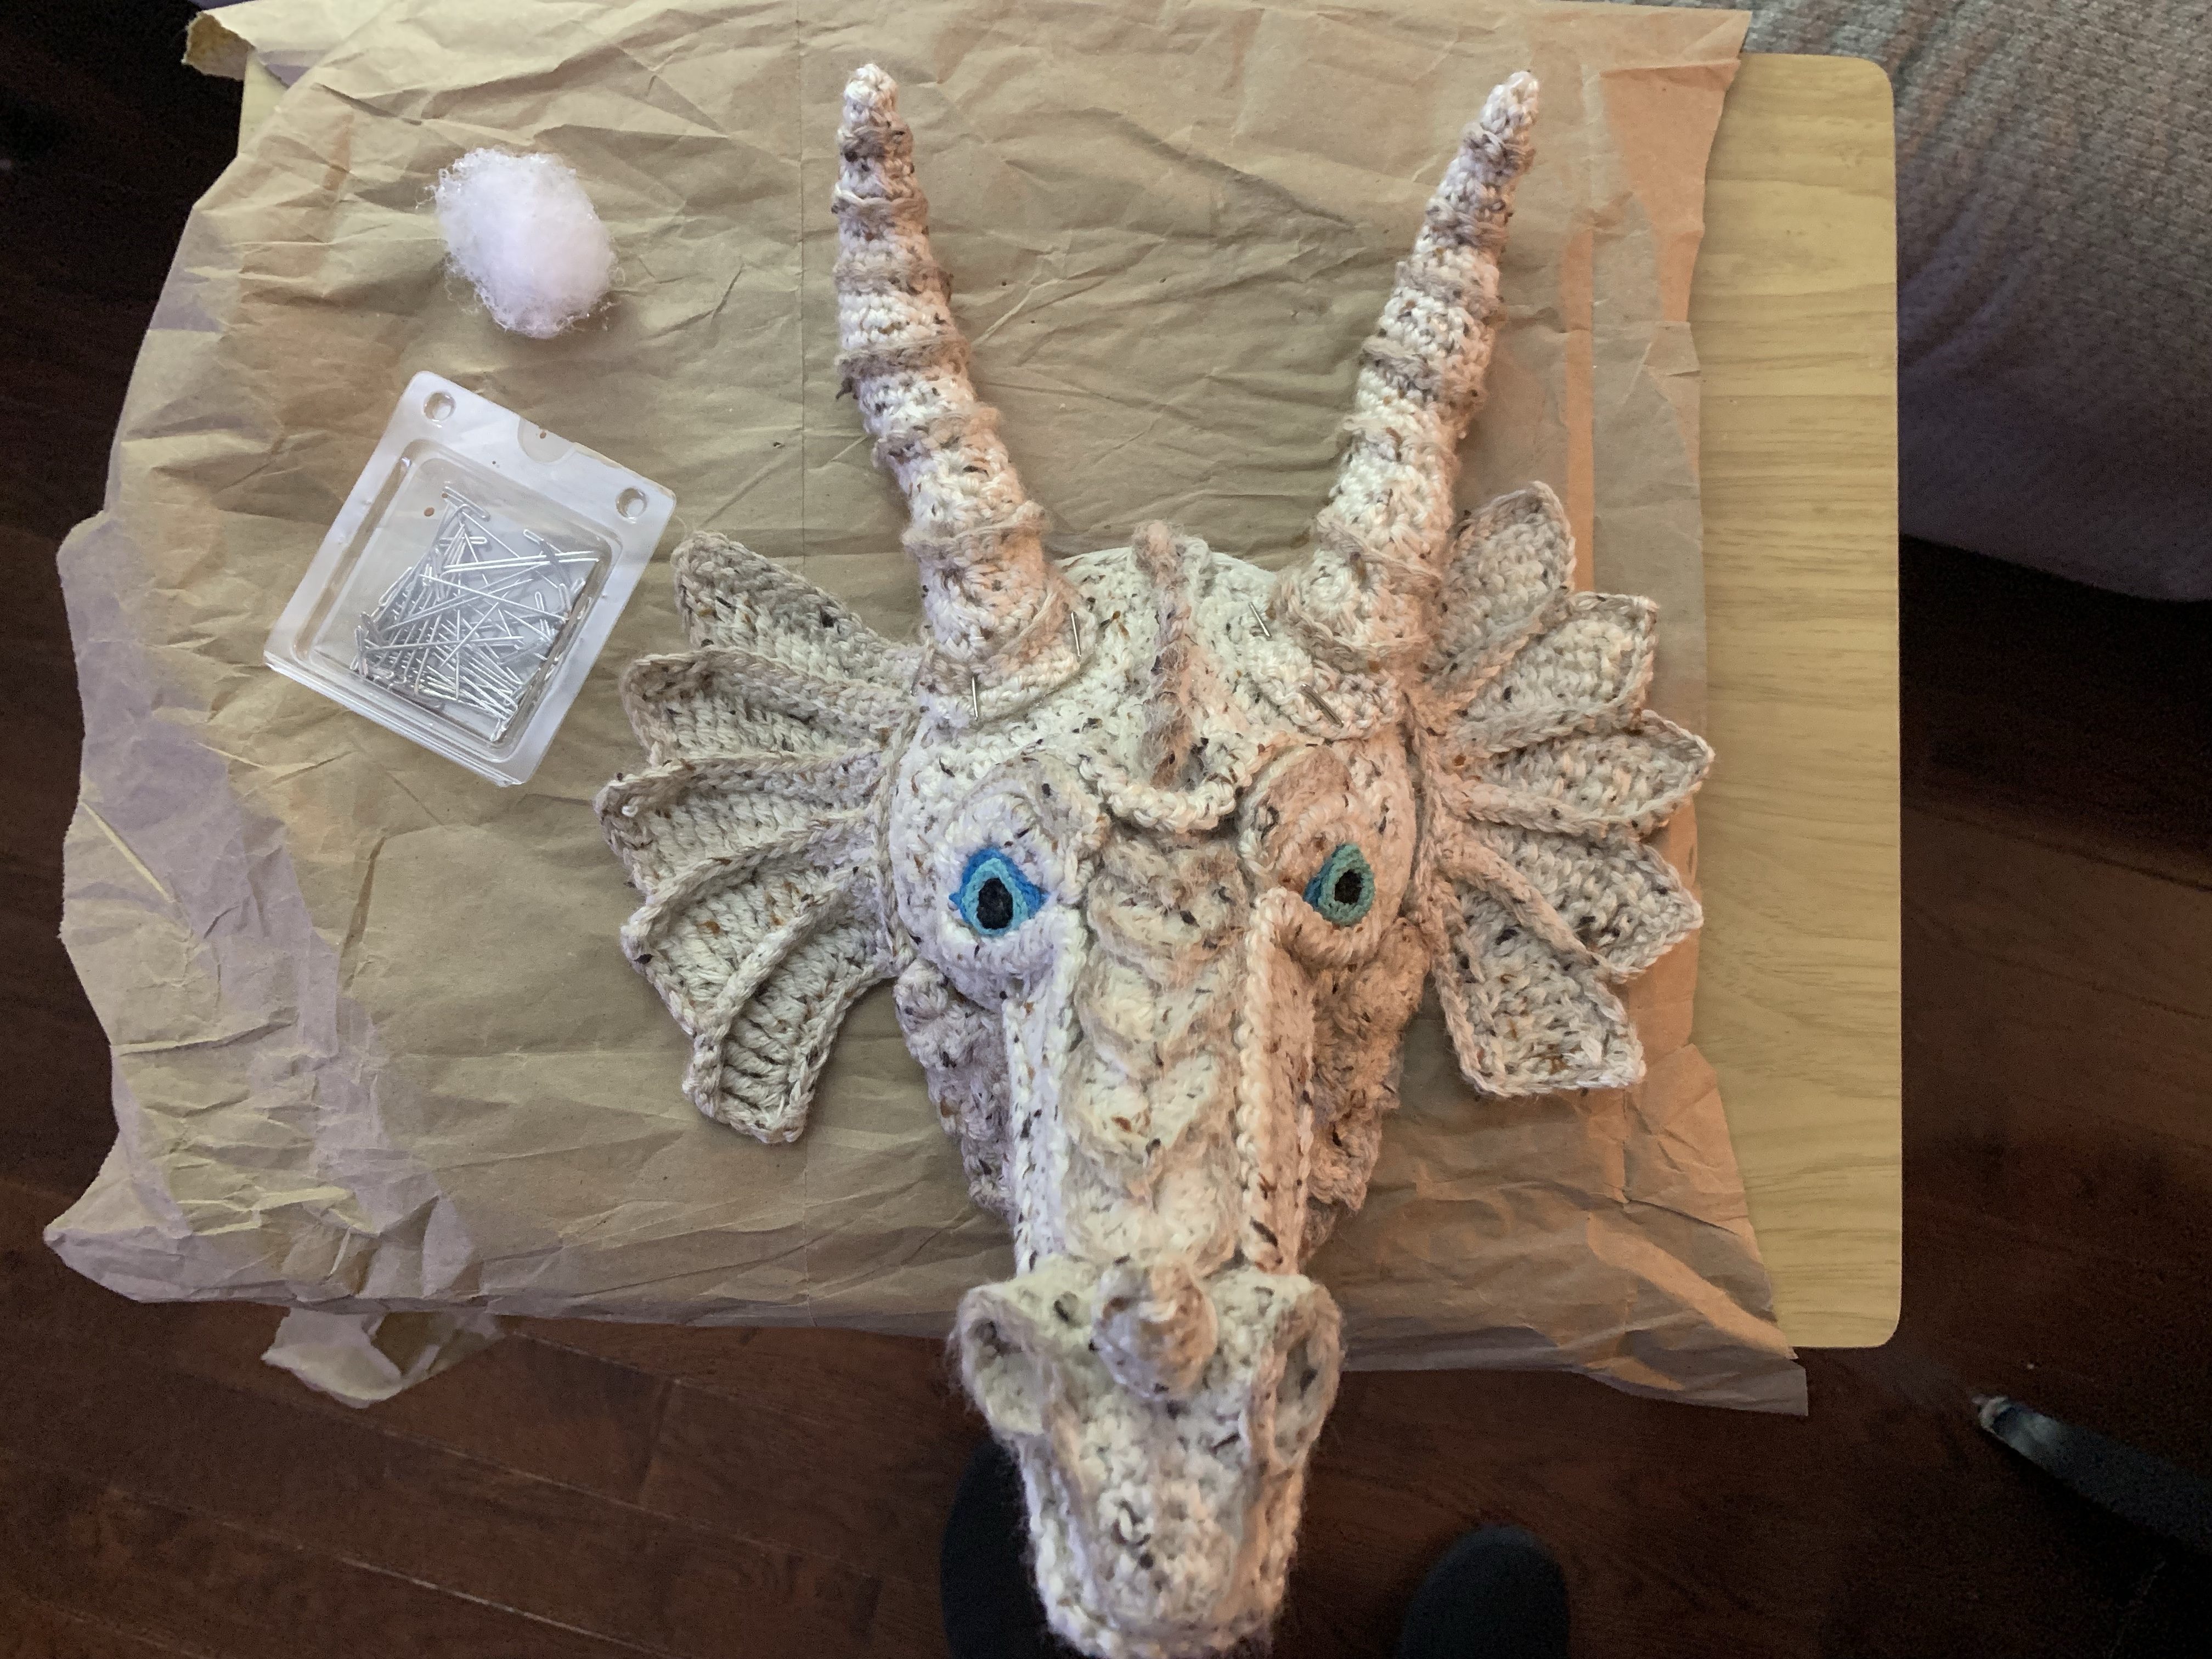
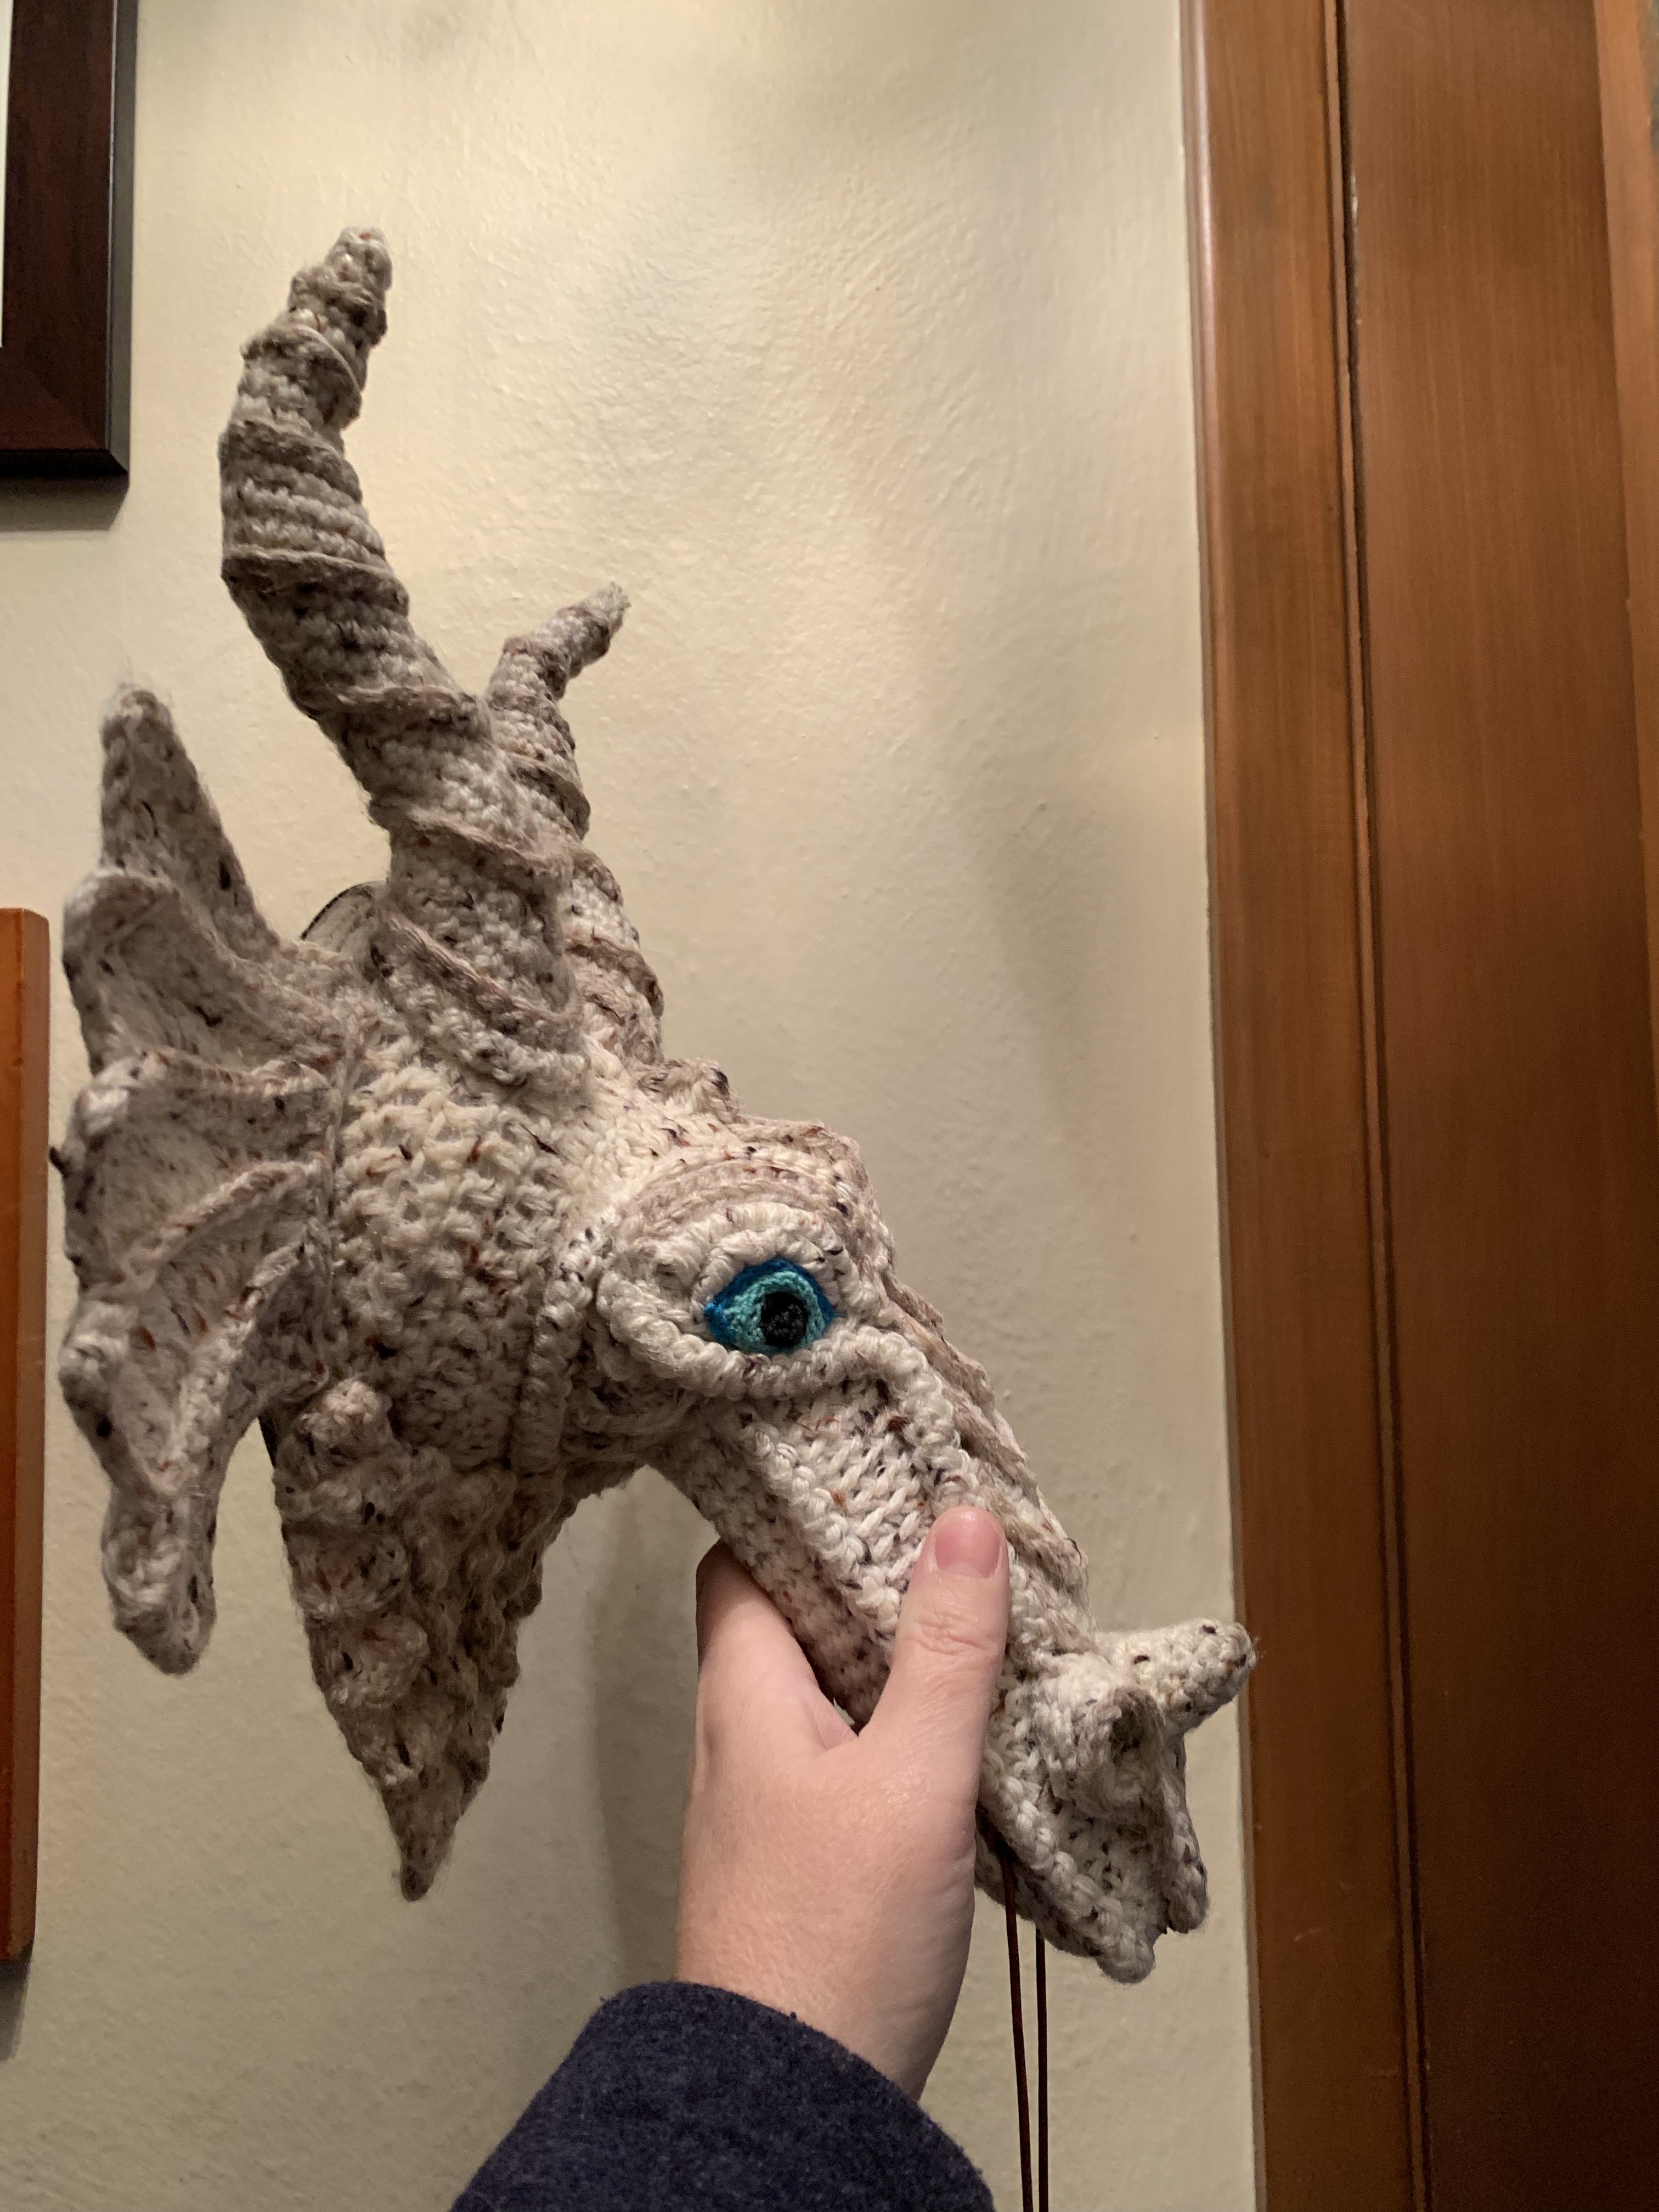
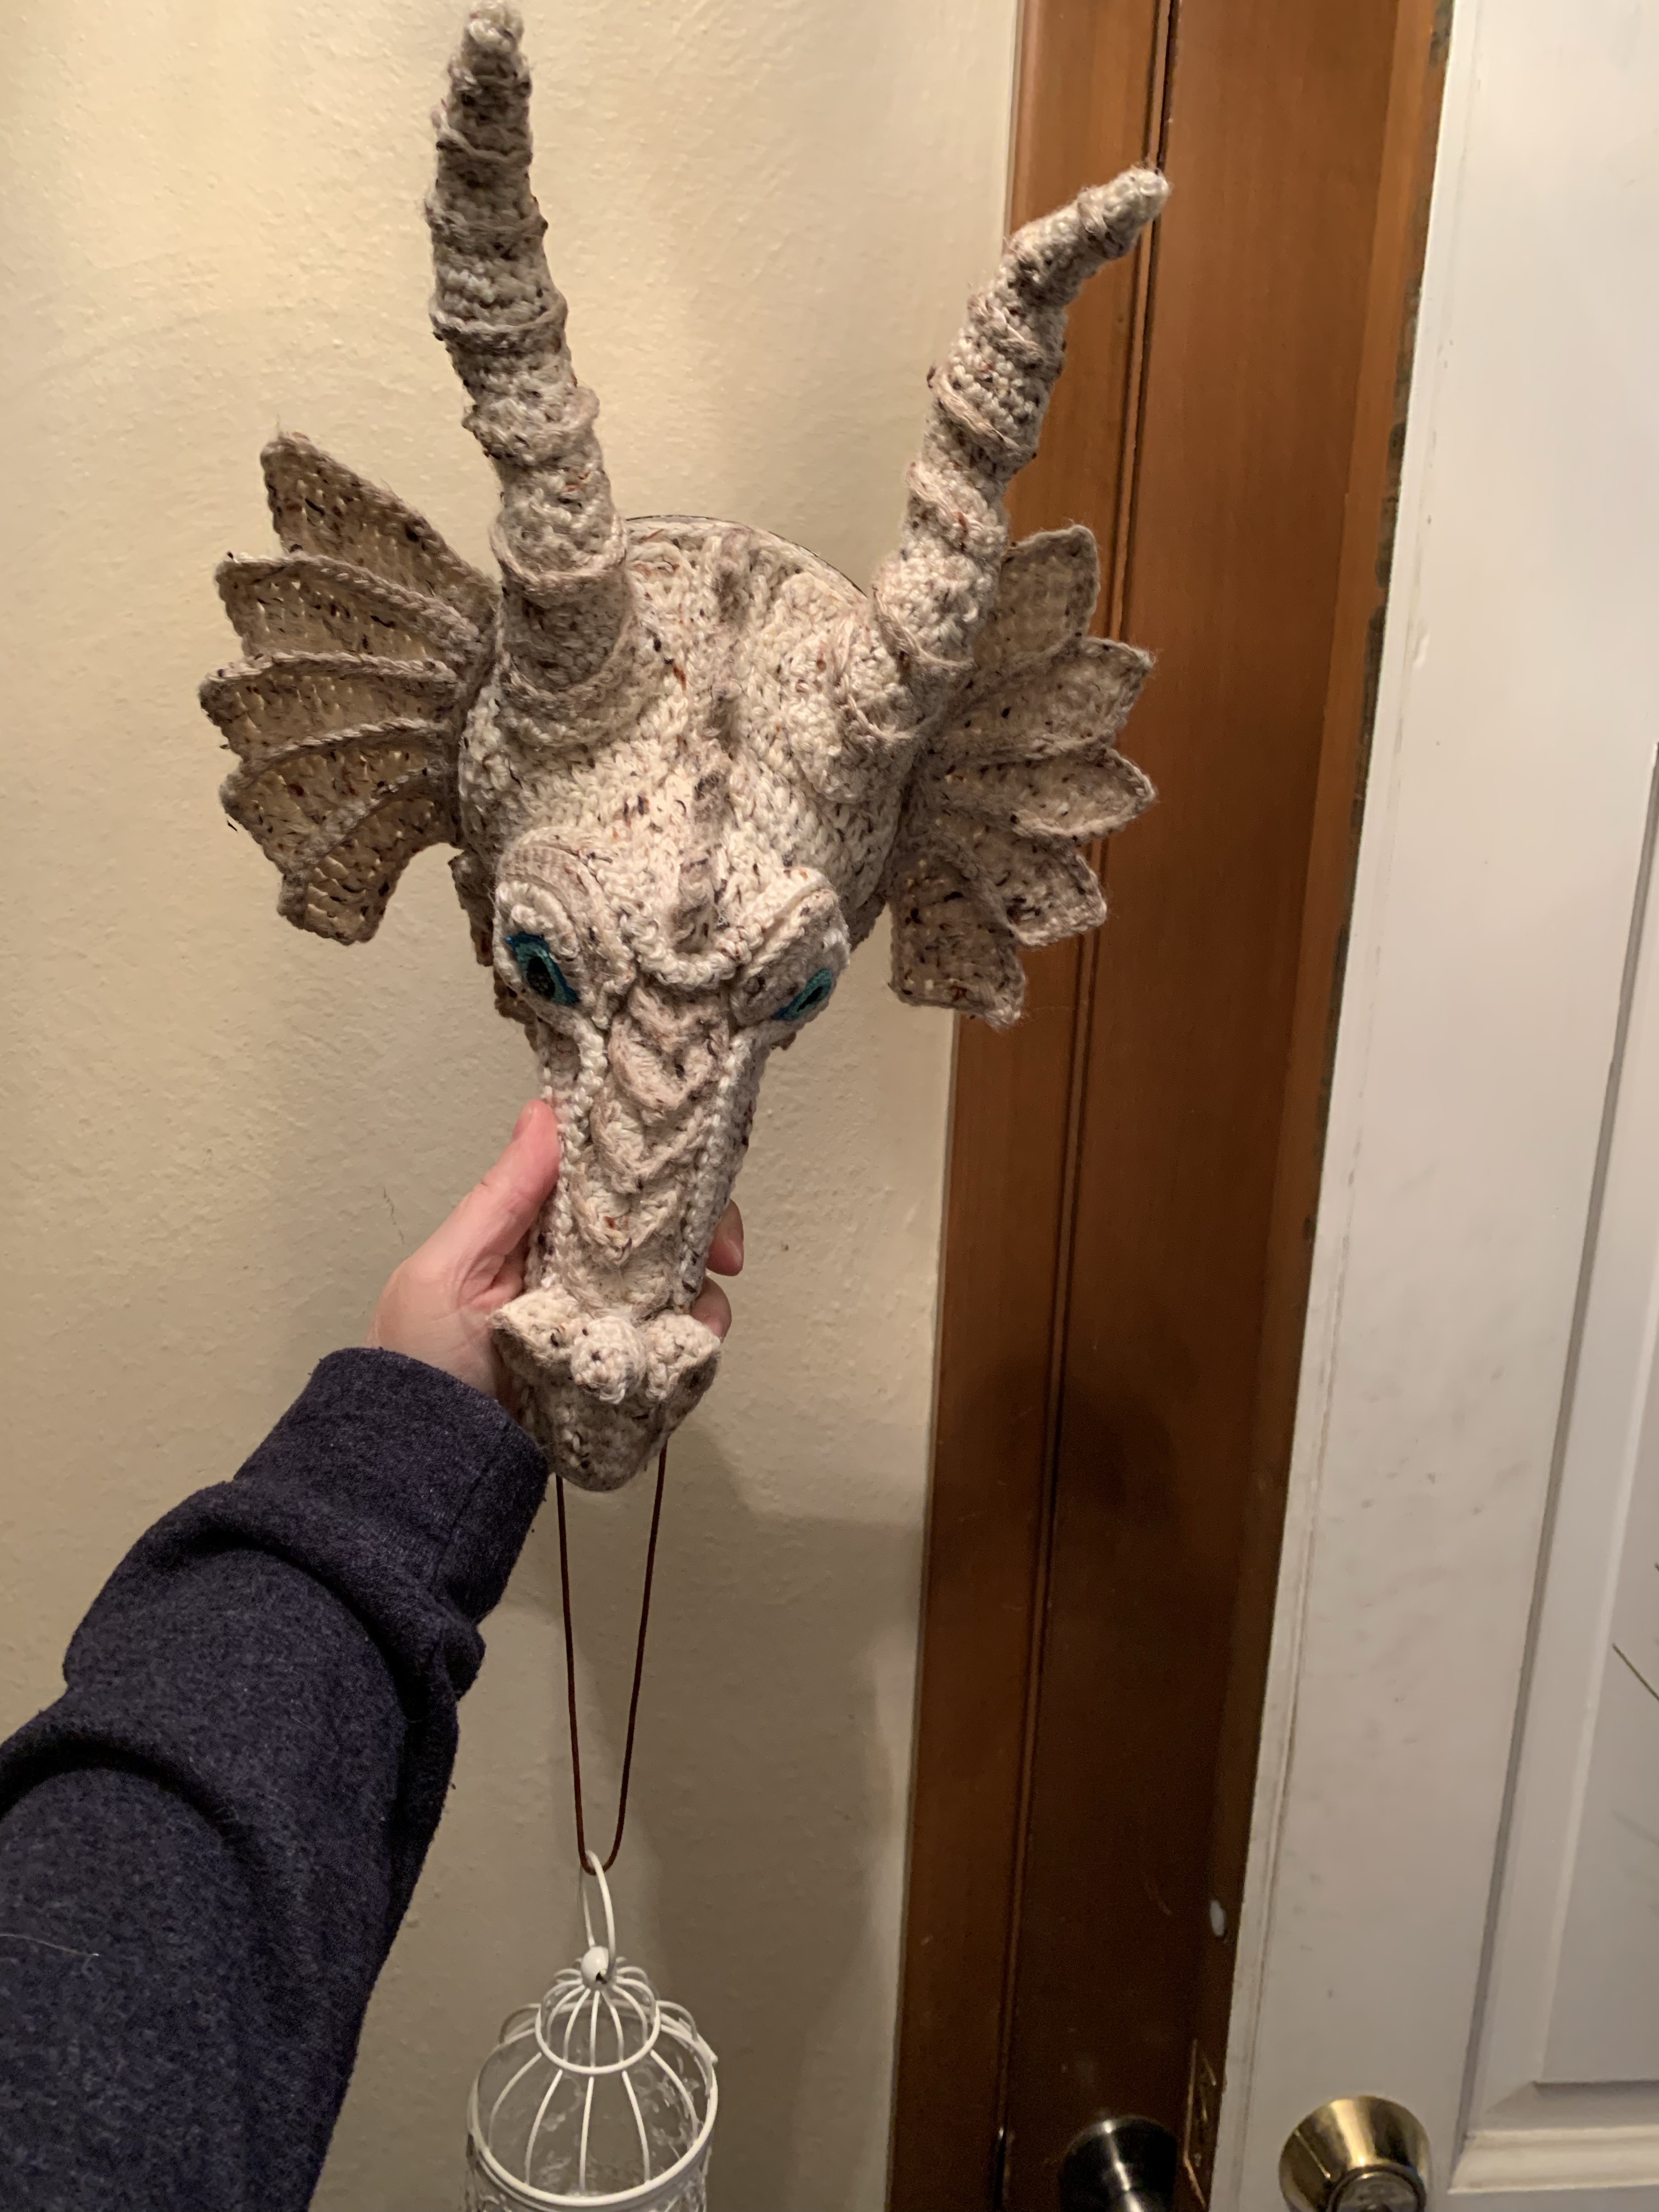
I finished up the year with 3 crochet project. The Guardian Dragon Crochet Wall Hanging was a pattern I purchased over the summer from Etsy. The pattern is by SRO Austin. This pattern was intense and is definitely an intermediate/experienced level pattern.
To start off, this pattern has 3 PDF exports and a long list of interesting materials including plastic canvas and Polyurethane. My first challenge was with the nose. My stitch is short, so I had to make extra rows to get to the end of the plastic canvas frame.
The PDF pattern has tons of step by step pictures, but they are small, so it’s best to read the pattern off the computer or at least zoom in on the pictures. Another hint, don’t print the pattern in black and white, because then the pictures are really hard to see.
The hardest part f the pattern, for me, was the reverse single crochet (crab stitch) in front loop only. I could not figure this out for the life of me. I was trying to look it up online, but still had trouble with it. It doesn’t help that I’ve never quite gotten the crab stich ether. Mom to the rescue! She told me the stitch is called Knurl stitch. I found a tutorial online that really helped.
I wasn’t crazy about the eyes and I bought some safety eyes to use for him, but the ones I bought were too small, so I stuck with my crocheted eyes. The final dragon was gifted to my friend Dawn as a Christmas present. I waited until she got the gift before writing this up. This was an incredible pattern and I highly recommend it. It’s just very clever all the pieces and how they come together.
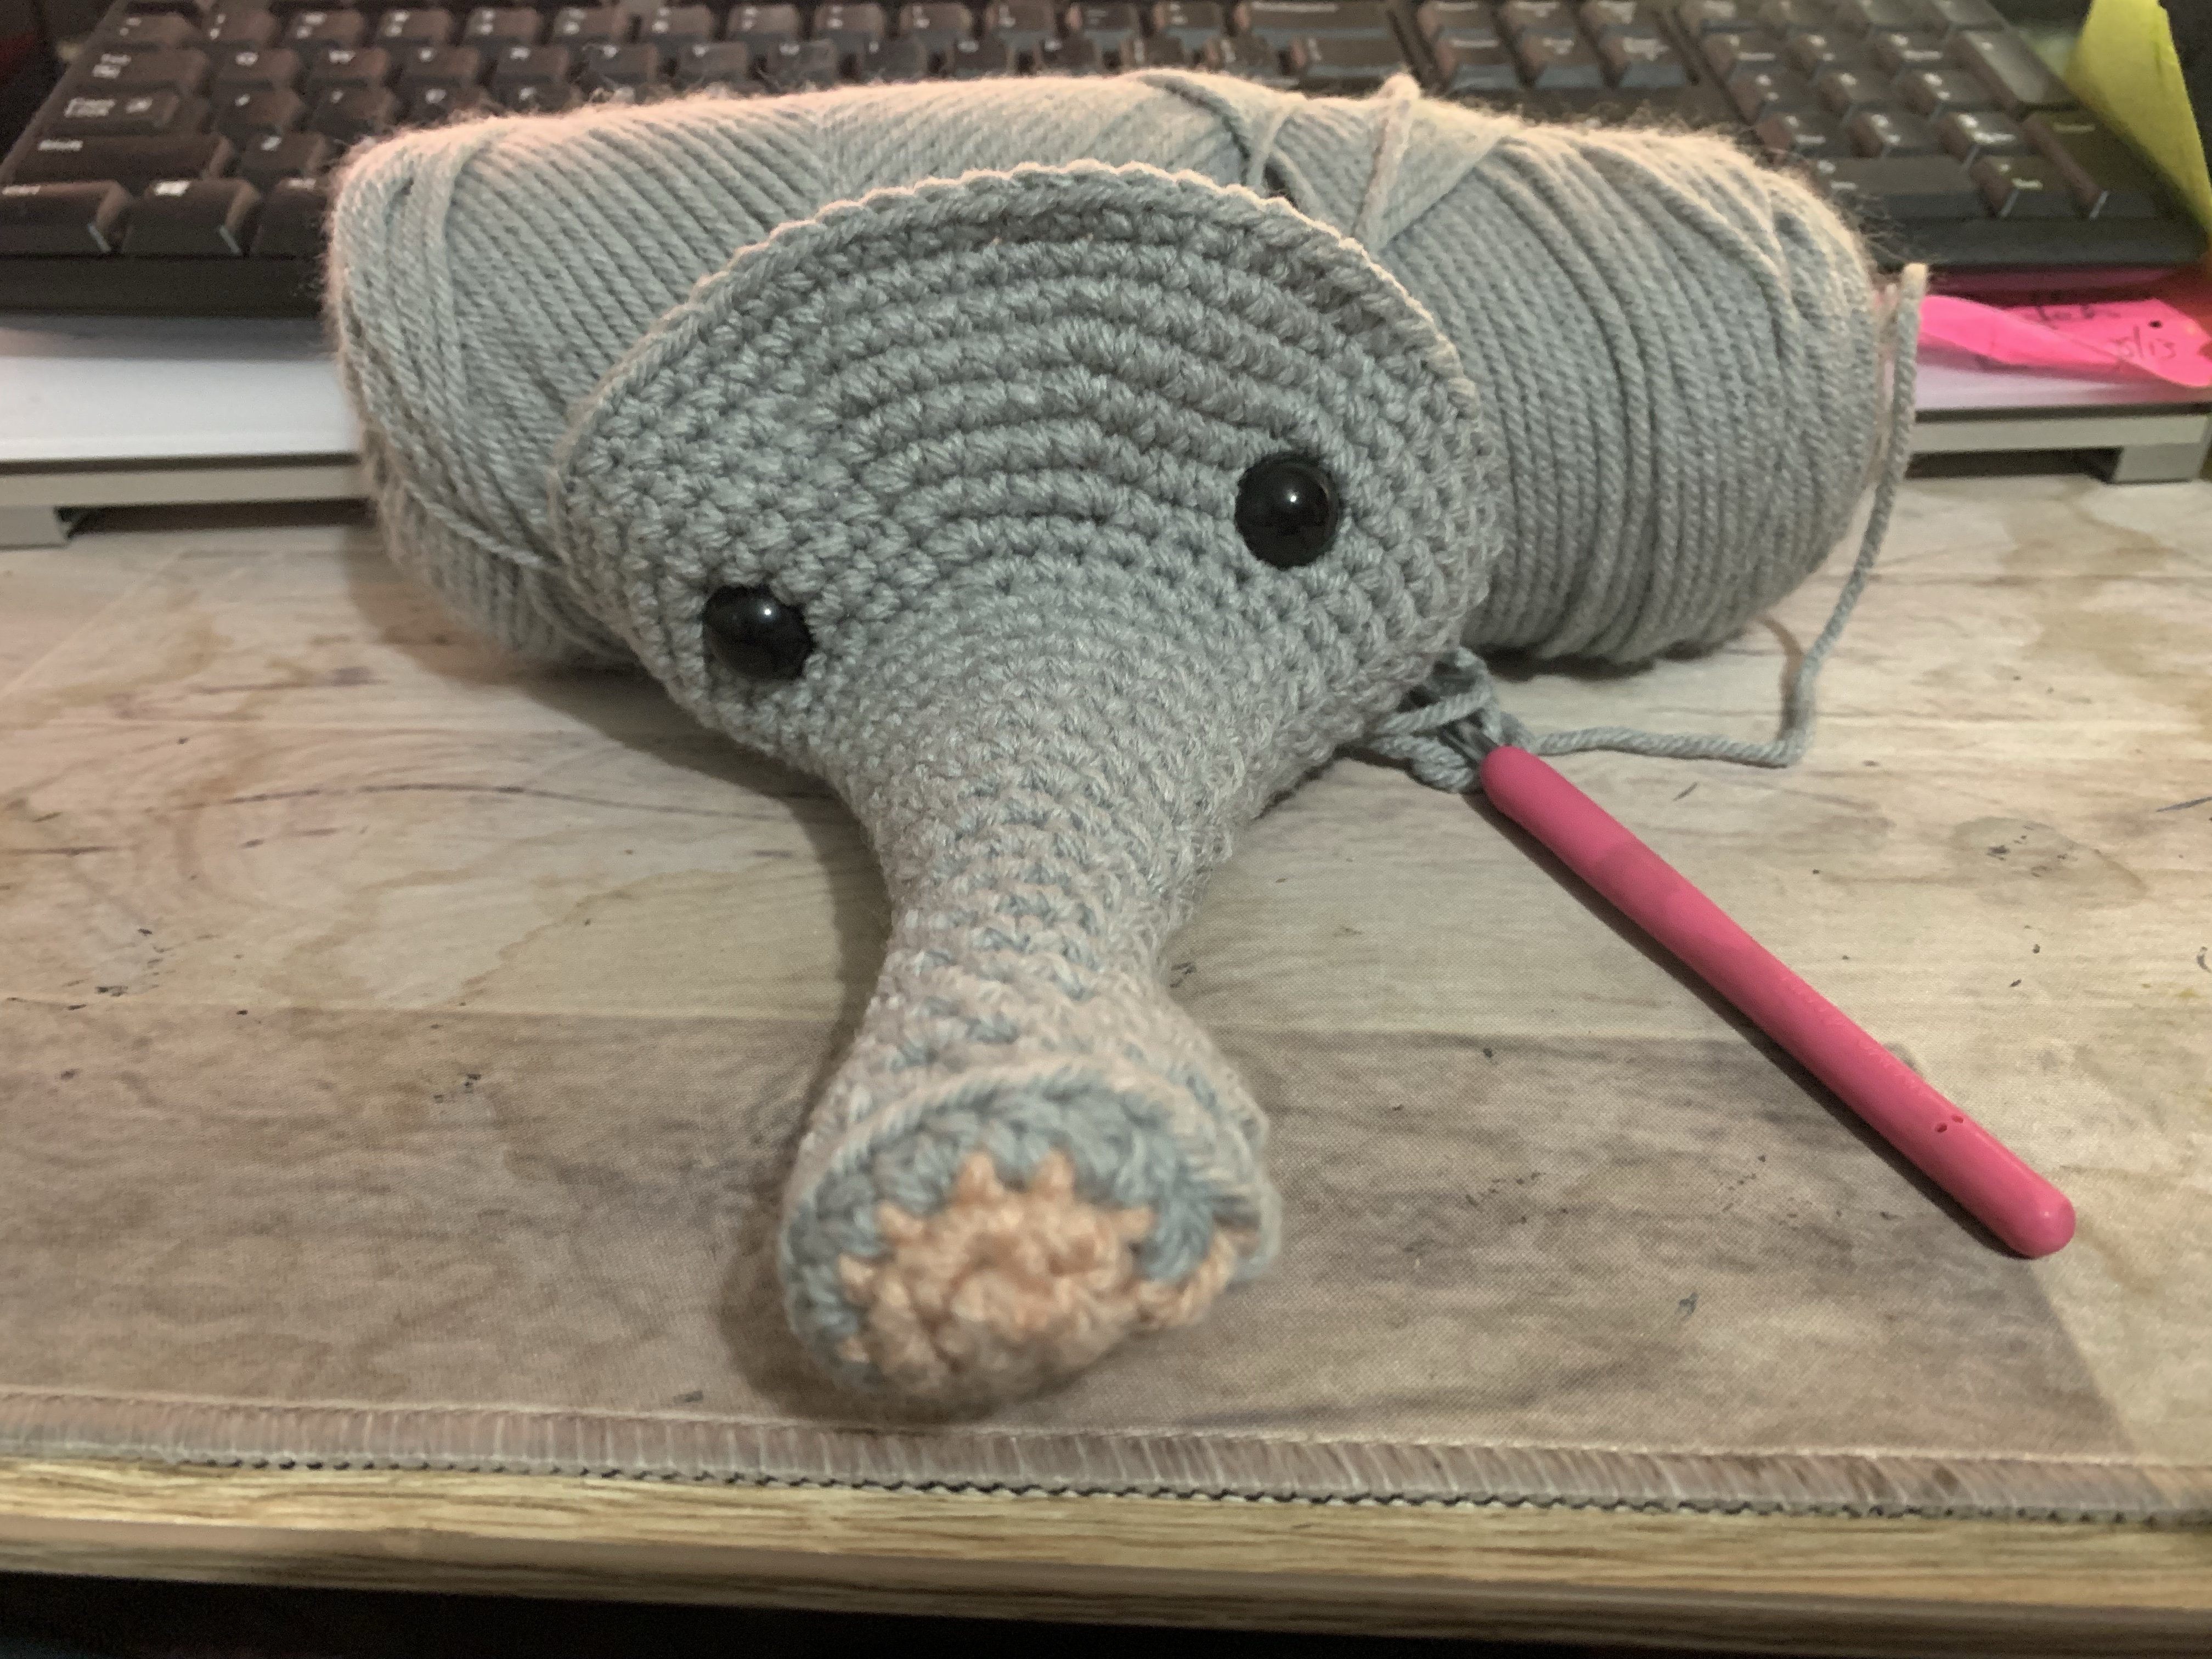
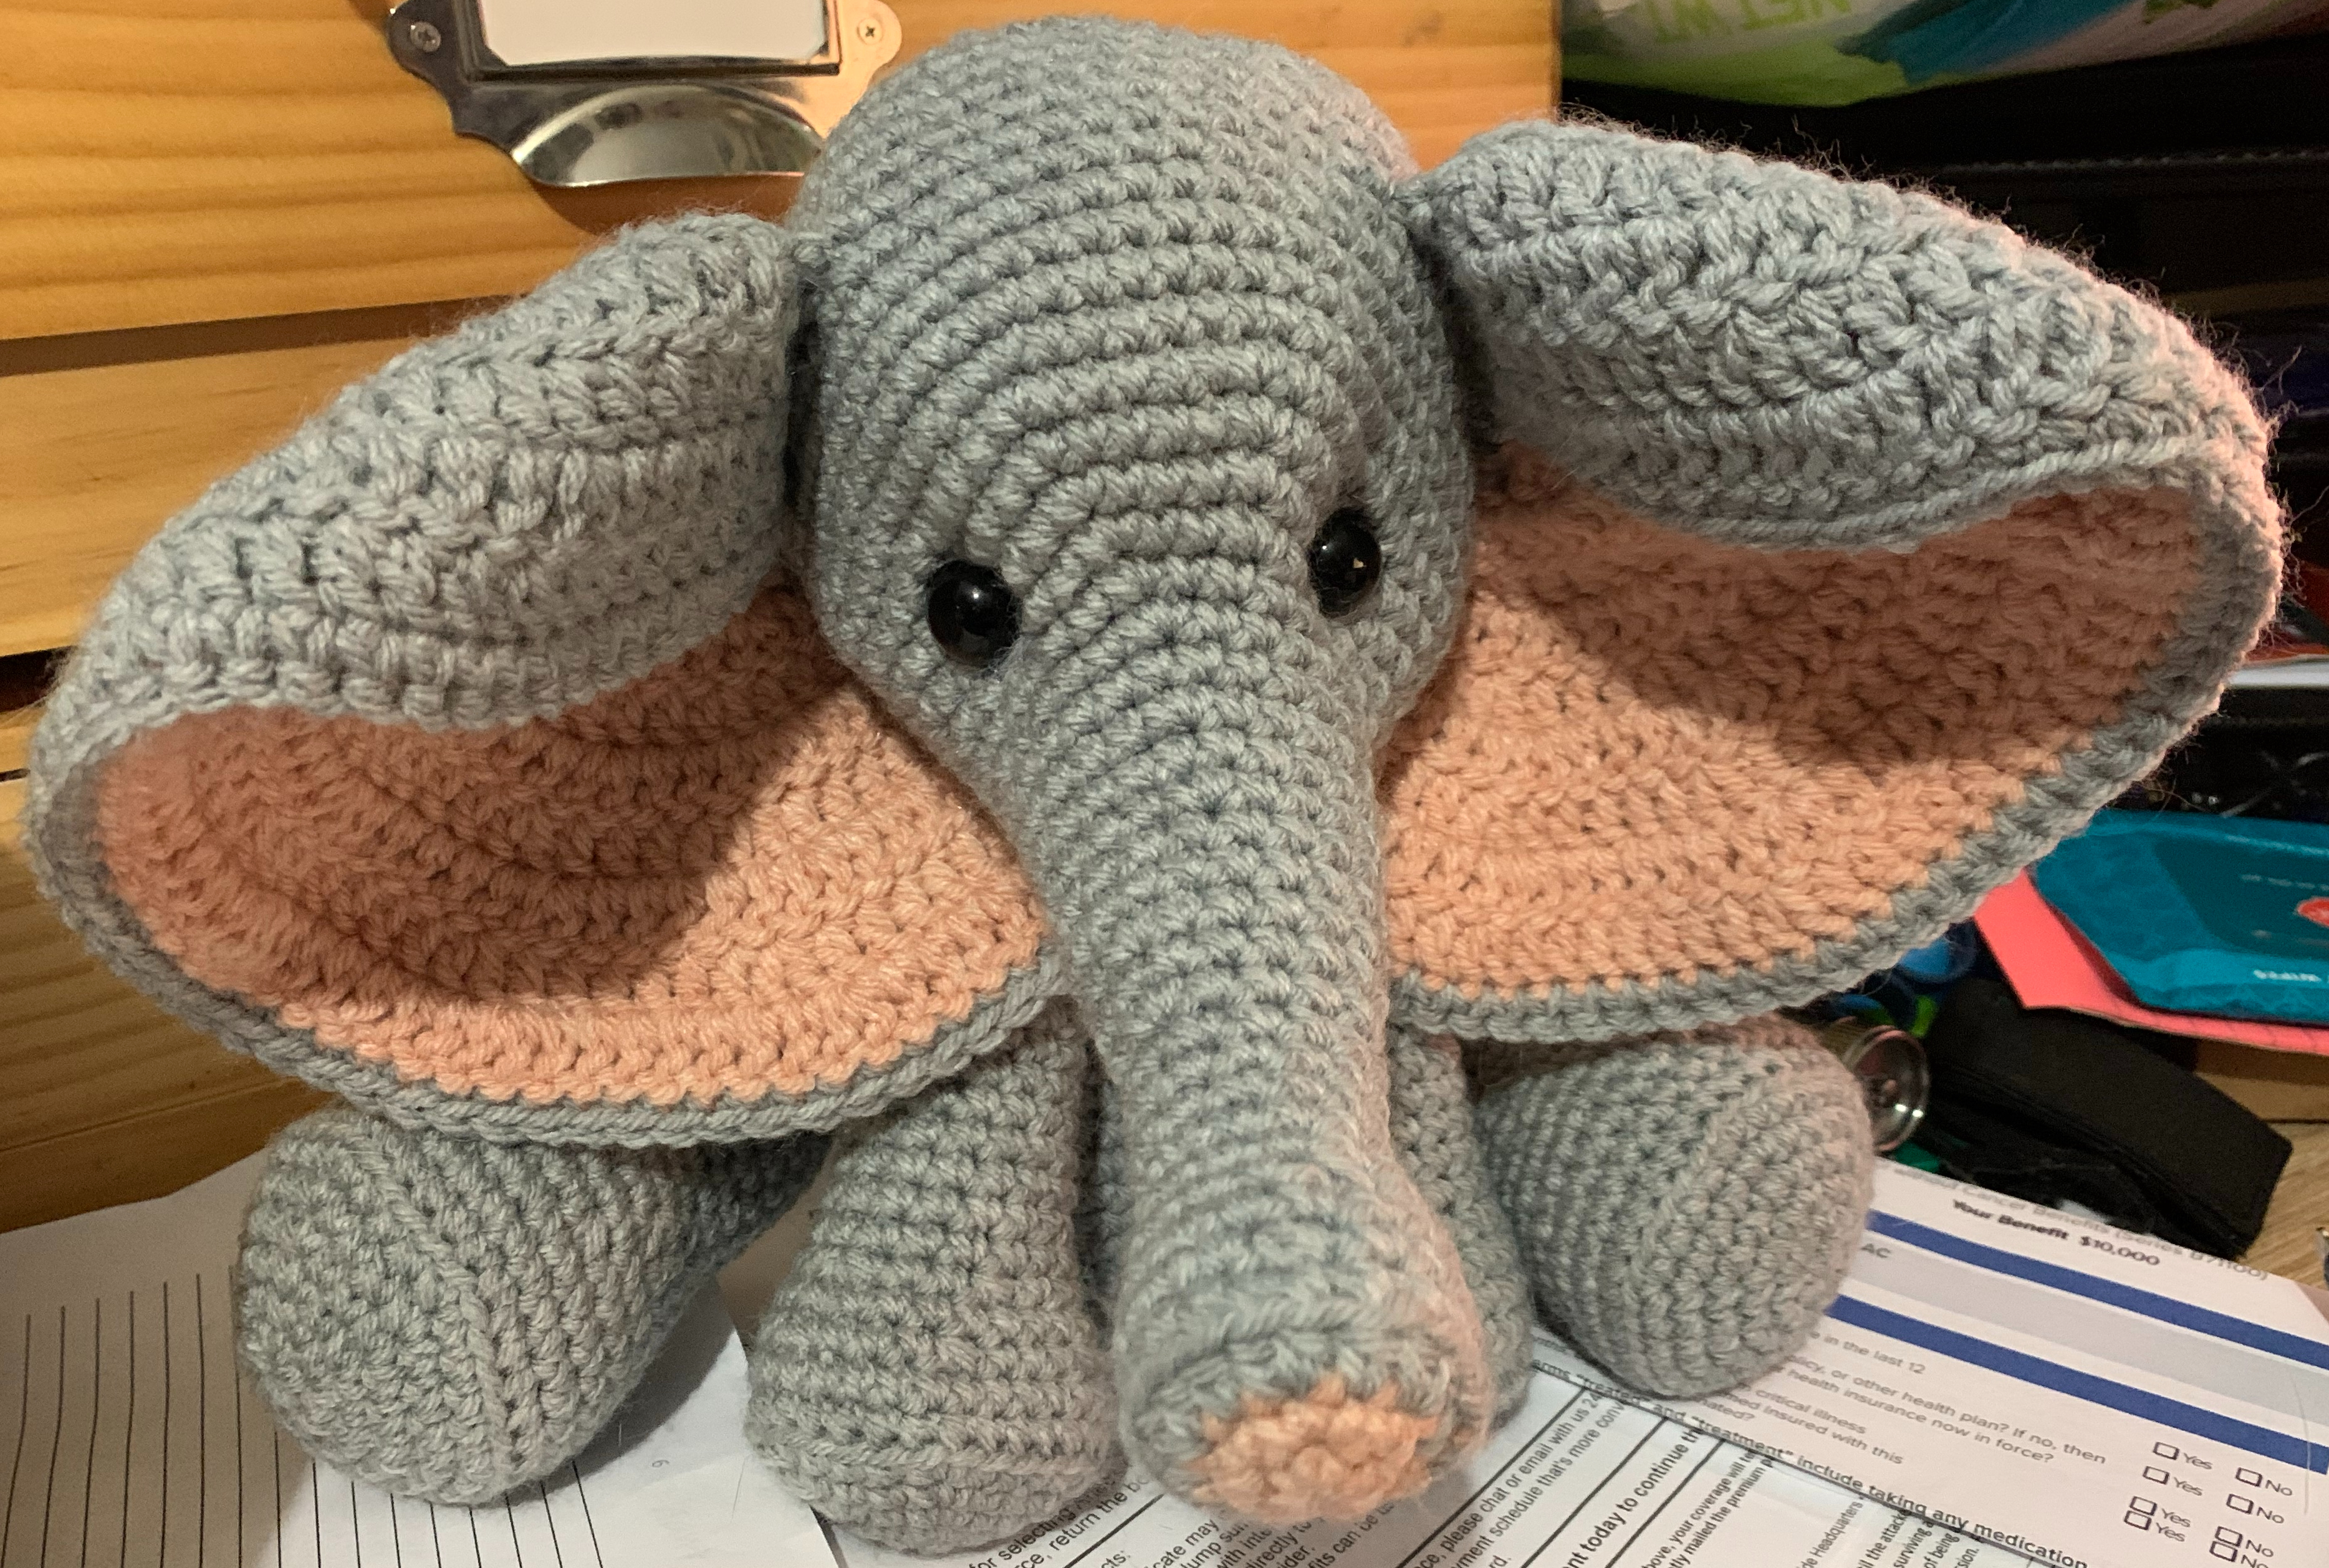
When I visited with my niece this summer, I asked her what her favorite animal was, and she said elephant. So I went and searched for a cute elephant pattern and found Everly the Elephant by Hannah Gerecke (HHDesigns4). Hannah also has a Facebook group that I follow and lots of really cute patterns in her Etsy store. I learned that if I don’t review something in Etsy, eventually the ability to review it goes away. Normally I like to make my crochet pattern before reviewing it, but I didn’t make it in time. Oops!
This was a simple, easy to follow pattern. The only thing that confused me was the optional mouth. I did make the mouth, but didn’t attach it. I realized later how it would be attached, but decided she didn’t need it. The only thing I would have liked is more pictures for the assembly including the tail, or at least a photo of the tail. But outside of those two wish list items, this pattern is awesome. I can’t wait to gift it to my niece.
I didn’t take too many photos while making; it just went so fast. I added her little flower headband to match the pattern picture for her. I sewed mine on, lightly tacked between the flowers. The yarn I used was Yarn Bee Yarn ID in Iron and Soft Shell.


You must be logged in to post a comment.