Oh boy, I’m out of it this year. I never published this post? Guess not. But the good new is that I won best Halloween decorations from my ward for my town.
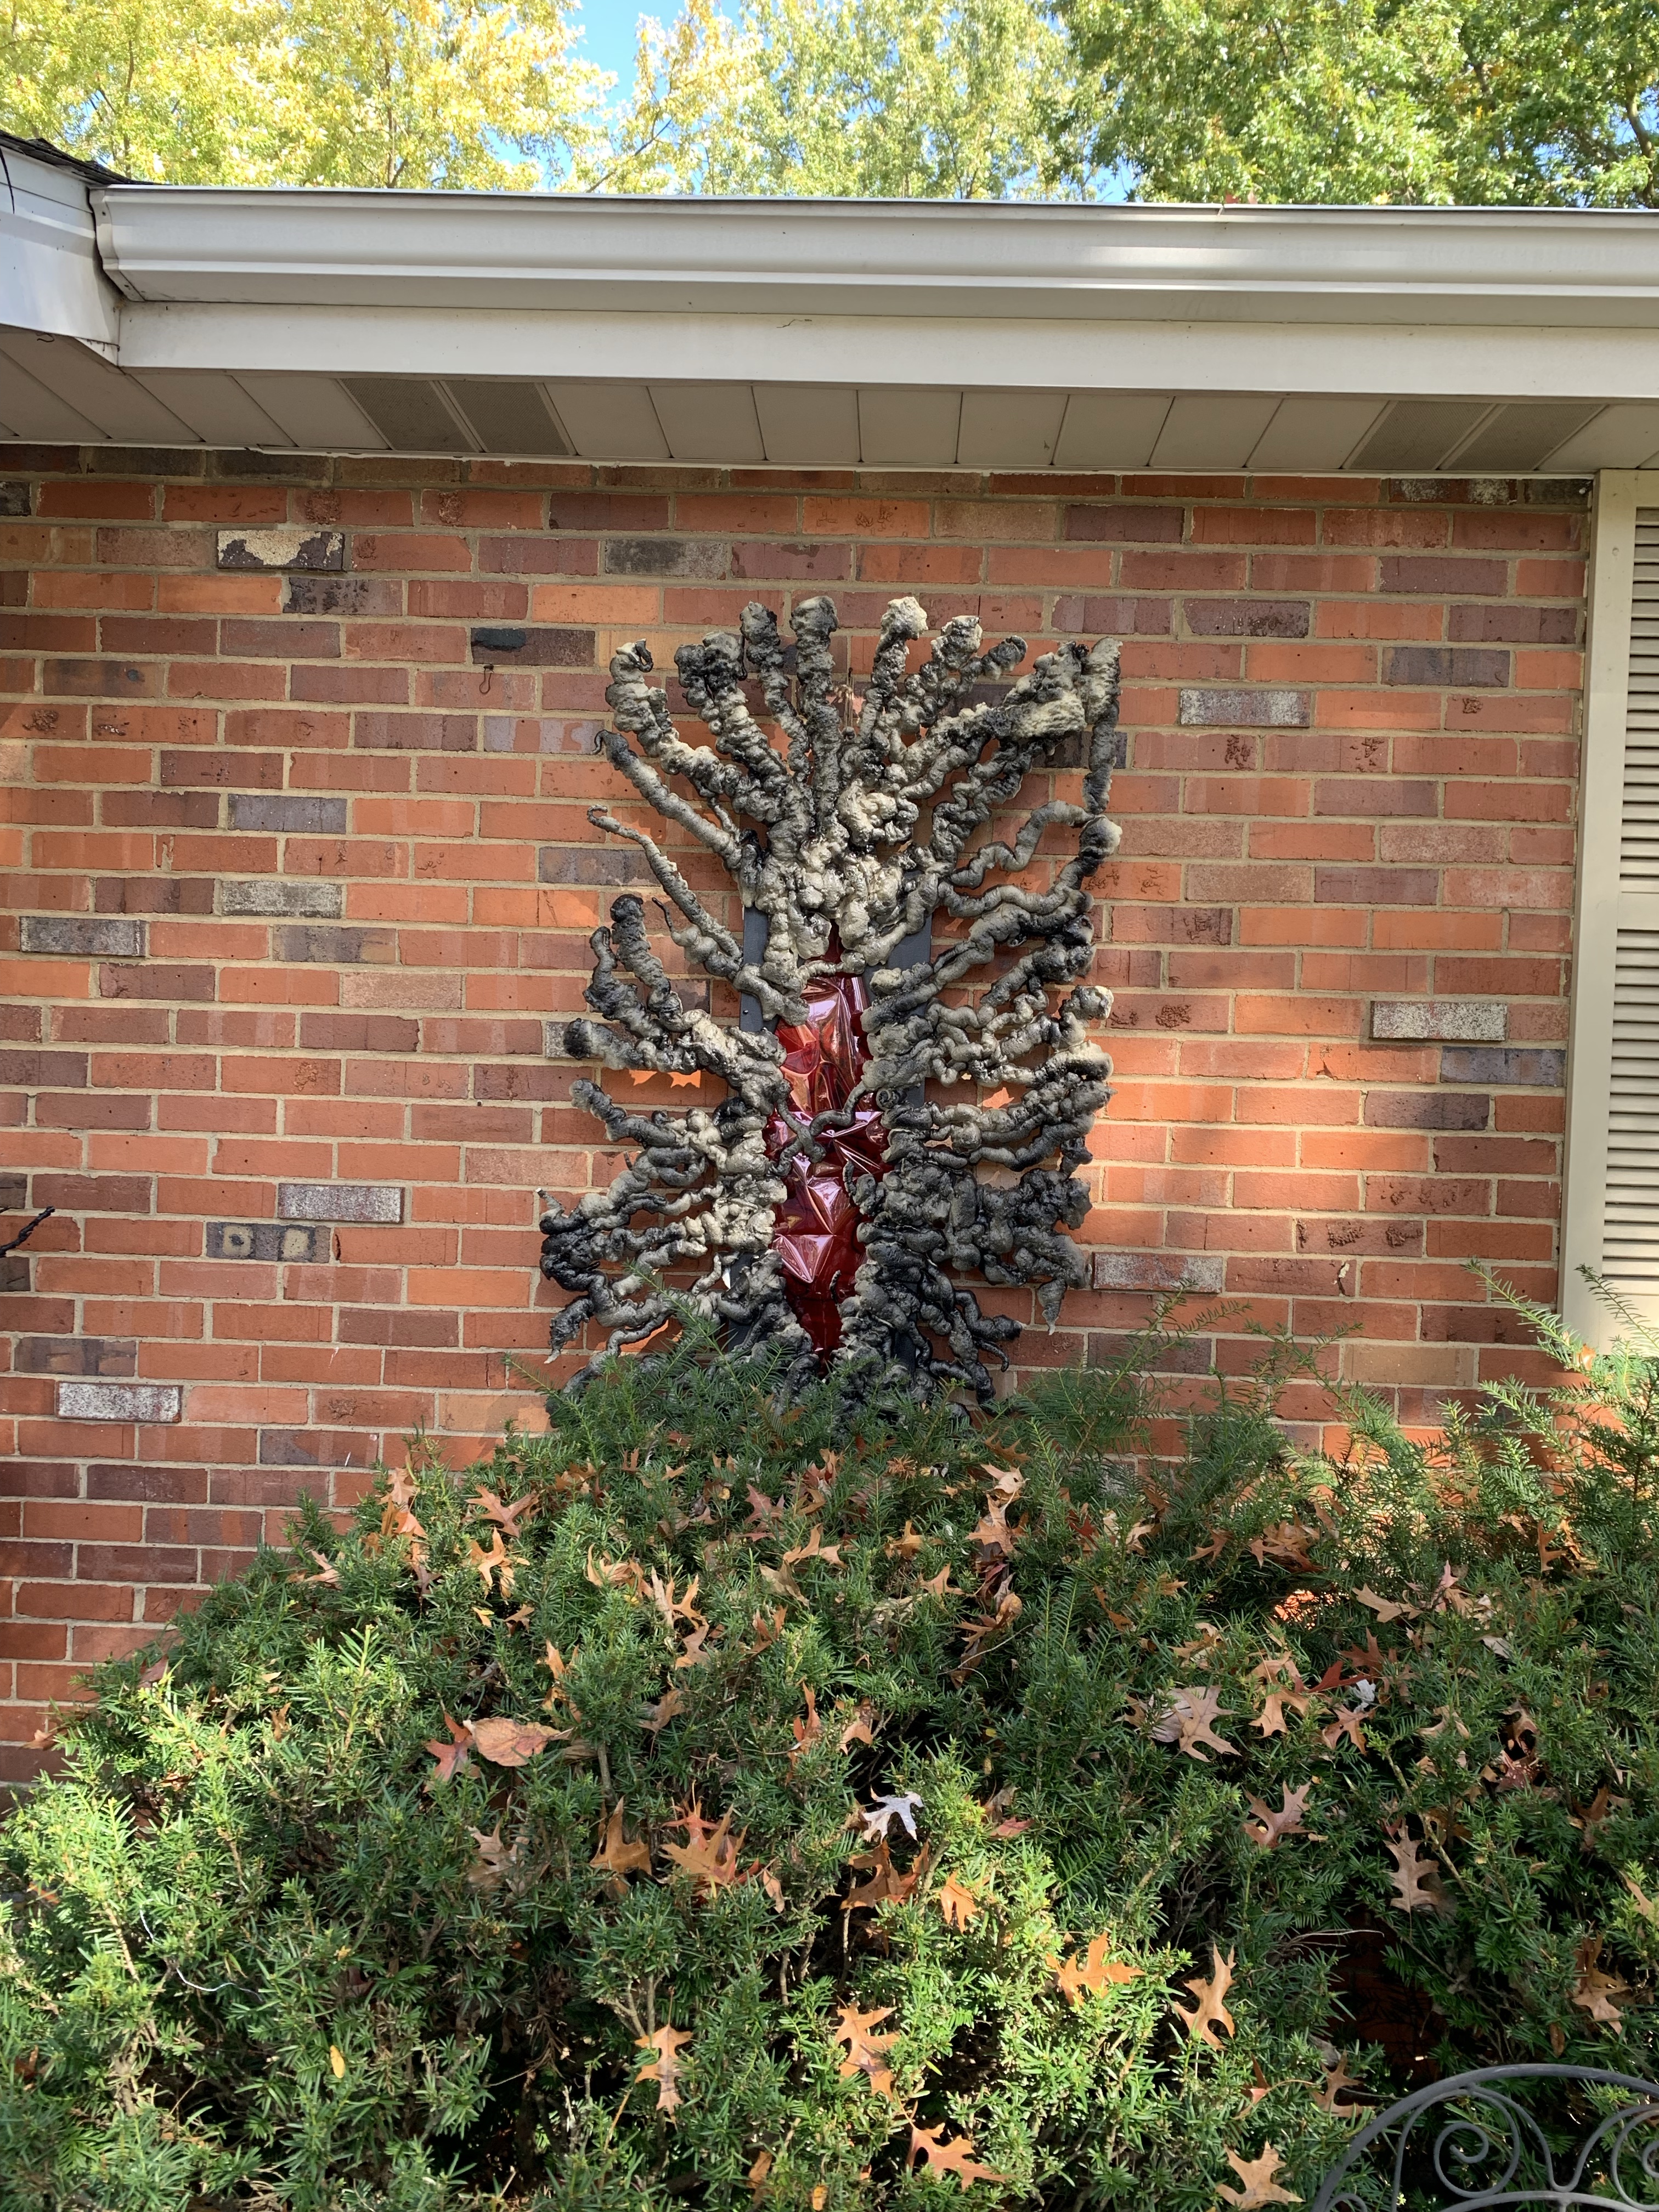
This year for Halloween I did a Nope scene, so I had to make a Jean Jacket prop. I decided that the easiest way to do it would be to just crochet it. So I got some very large wreath frames and some grey and black yarn and did a freeform version of Jean Jacket.
I was a bit inspired by Crochetverse and the costumes she makes for her kids. So I wanted to do a large scale crochet freehand Halloween prop. I have a long way to go to catch up with her talent, but I did learn a little bit about shaping. I also learned that I’m very impatient and that I don’t want to go back and reshape when I’m working on something this big.
Some additional props I made this year are the upside down portal and a Chrissy. For Chrissy, I found a cool YouTube video of someone making her from an old Halloween Spirit prop. But the prop is discontinued and I could only find it on sale for $350 – $400 and I wasn’t willing to spend that much.
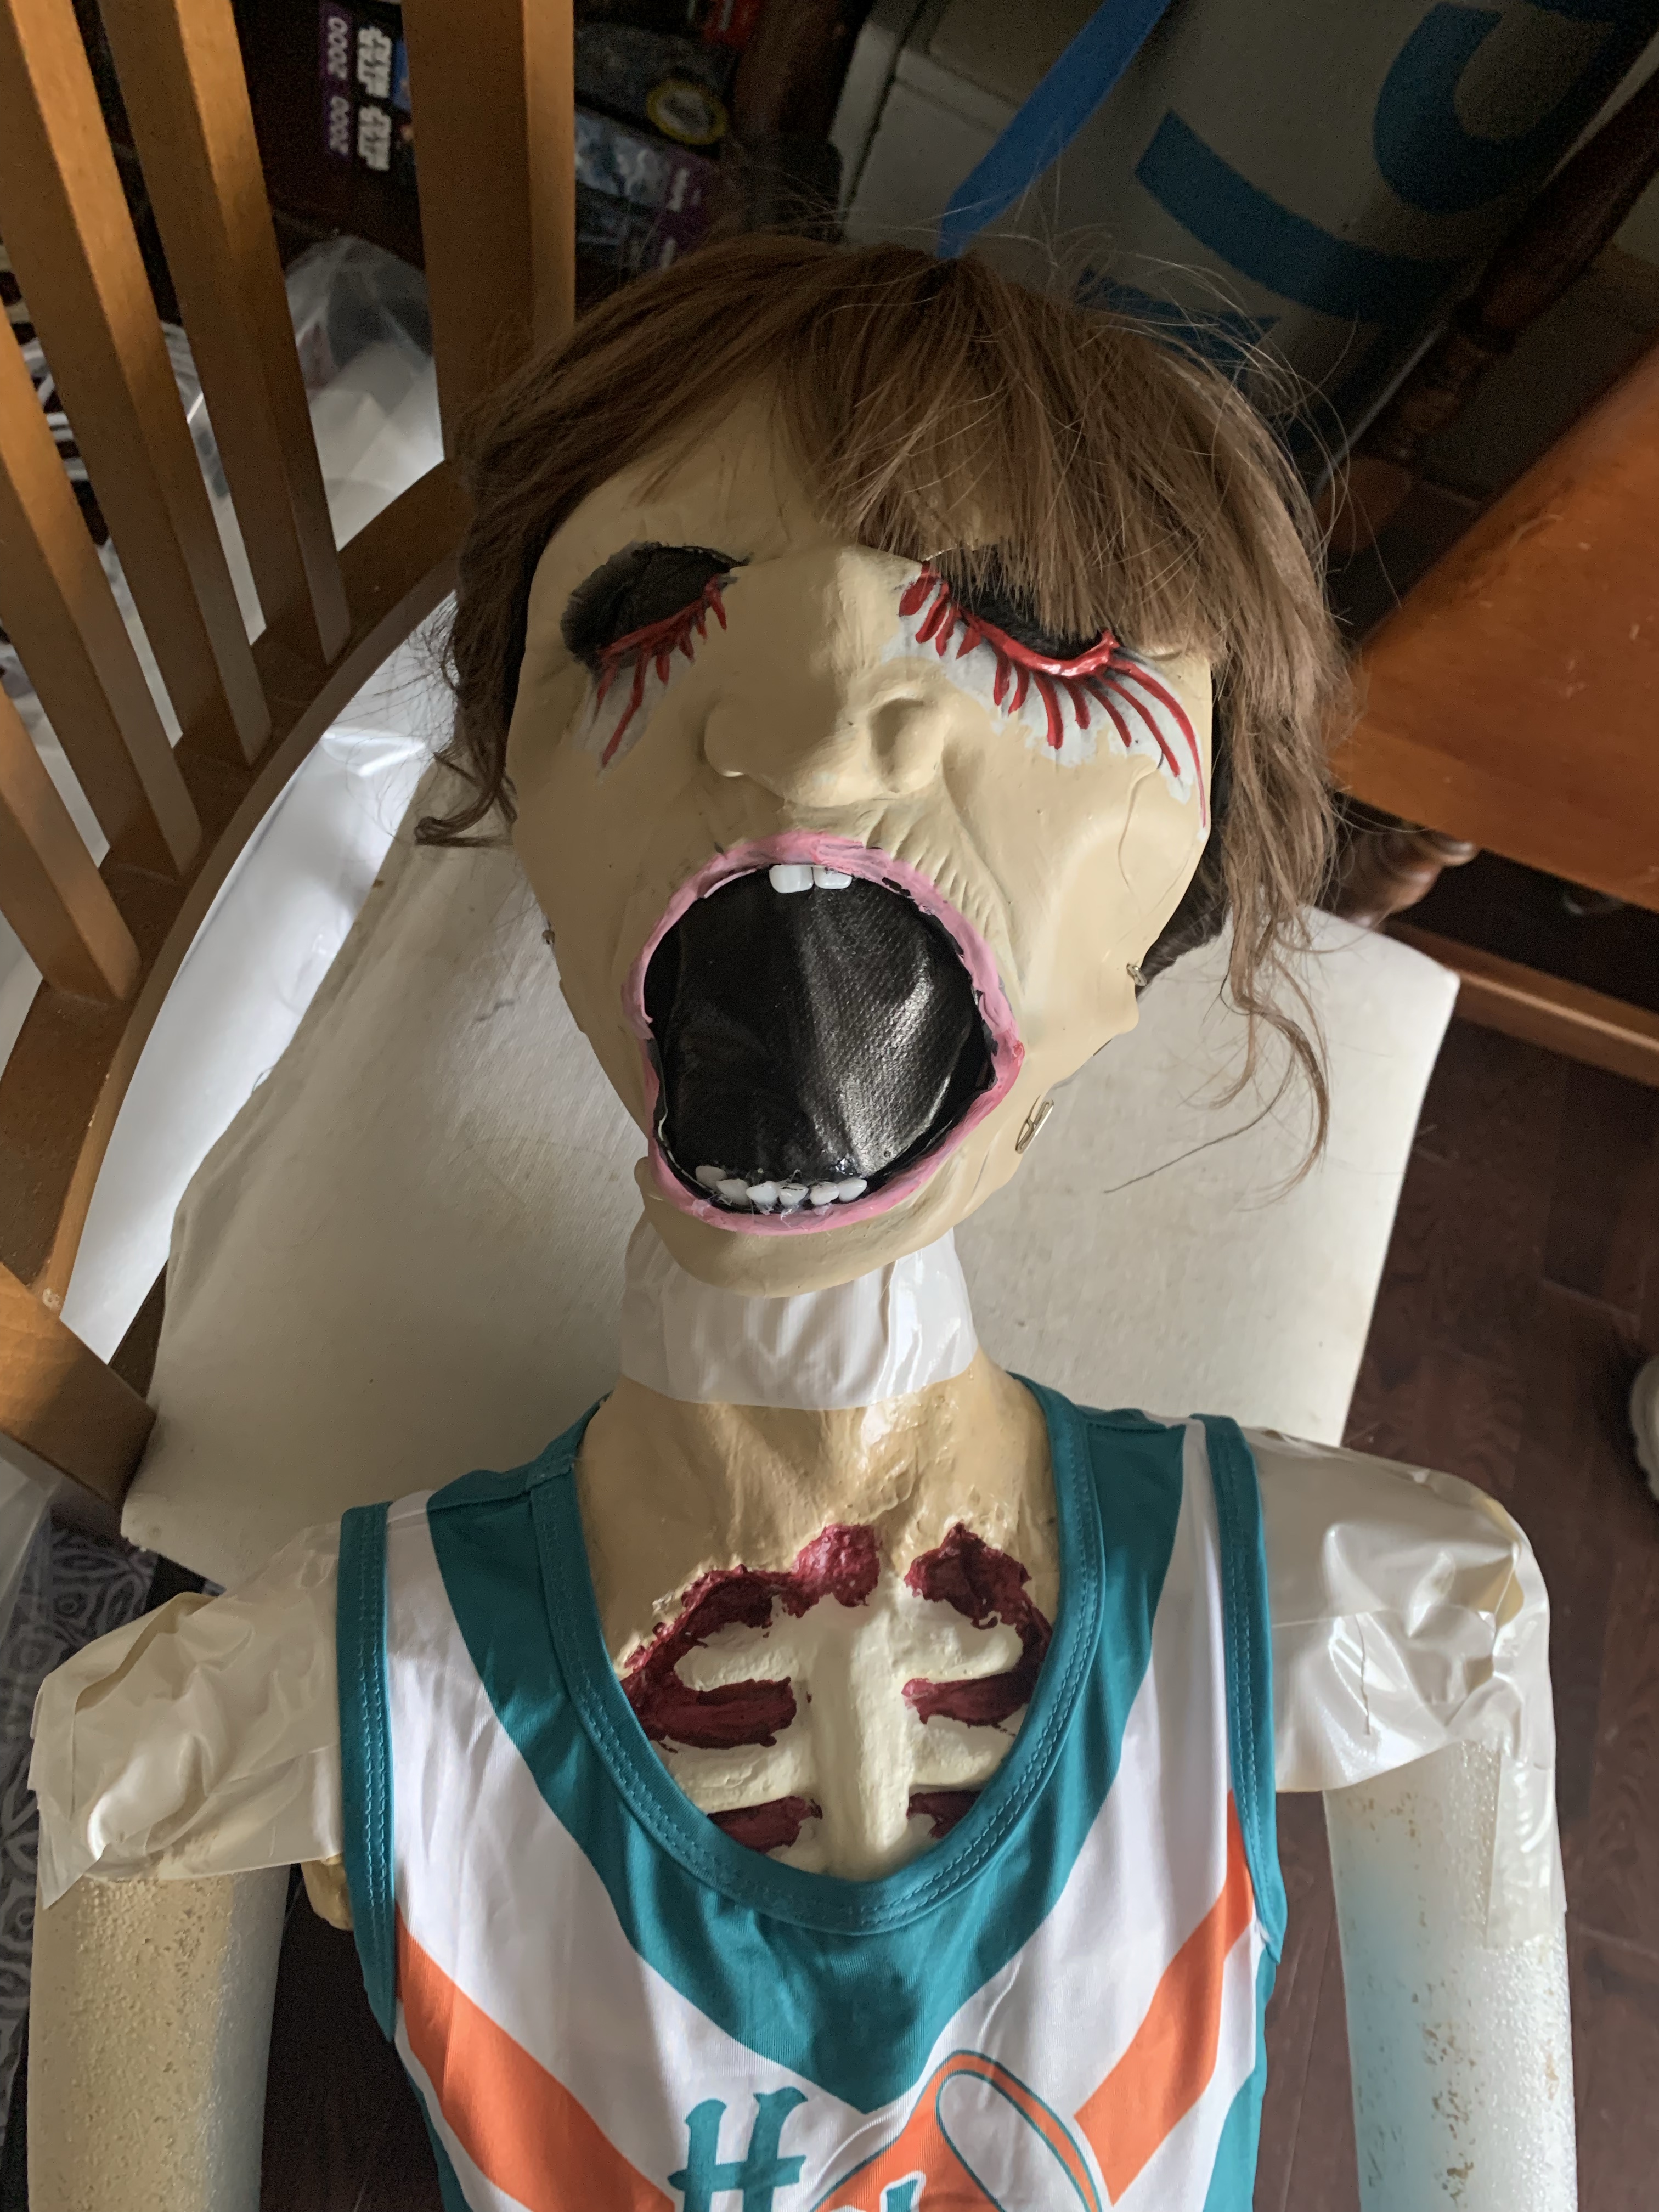
So for my budget Chrissy I started with a Styrofoam head that I already had and Billy Butcherson’s body. I used this screaming nun mask as the template for her face (I searched lots of masks and this is the best I could find for my purpose). I bought a bunch of pool noodles for her limbs, and used some heavy wire from Lowes to bend and form the noodles. I also bought some teeth for her mouth.
The biggest adjustment was the mask. I cut out the eyes and mouth. Then I painted the mask. I used landscaping fabric to fill the void of the eyes and mouth. Then I pinned the mask to the Styrofoam head. I cut the heads neck at an angle to make the head a little crooked. I added some teeth and the wig to her head. BTW, this wig is great, maybe the color doesn’t match Chrissy 100%, but the hair style does.
Oh yeah, I also bought her hands, but they didn’t arrive on time so I had to order replacement hands. They weren’t quite what I wanted. I couldn’t find any female hands. I even tried to make my own hands, but that turned into a big mess. In the end, I just used wire in the hands to break the fingers, and I painted them because the were too pink.
Next up was the portal to the upside down. I used a painting canvas, spray foam, red film, and lights. I cut a gash in the canvas and painted the canvas all black. Then I laid the canvas out on plastic and sprayed the expanding foam coming out of the opening. I also had a couple go across the opening. Then a spray painted black. Once dry I flipped it over, carefully to add the red film and lights. I just used tape because I was afraid of hurting the foam. Then I attached a wire to hang it on the wall.
Oh yeah, and I bought these because they were awesome and I couldn’t make them myself.
I lied. My Stranger Things decorations were not done. I found a new Facebook group called DIY Halloween Decorations and Props and I have been getting tons of inspiration from these talented people. I decided to add to my Stranger Things decorations.
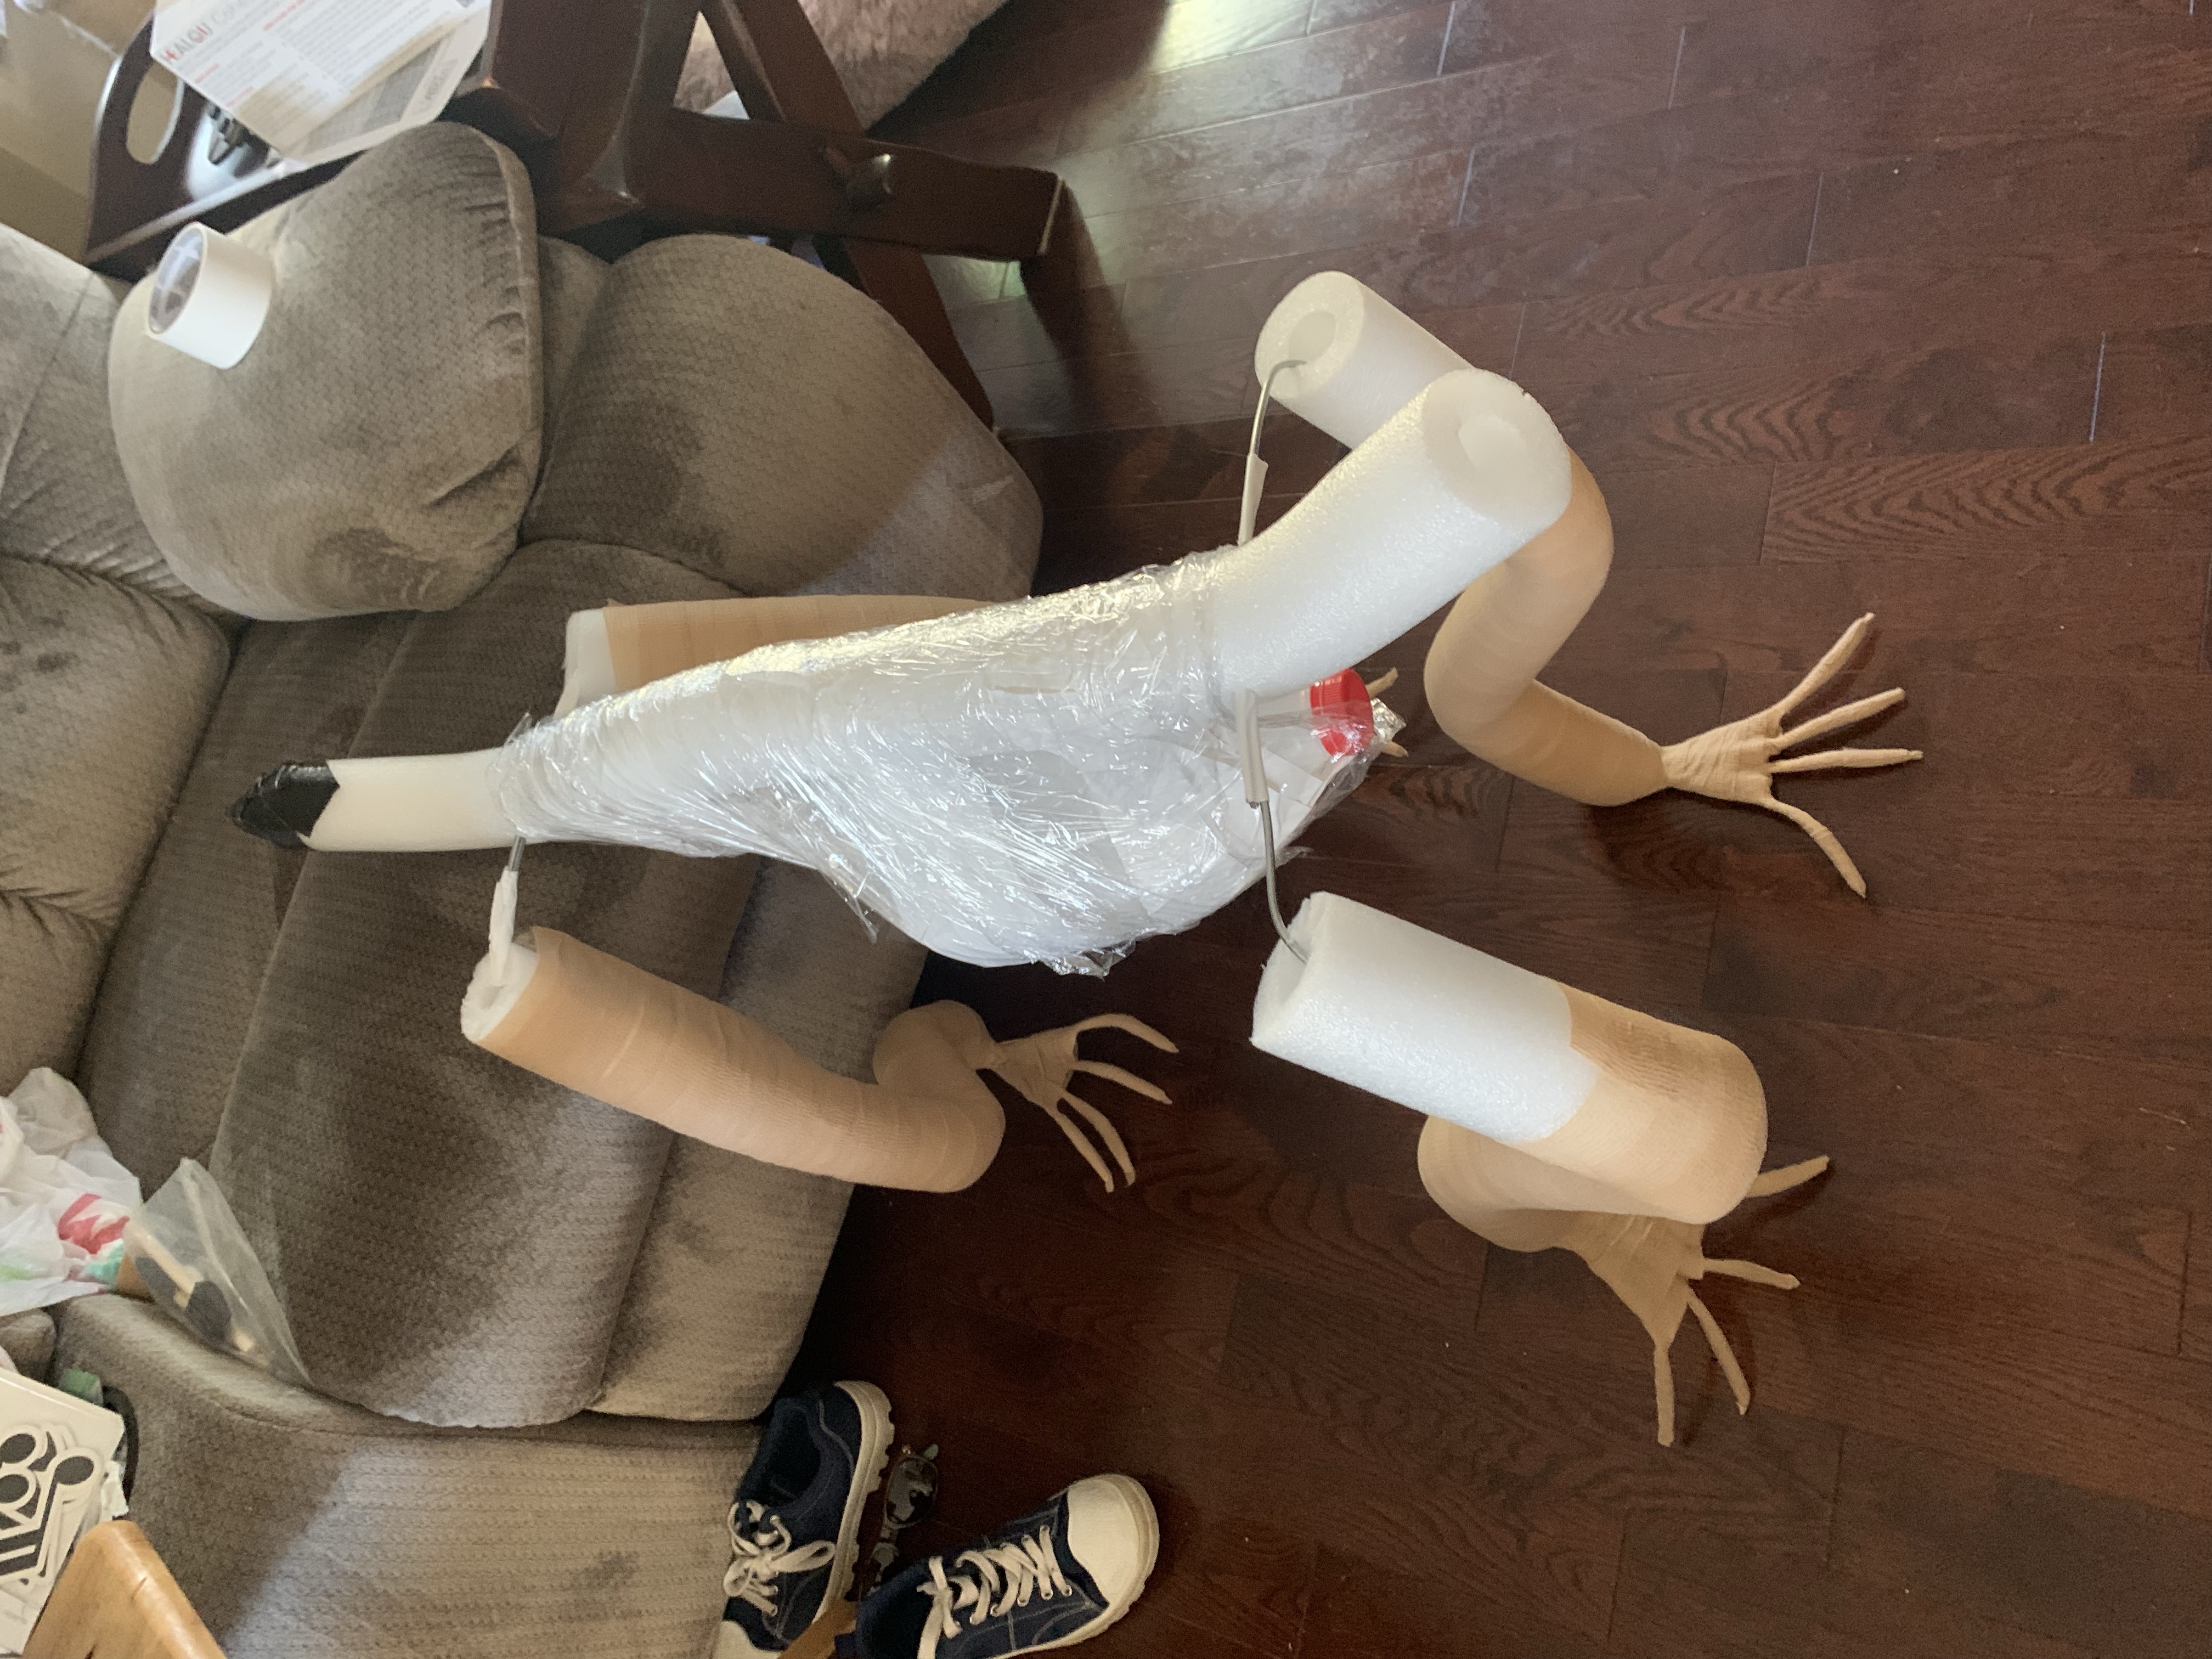
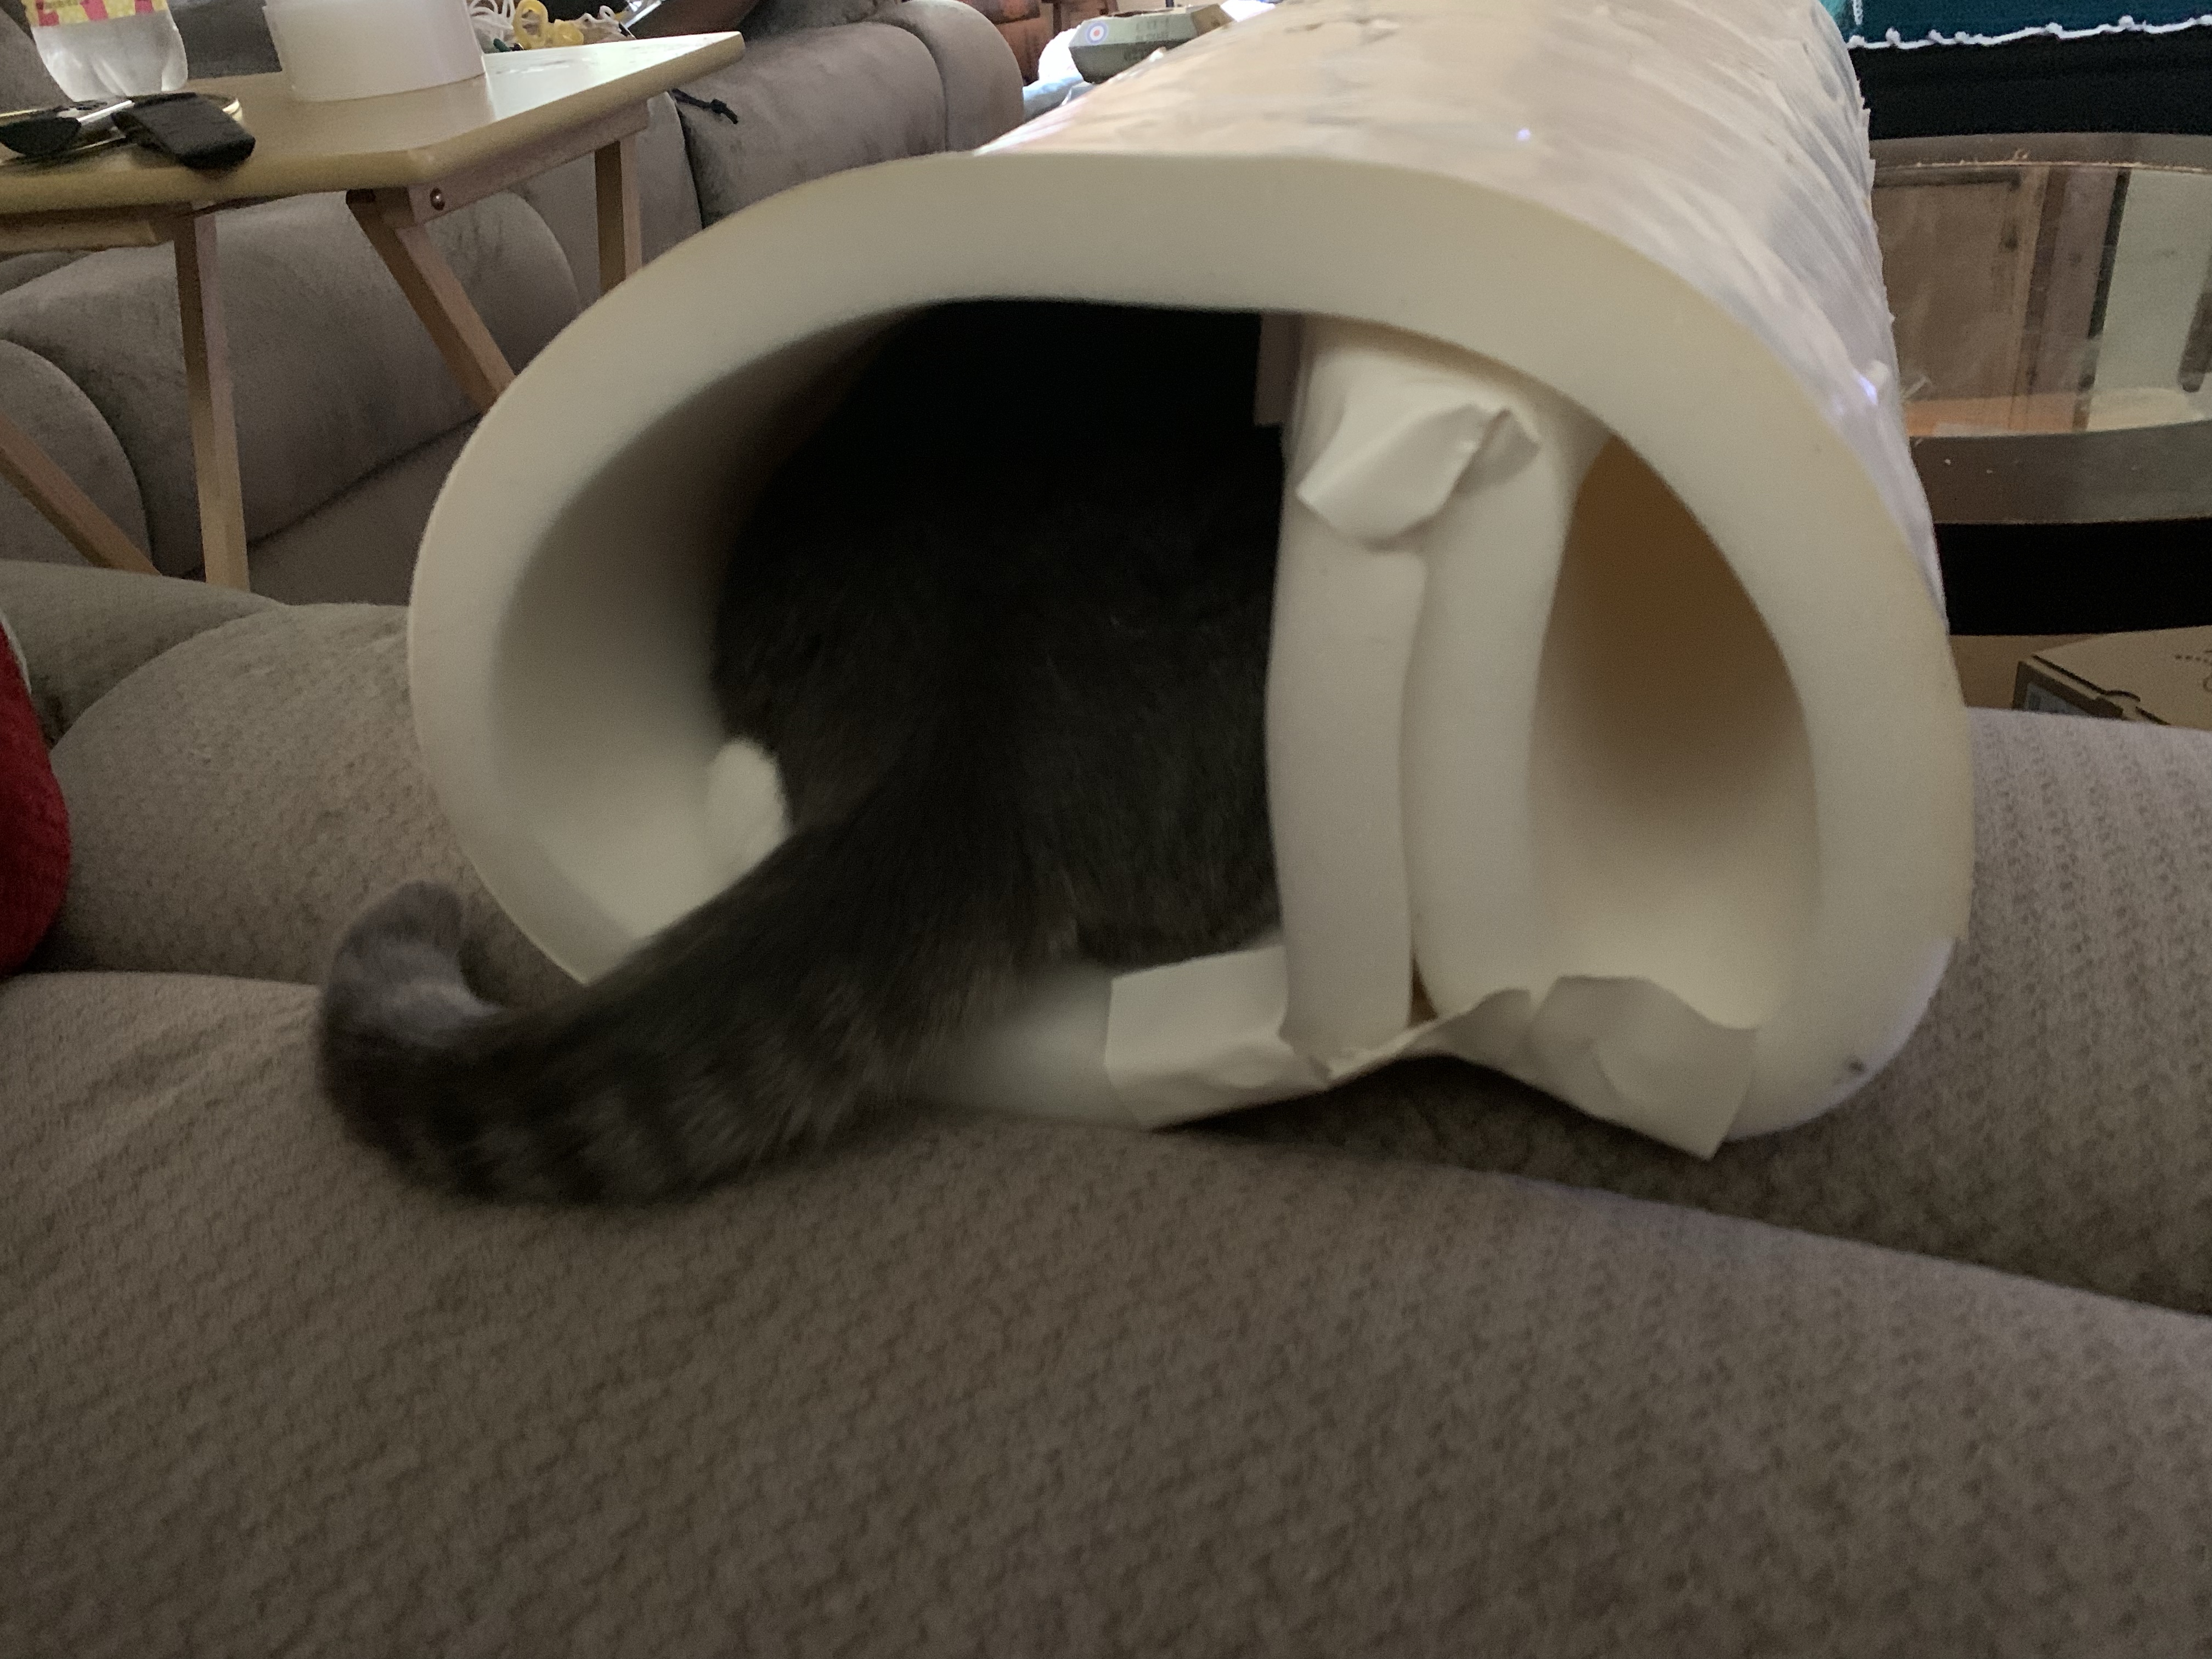
Several members of the group made the demo dogs. one used the Home Depot Wolf skeleton as a base, some used bottles and pool noodles, some molded their heads, some one used a yoga mat. So I had a lot of ideas to work from and I decided to use pool noodles wit heavy wire running through. Then I used some one litter bottles to fill out the thigh muscles and a milk gallon jug to fill out the chest.
I added additional wire for the feet and then I wrapped everything with self sticking bandages. I tried to paint the bandages, but they just soak up the paint. Then I used some spray paint on then, but that didn’t add too much color to him.
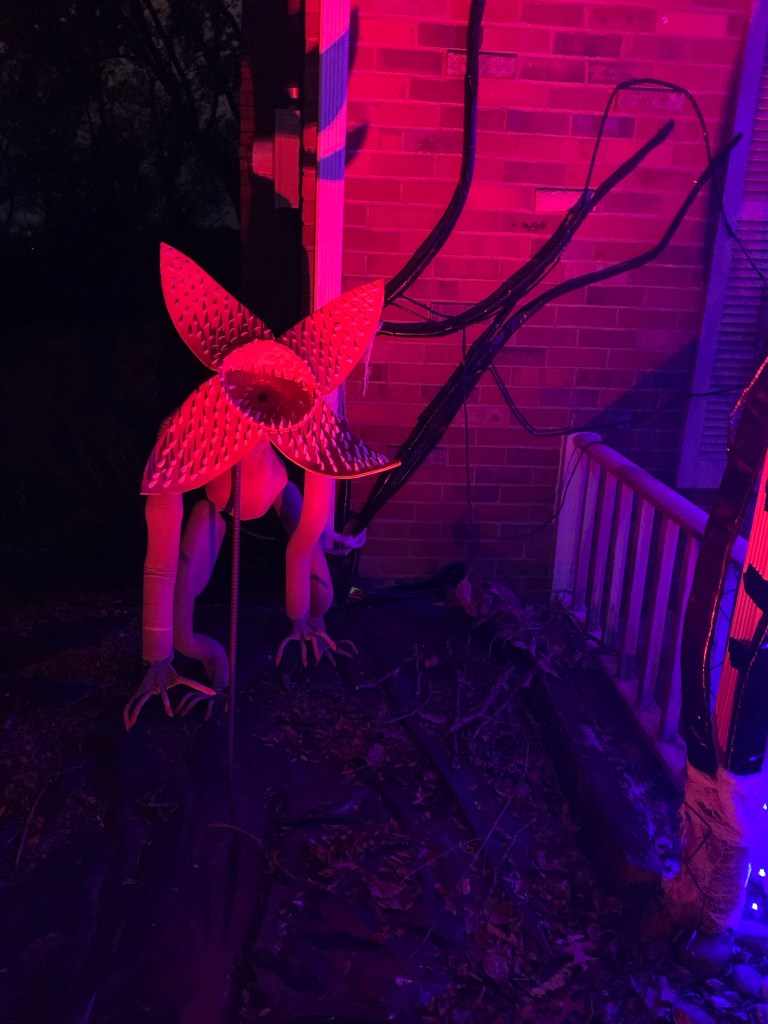
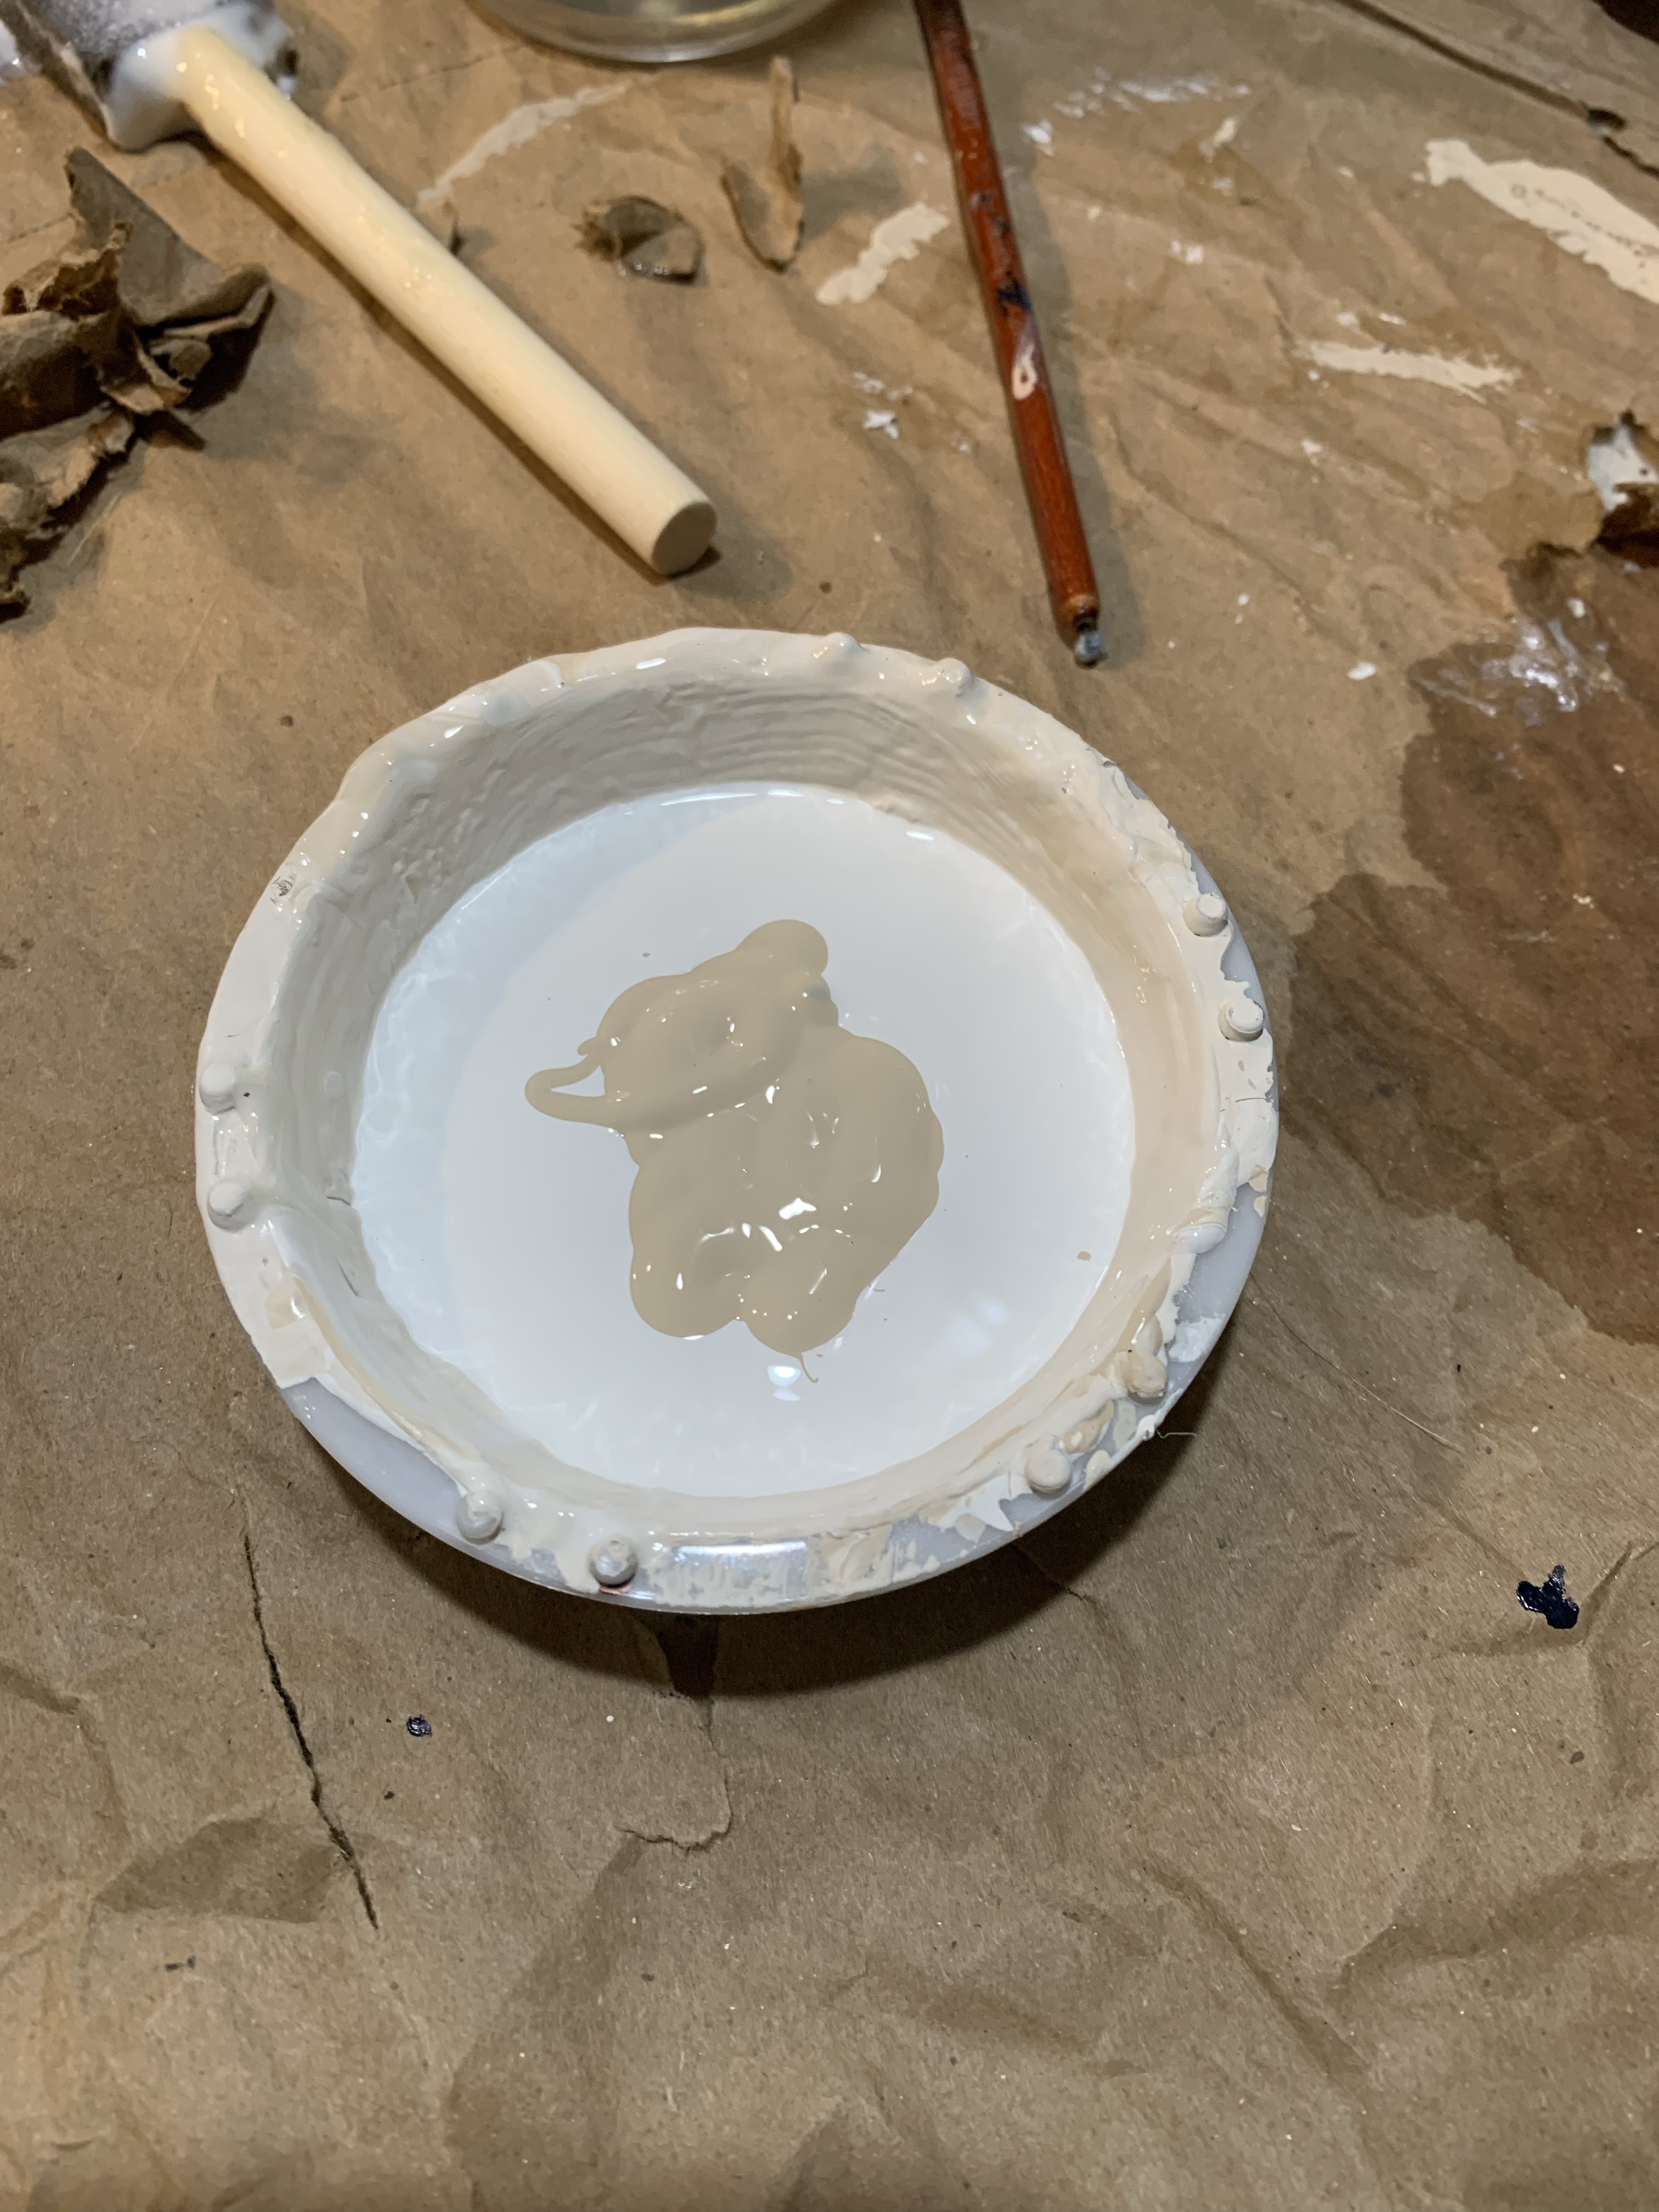
The hardest part was the head. I decided to use foam clay in a bowl to create the inner mouth. Then I measured the bowl on poster board, measured out the circumference for five petals and made a template for the petals on poster board. I made cut out five petals from EVA foam. Once the clay had dried, I pulled it away from the bowl. This was my first time working with foam clay. It’s pretty funky. I think I need a lot more practice, especially if I want to use it for sculpting. Then when I glued the petals to the bowl shape, only 4 fit. I guess the foam had shrunk, so my demo dog only has 4 petals for his head.
I painted the inside of the mouth red, the EVA foam also absorbs the paint, so it took about 4 coats of paint. Then I painted the outside of the head beige to match with the body. The teeth were made from fake nails that were cut into claw shapes. I used these for the claws also. Then it was a matter of hot gluing everything.
So next year I definitively want to improve his head, and maybe build out his body a little more. But he’s still pretty cool and cheaper than buying the wolf skeleton.
Oh, I also made a Chrissy and an Upside Down portal, so more to come.
Well, as I’ve been writing about, my theme for Halloween this year is Stranger Things Season 4 and I’ll be dressing up as Eddie Munson. I started by trying to re-create the Grandfather Clock from the first episode. Then I built Vecna using a lot of foam and tape. And most of my other decorations center around Eddie’s story from Season 4.
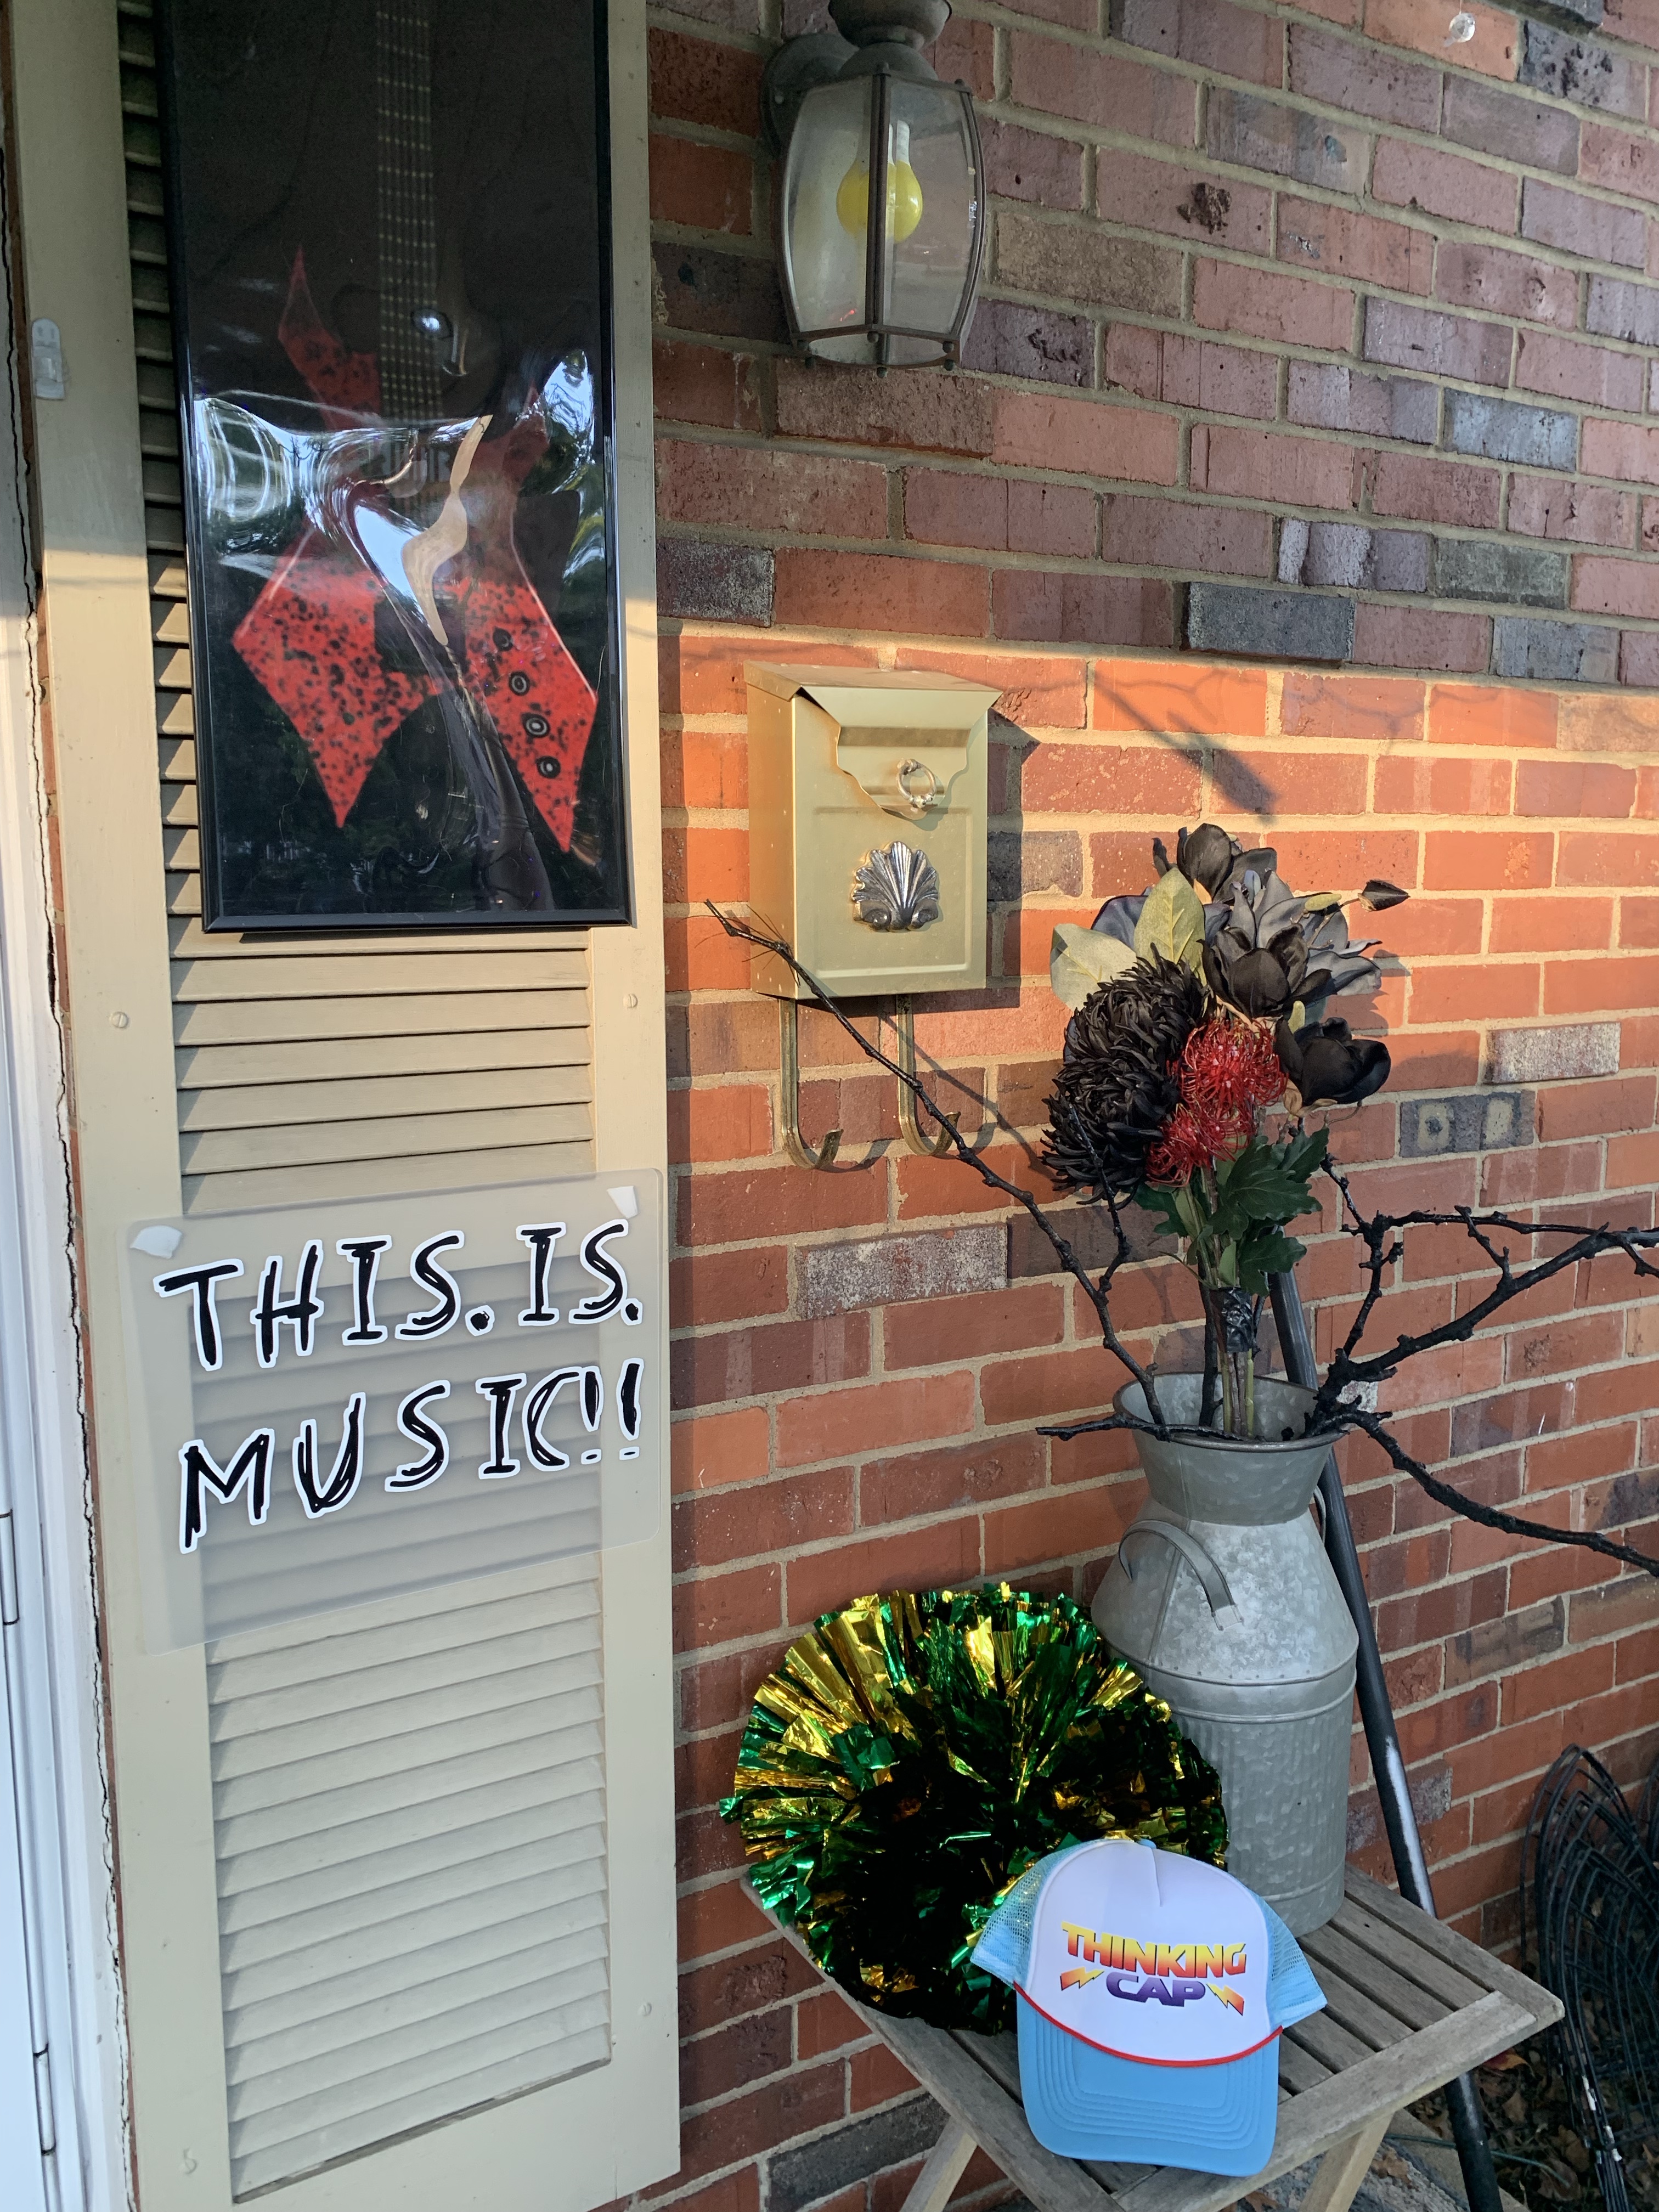
Most of the stuff I used for decorations I found on Amazon, a couple of demobats to hang from the porch, a Stained glass poster to hang on my storm door, bats, pom poms, Tigers patch, and door mat. I also found Dusty’s hat, but that link doesn’t work anymore. I’m surprised I couldn’t find more.
A hung the grandfather clock on our tree and made a Chrissy sign with a pom pom and Tigers patch. A blue spot light shines on it at night.
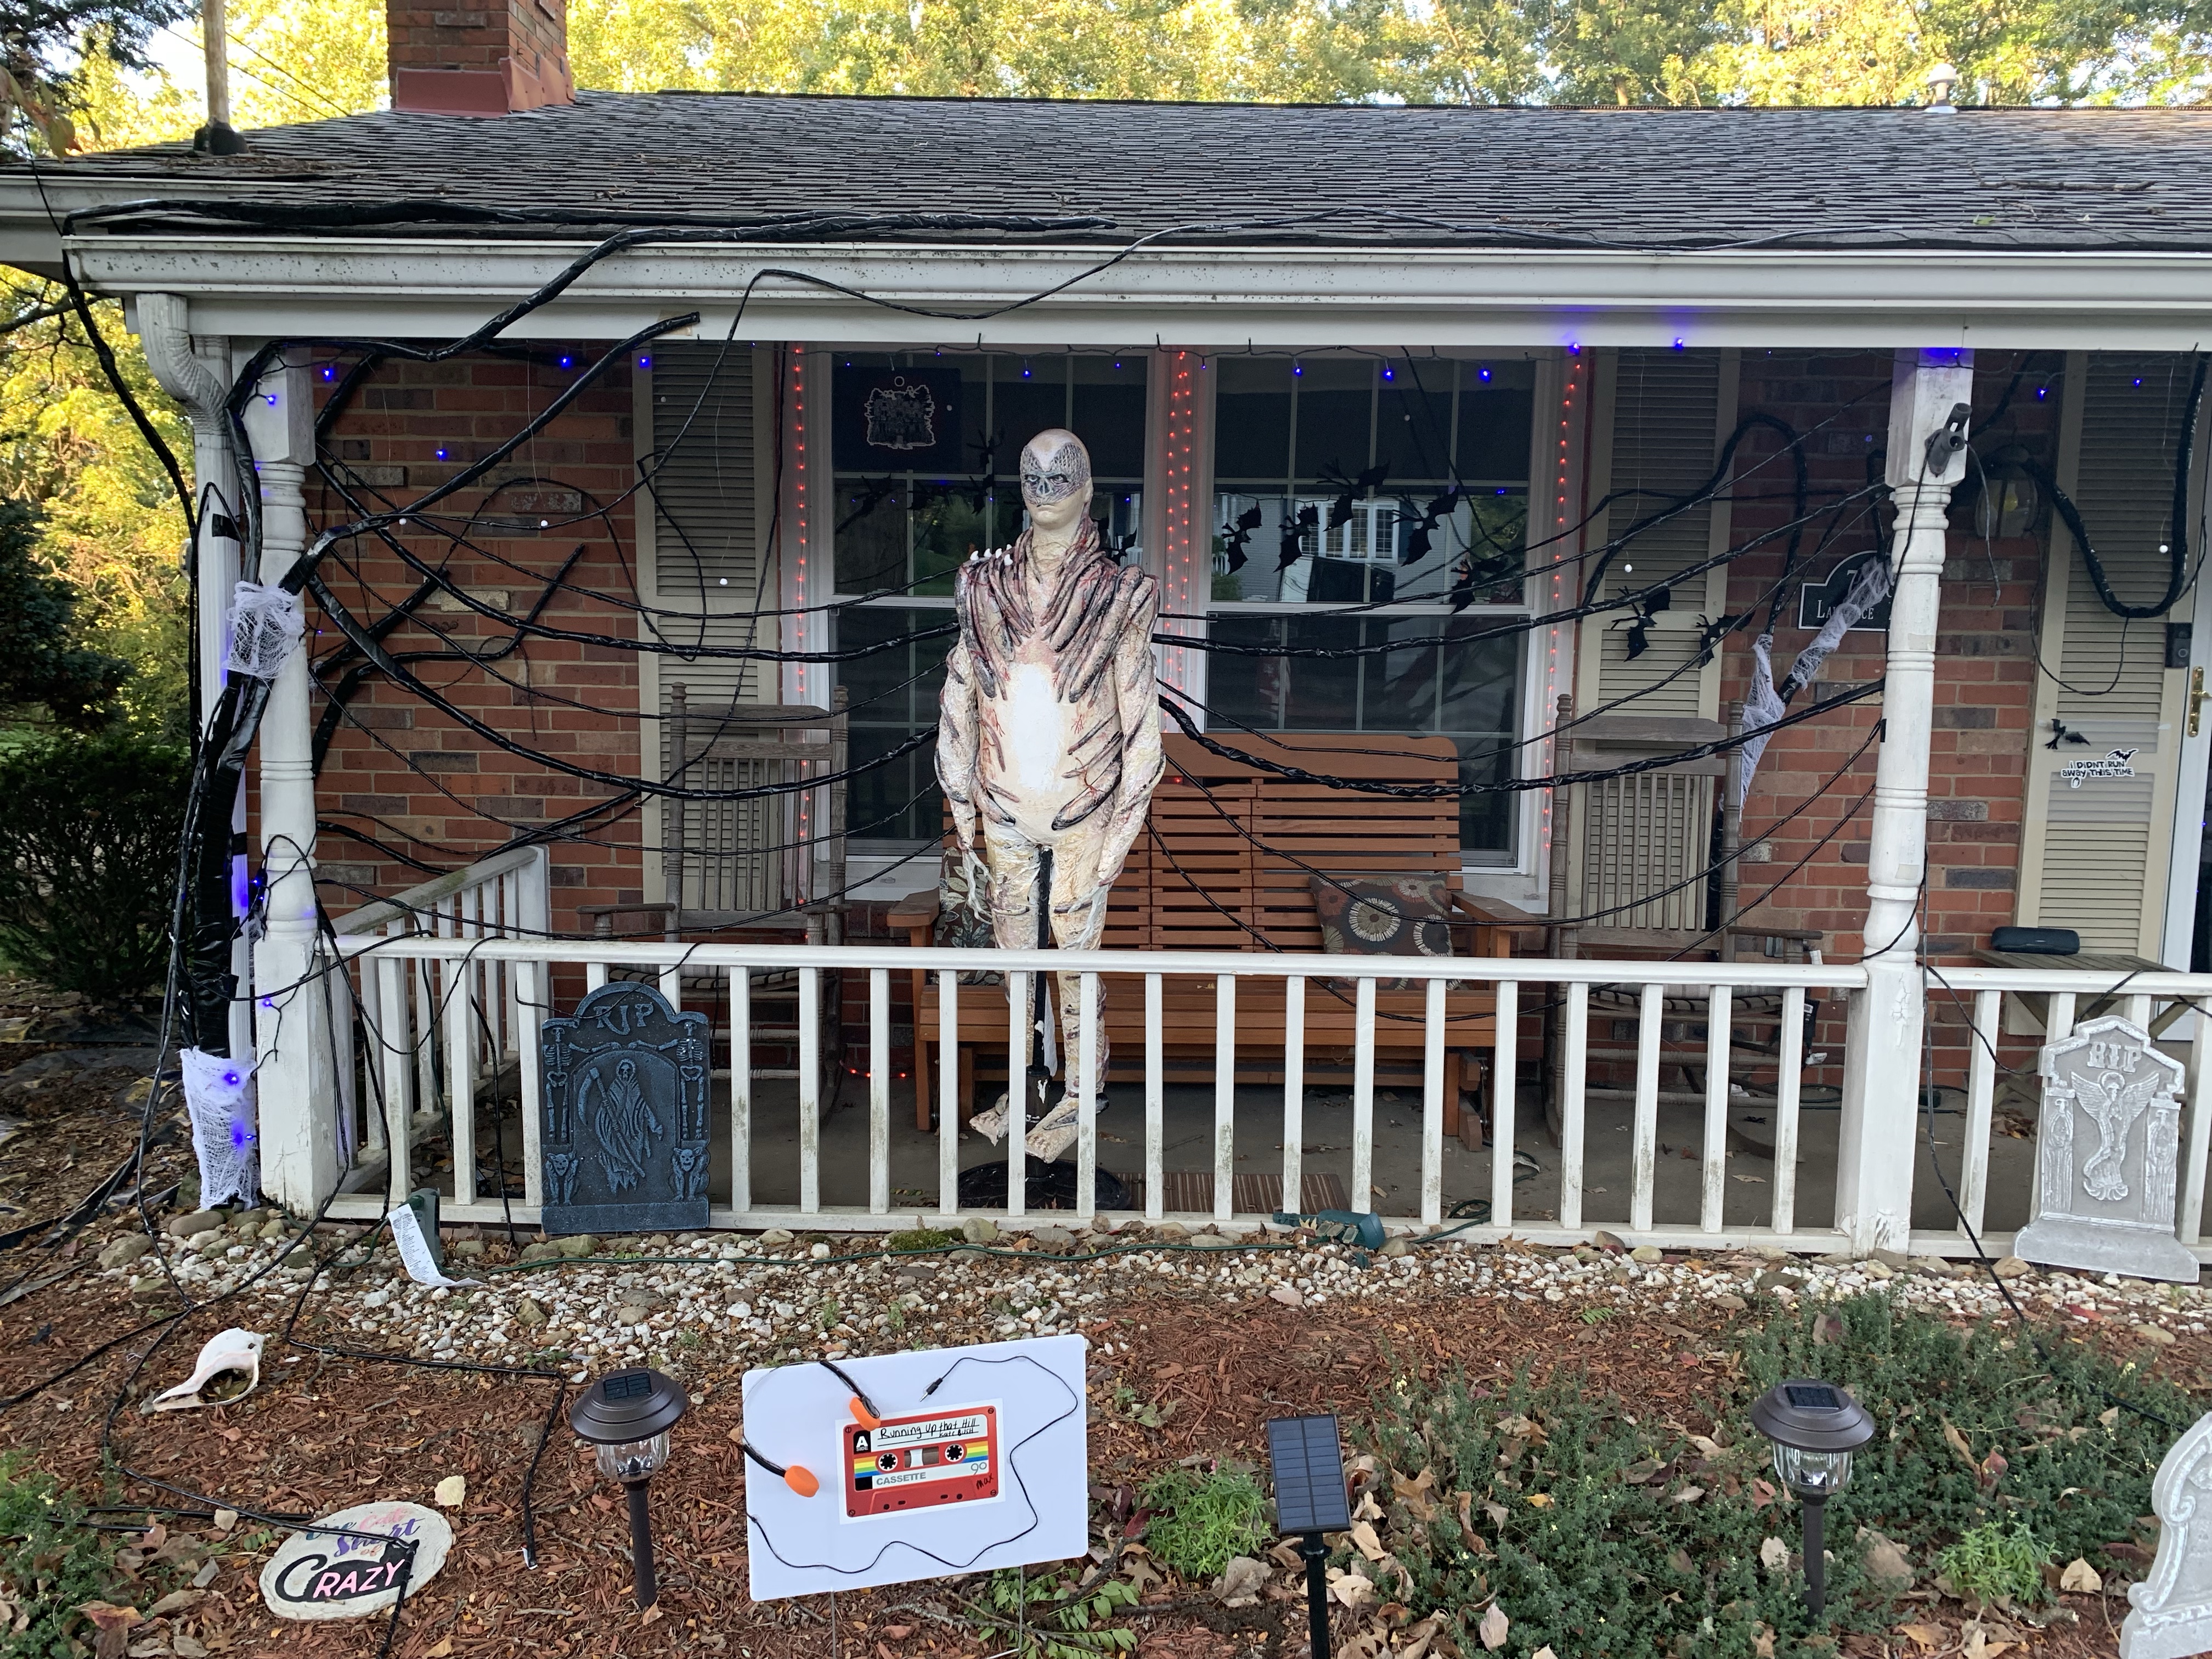
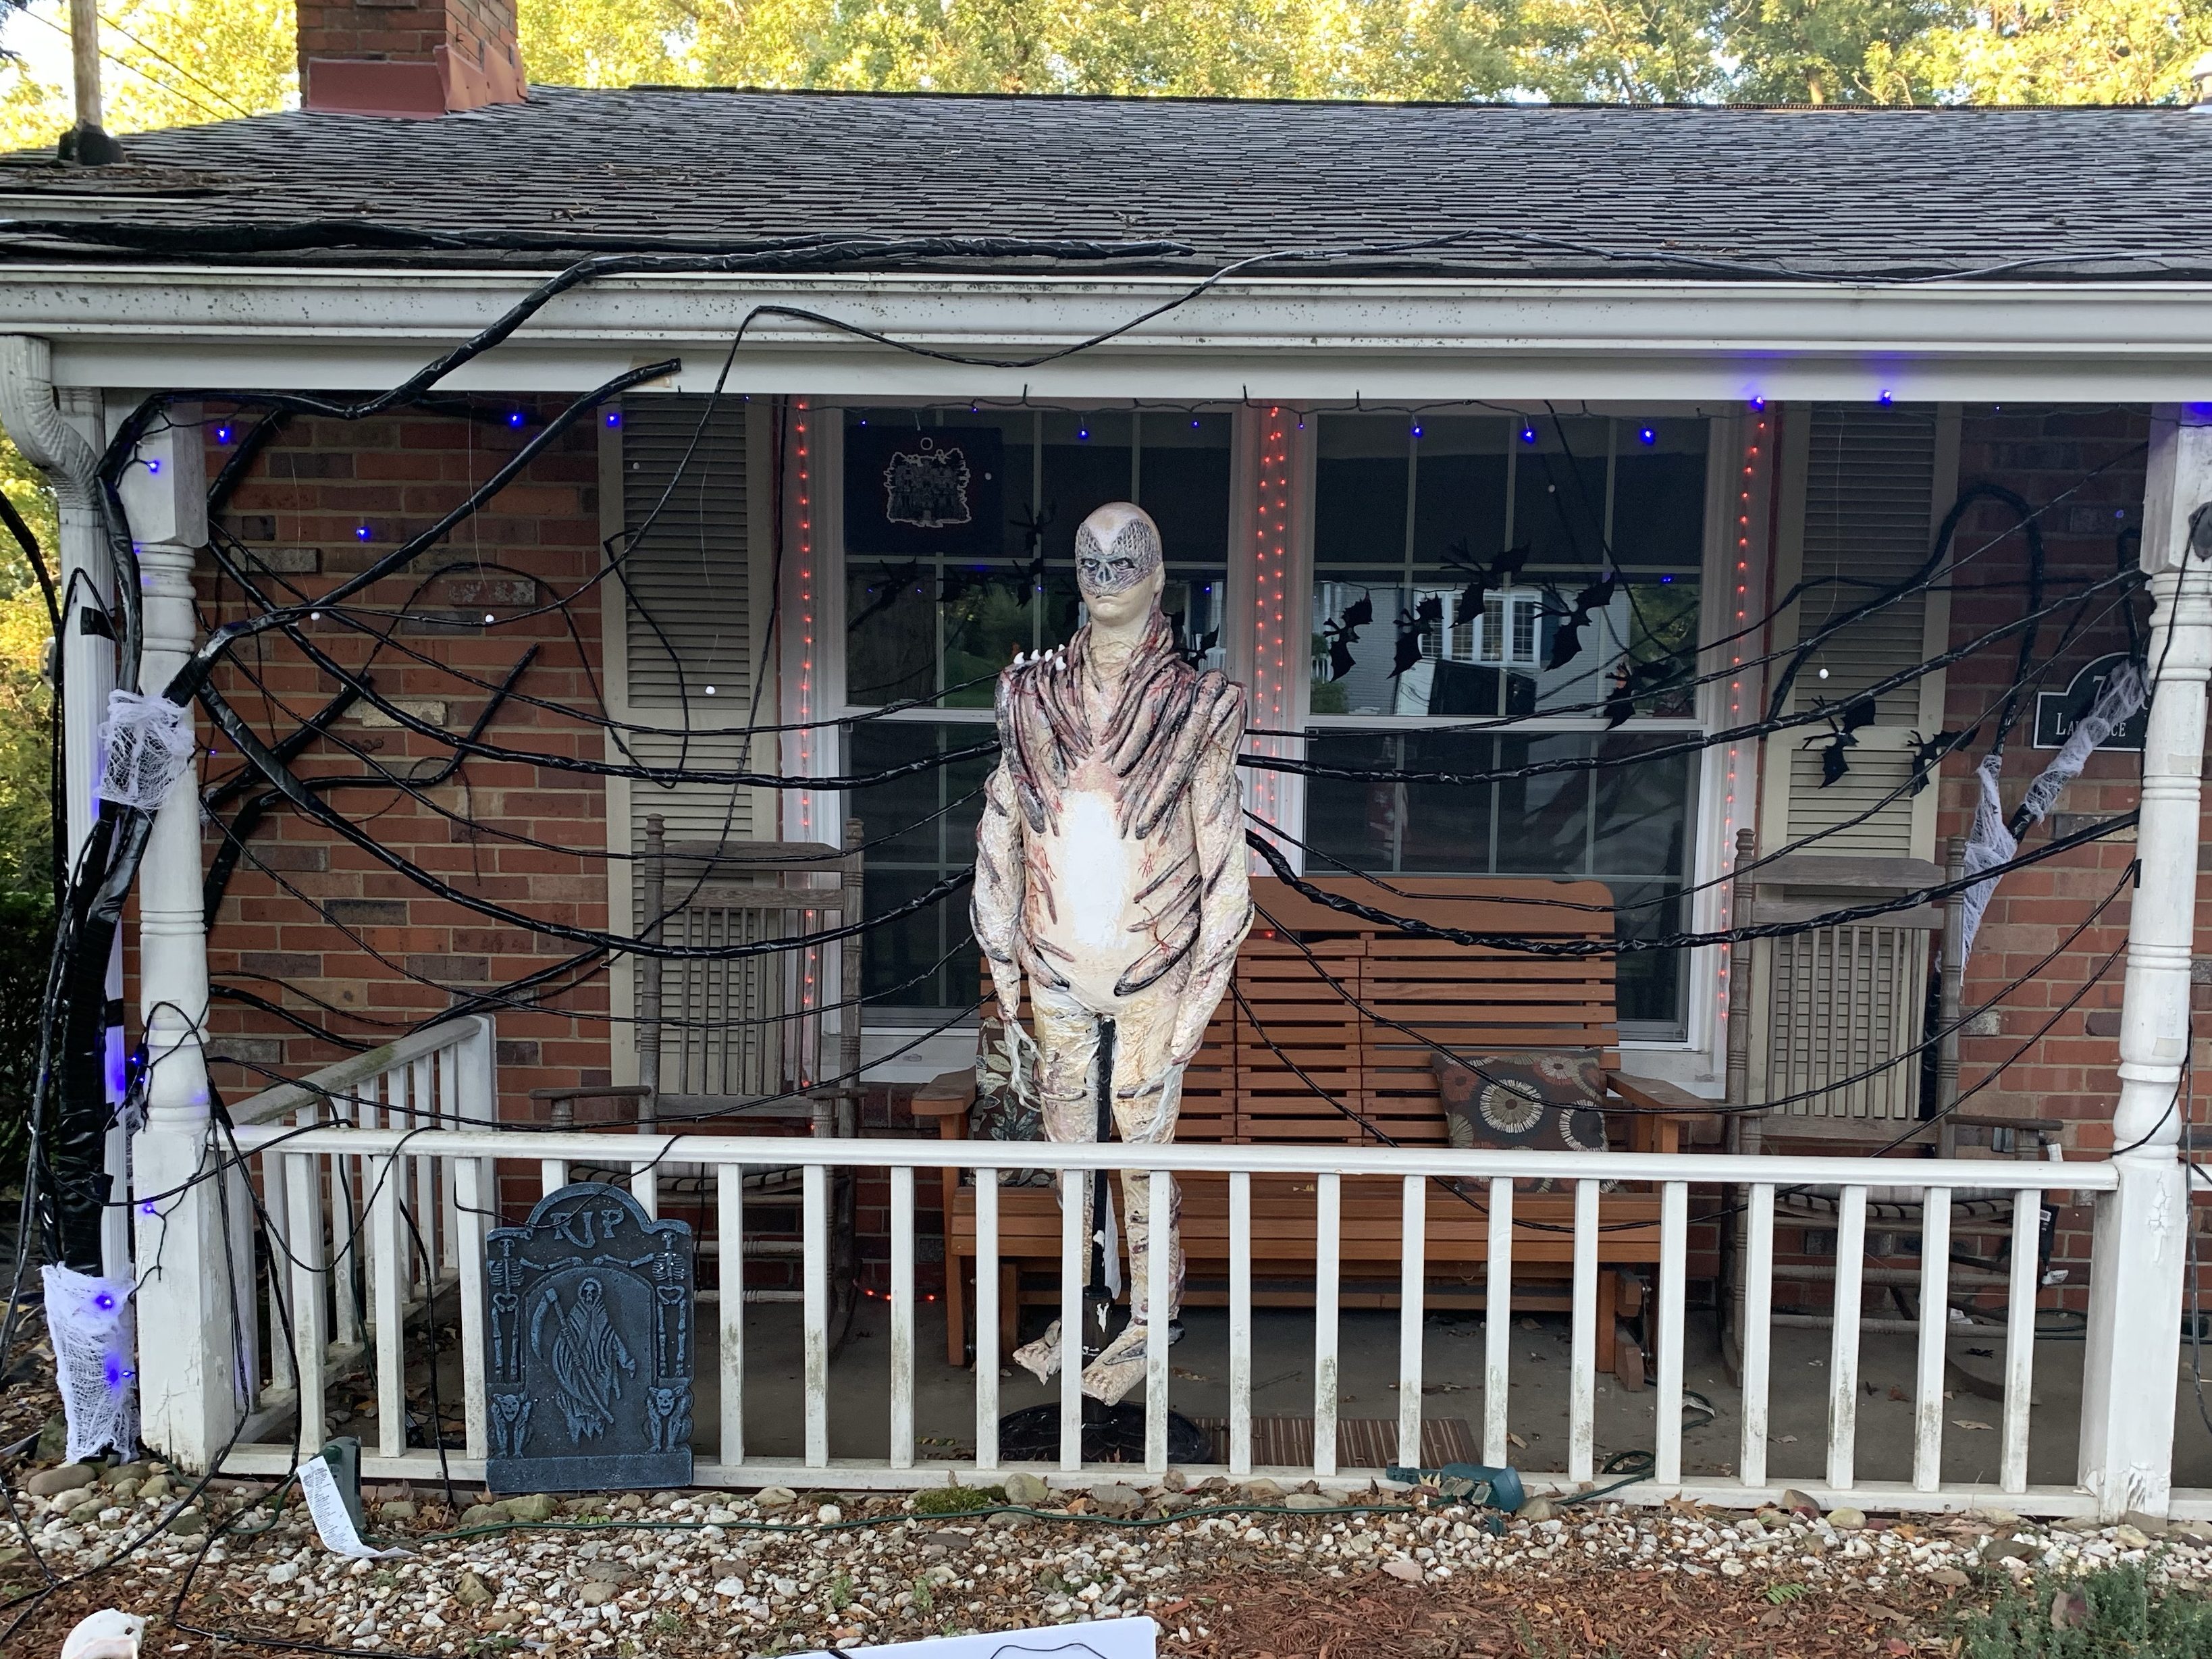
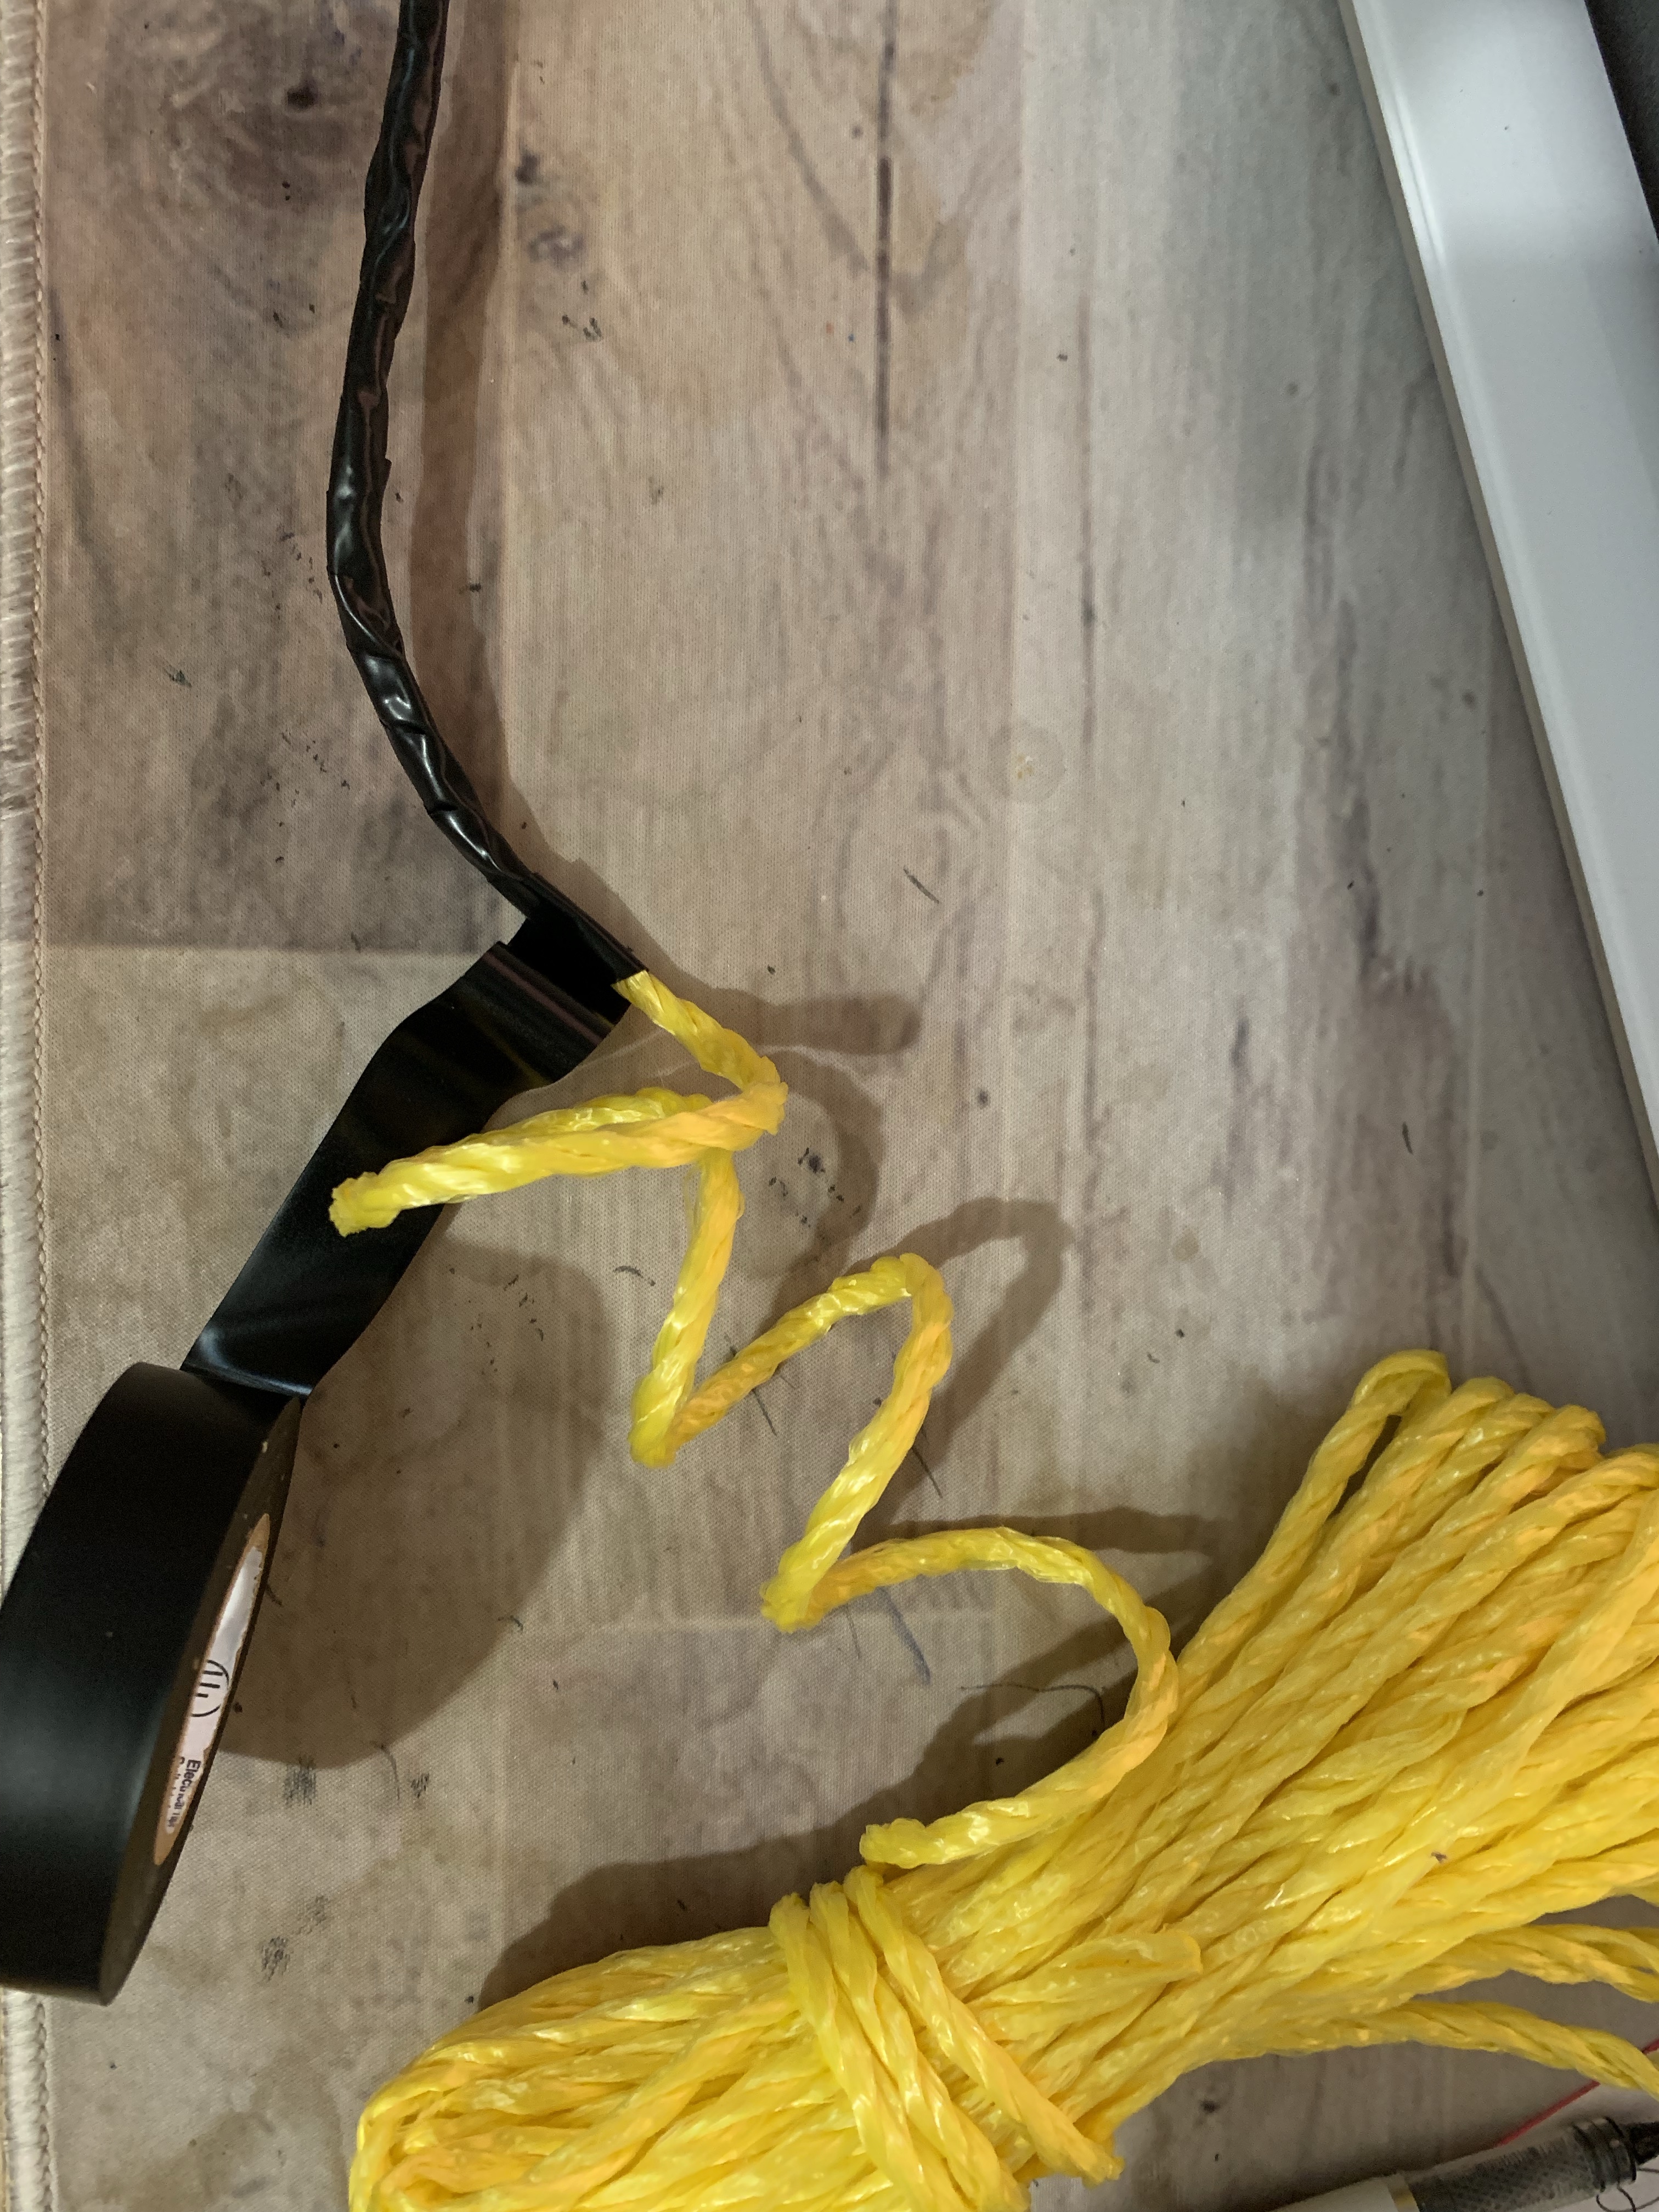
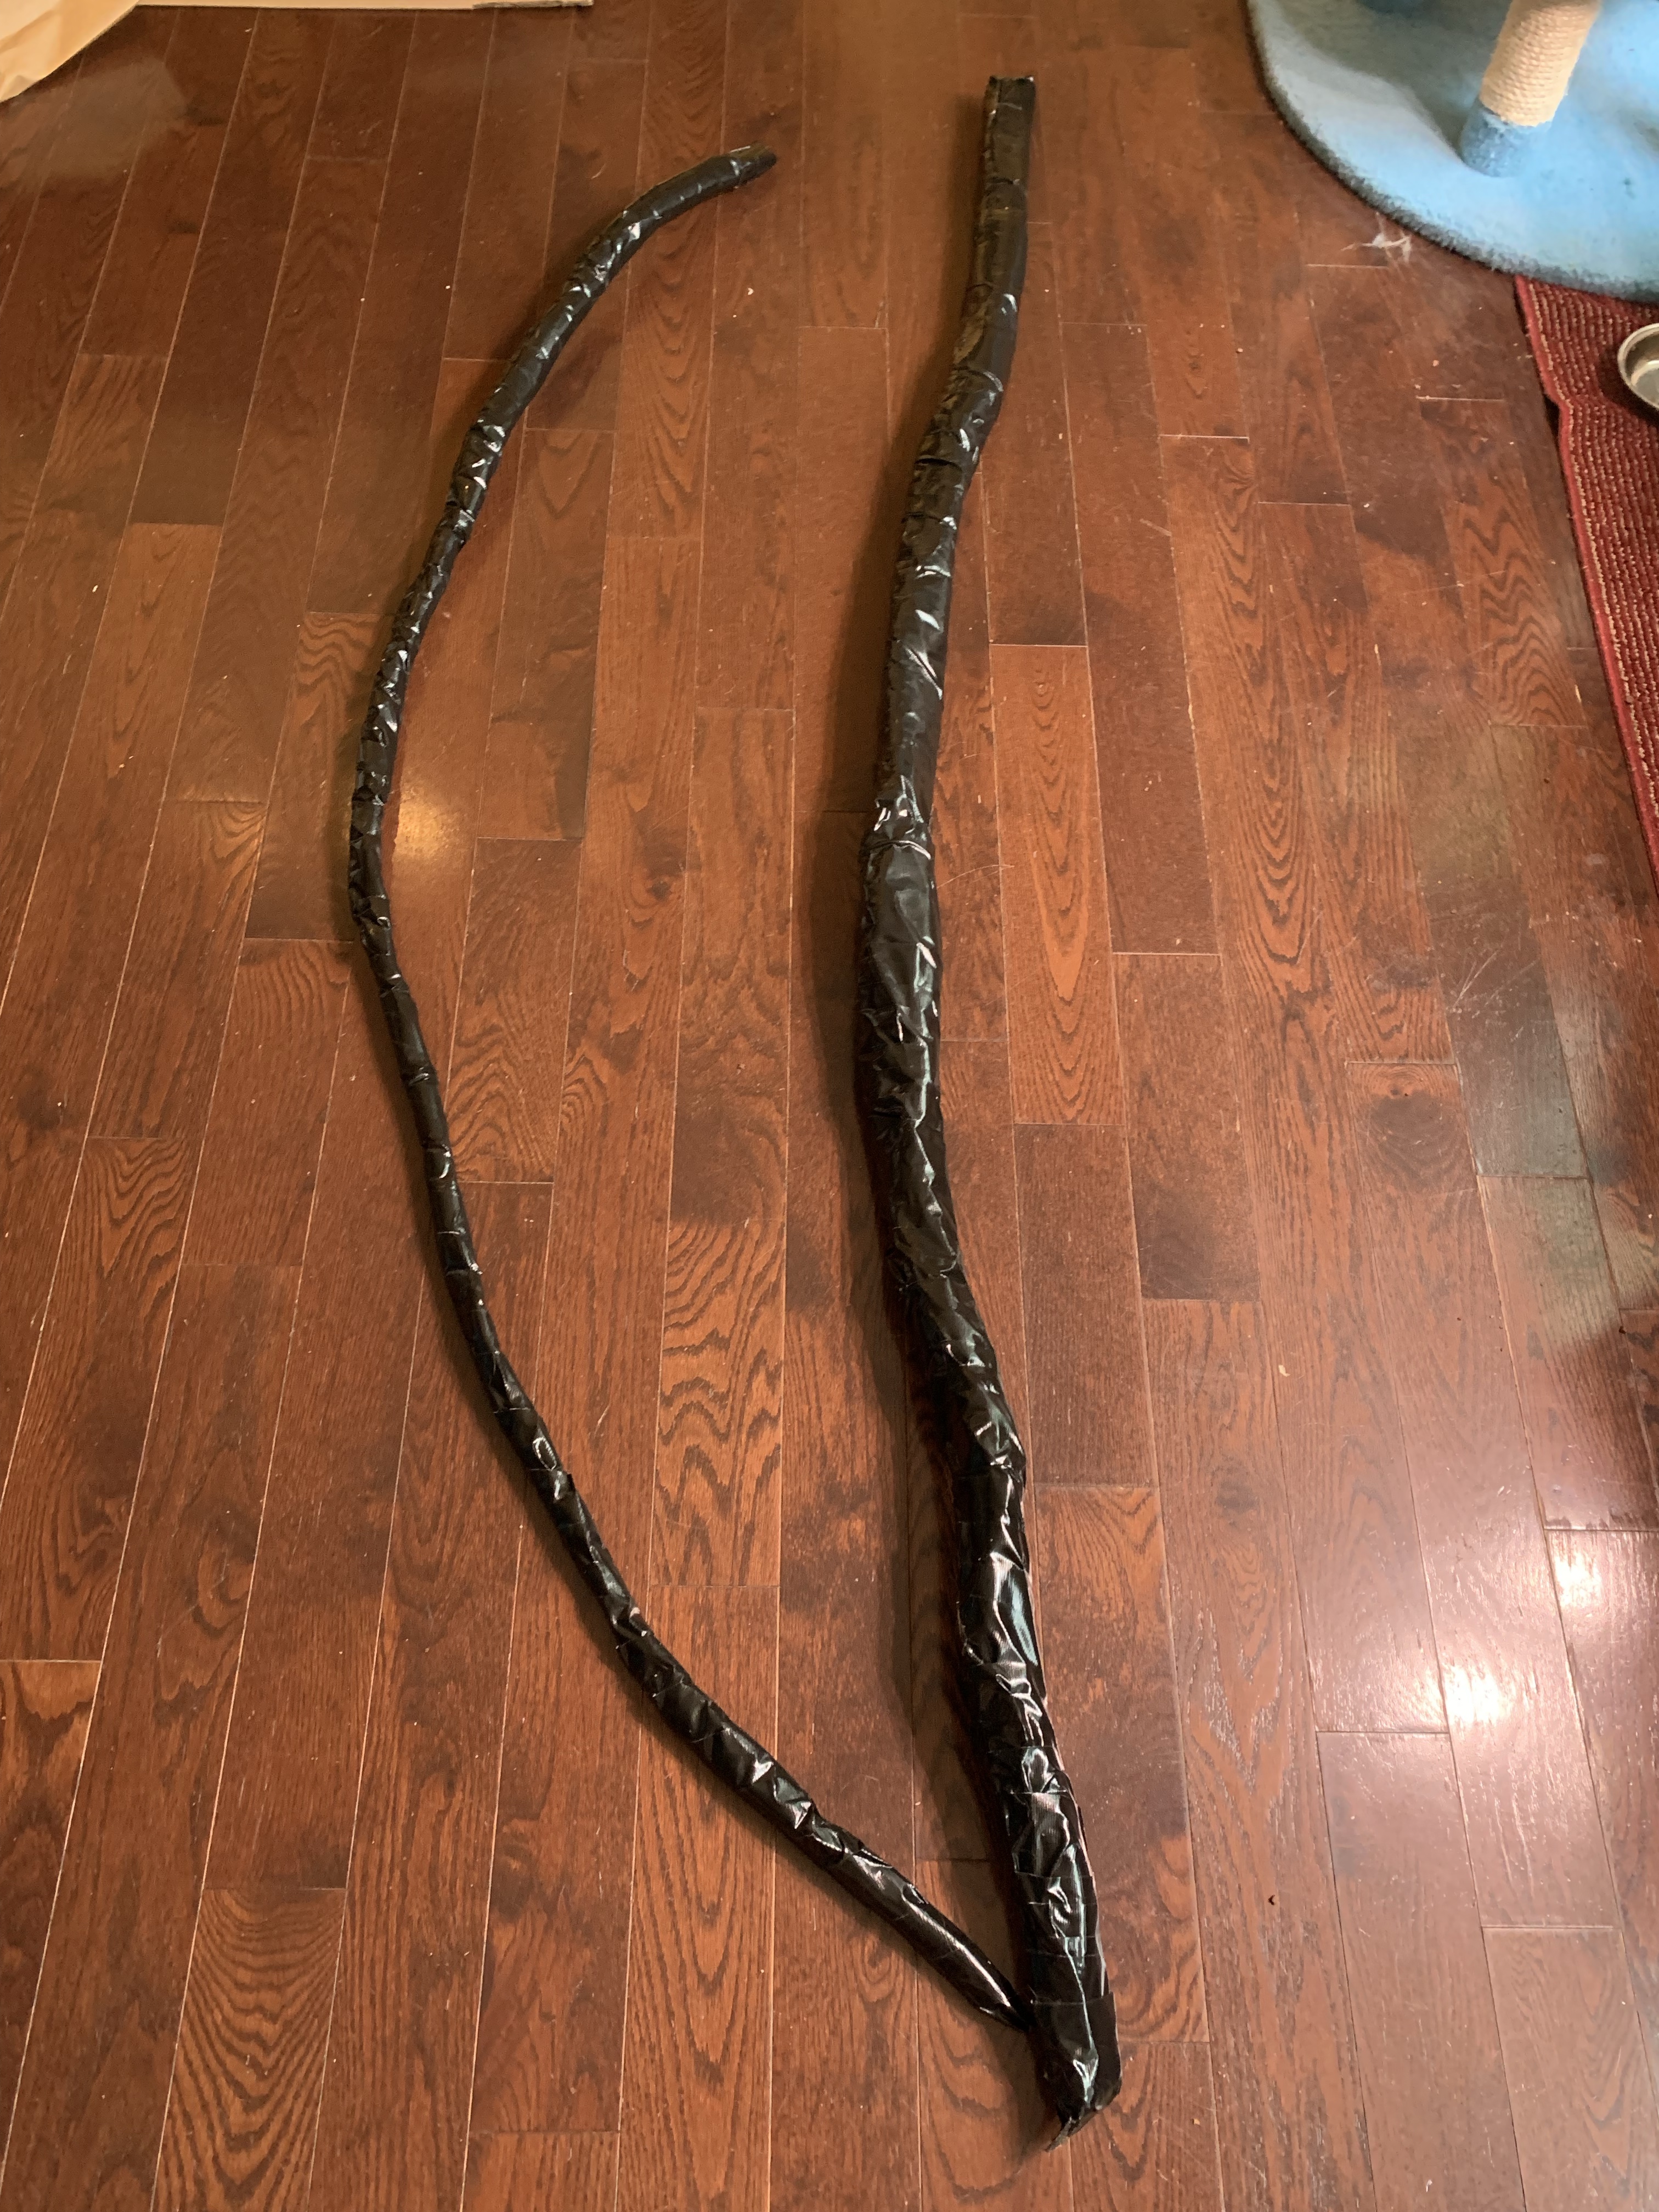
I put Vecna on the front porch and used my vines to attach him to the porch posts. I also added vines to the house in several locations. My vines were several sizes because I used foam sliced in strips, for the thicker vines, and clothesline and dollar store clothesline for the smaller vines. They were wrapped in black duct tape and/or electrical tape. I also had some white spooky cloth that I wrapped around the vines in some locations.
Part of me wants to create a ton more vines to cover the house. And the other part of me say, just let it go.
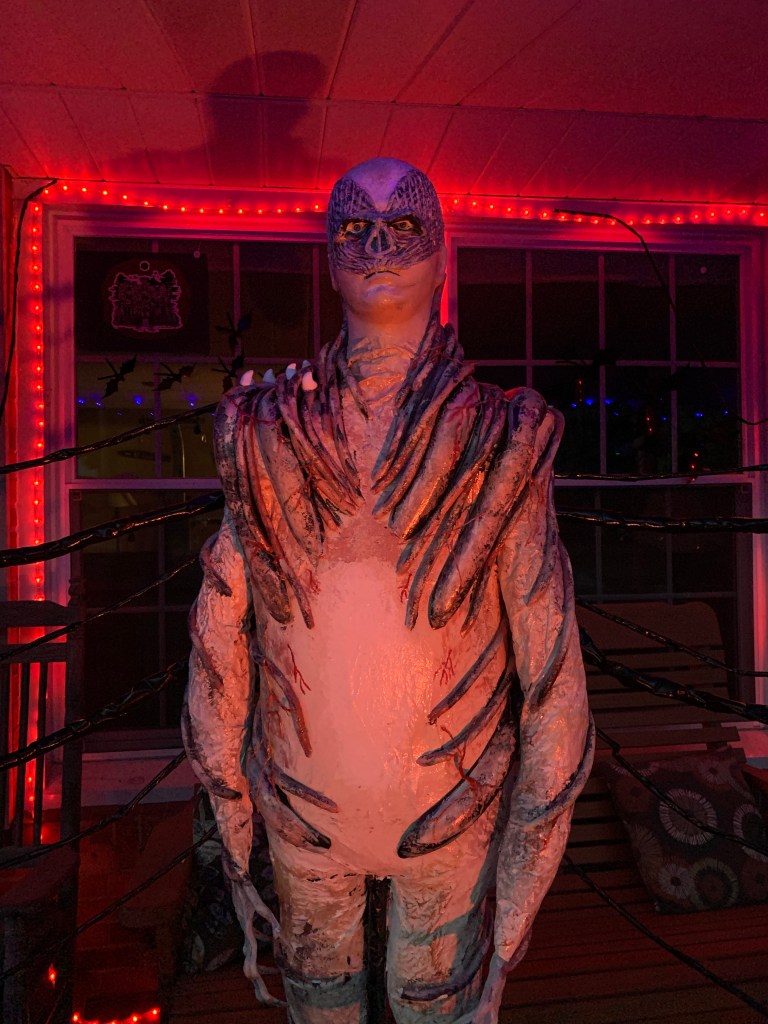
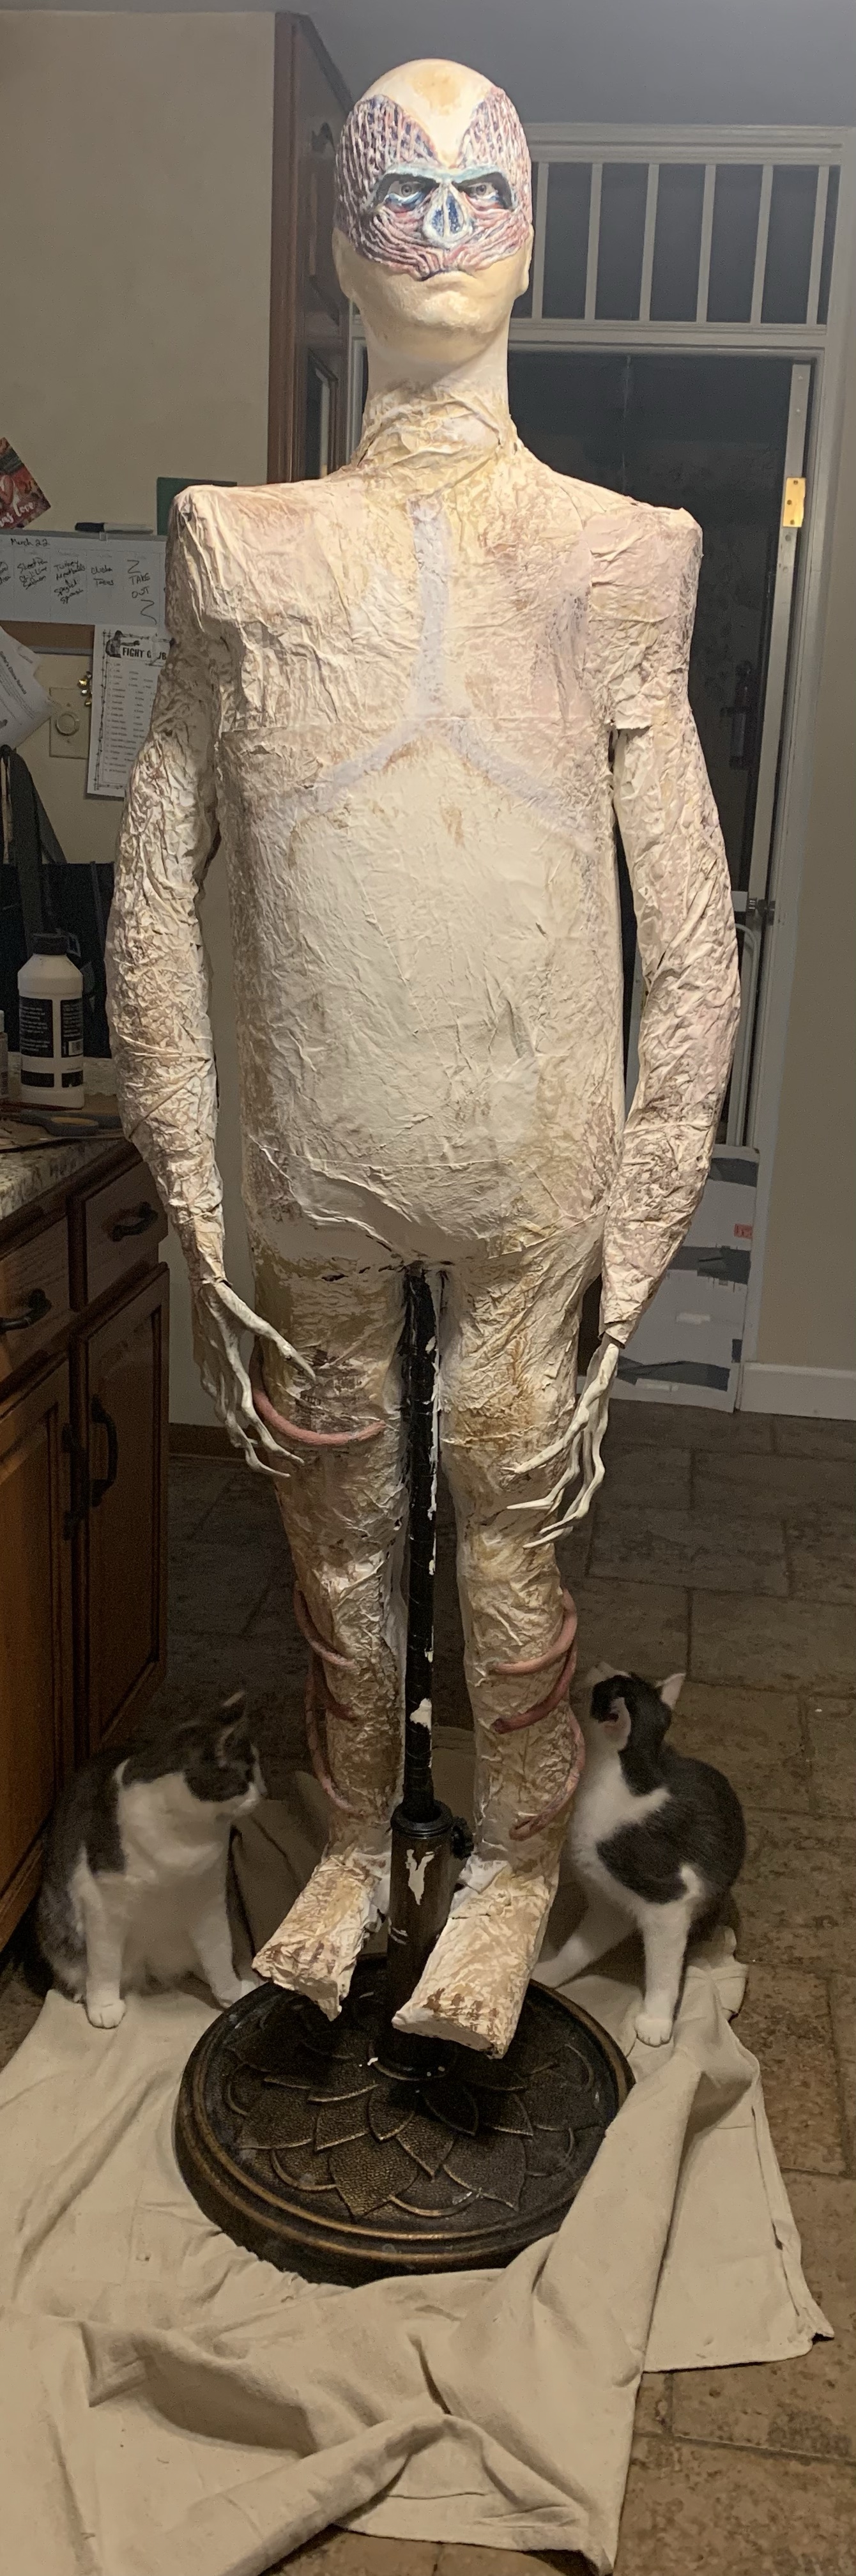
My second prop for Halloween this year was Vecna. I wanted a life sized Vecna for my decorations, but I couldn’t find anything, so I made it.
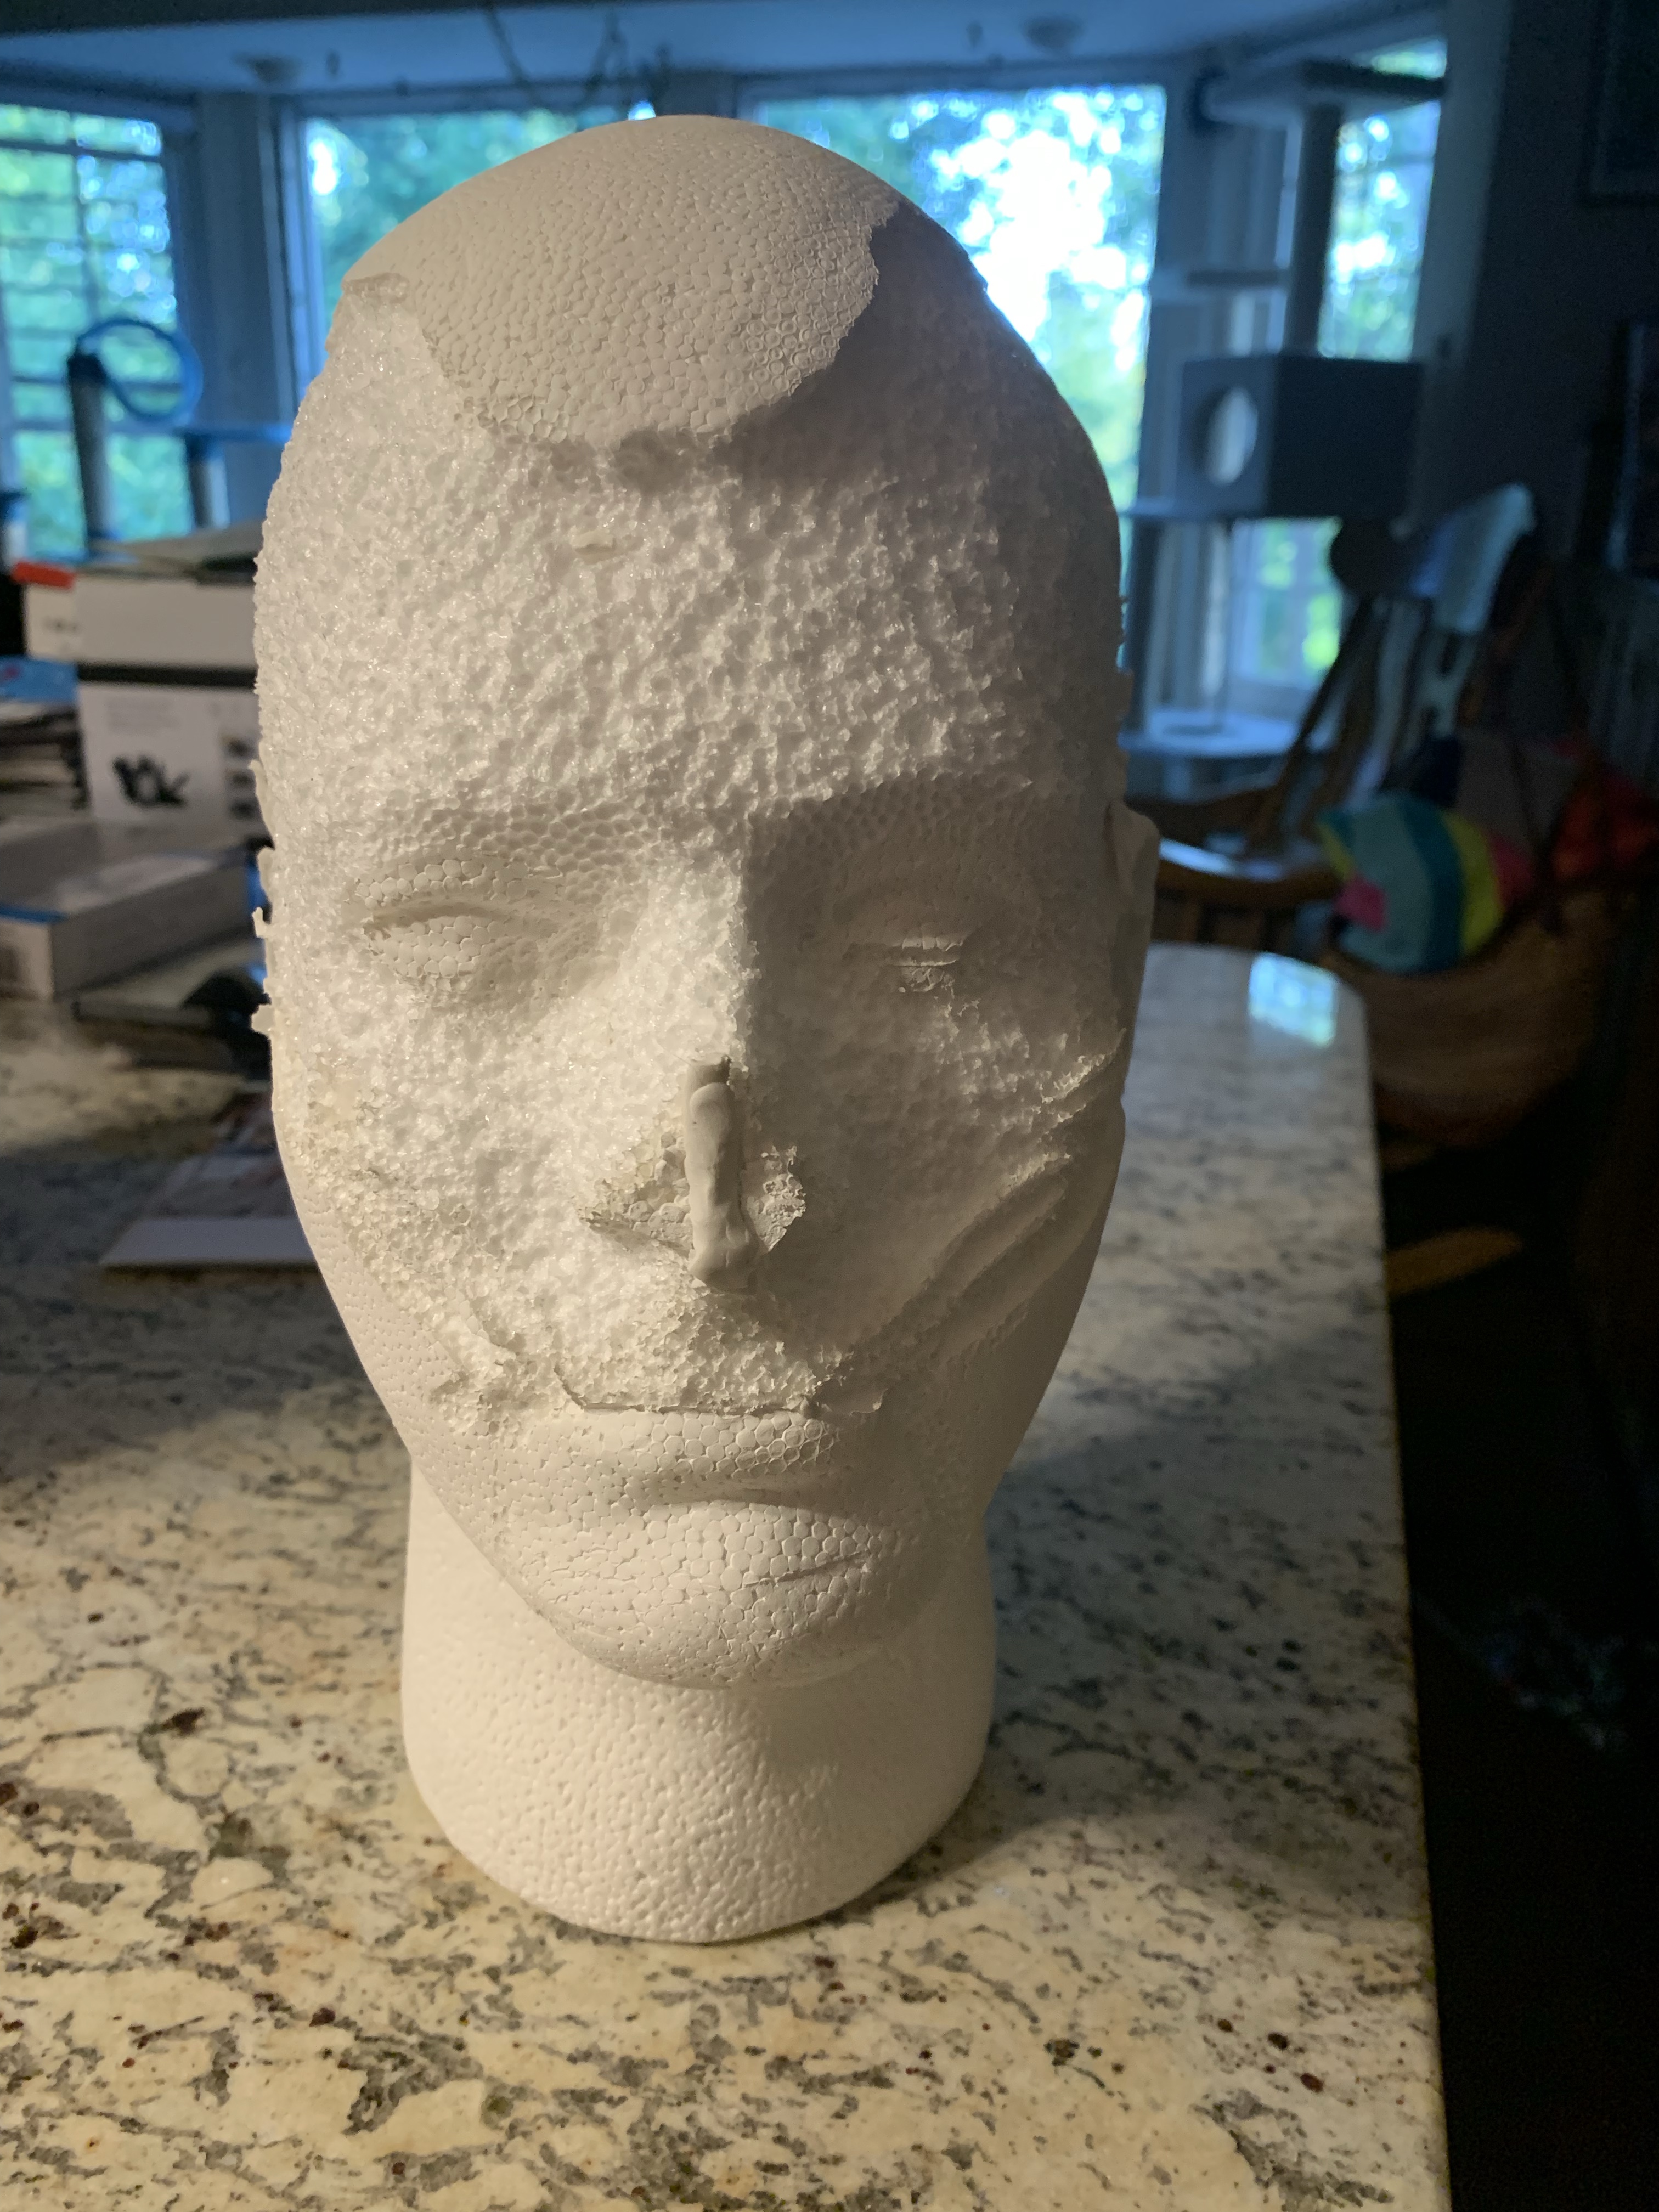
I started with a Styrofoam head, cut off the nose and used modeling clay to add the embellishments to his face. I also learned a lesson about Styrofoam. I already knew not to spray-paint Styrofoam. Now I learned not to add modeling clay directly to the Styrofoam. It will eat away at the Styrofoam as well and cause it to sink away, until eventually it just falls off and leaves the eaten away Styrofoam. In this particular case, he kind of reminded me of Vison from the Avengers.
So after my first failed attempt, I decided to try again, but this time I made sure that I primed the Styrofoam a few times first. This time the clay stayed on and I was able to finish his head with paint and some doll eyes.
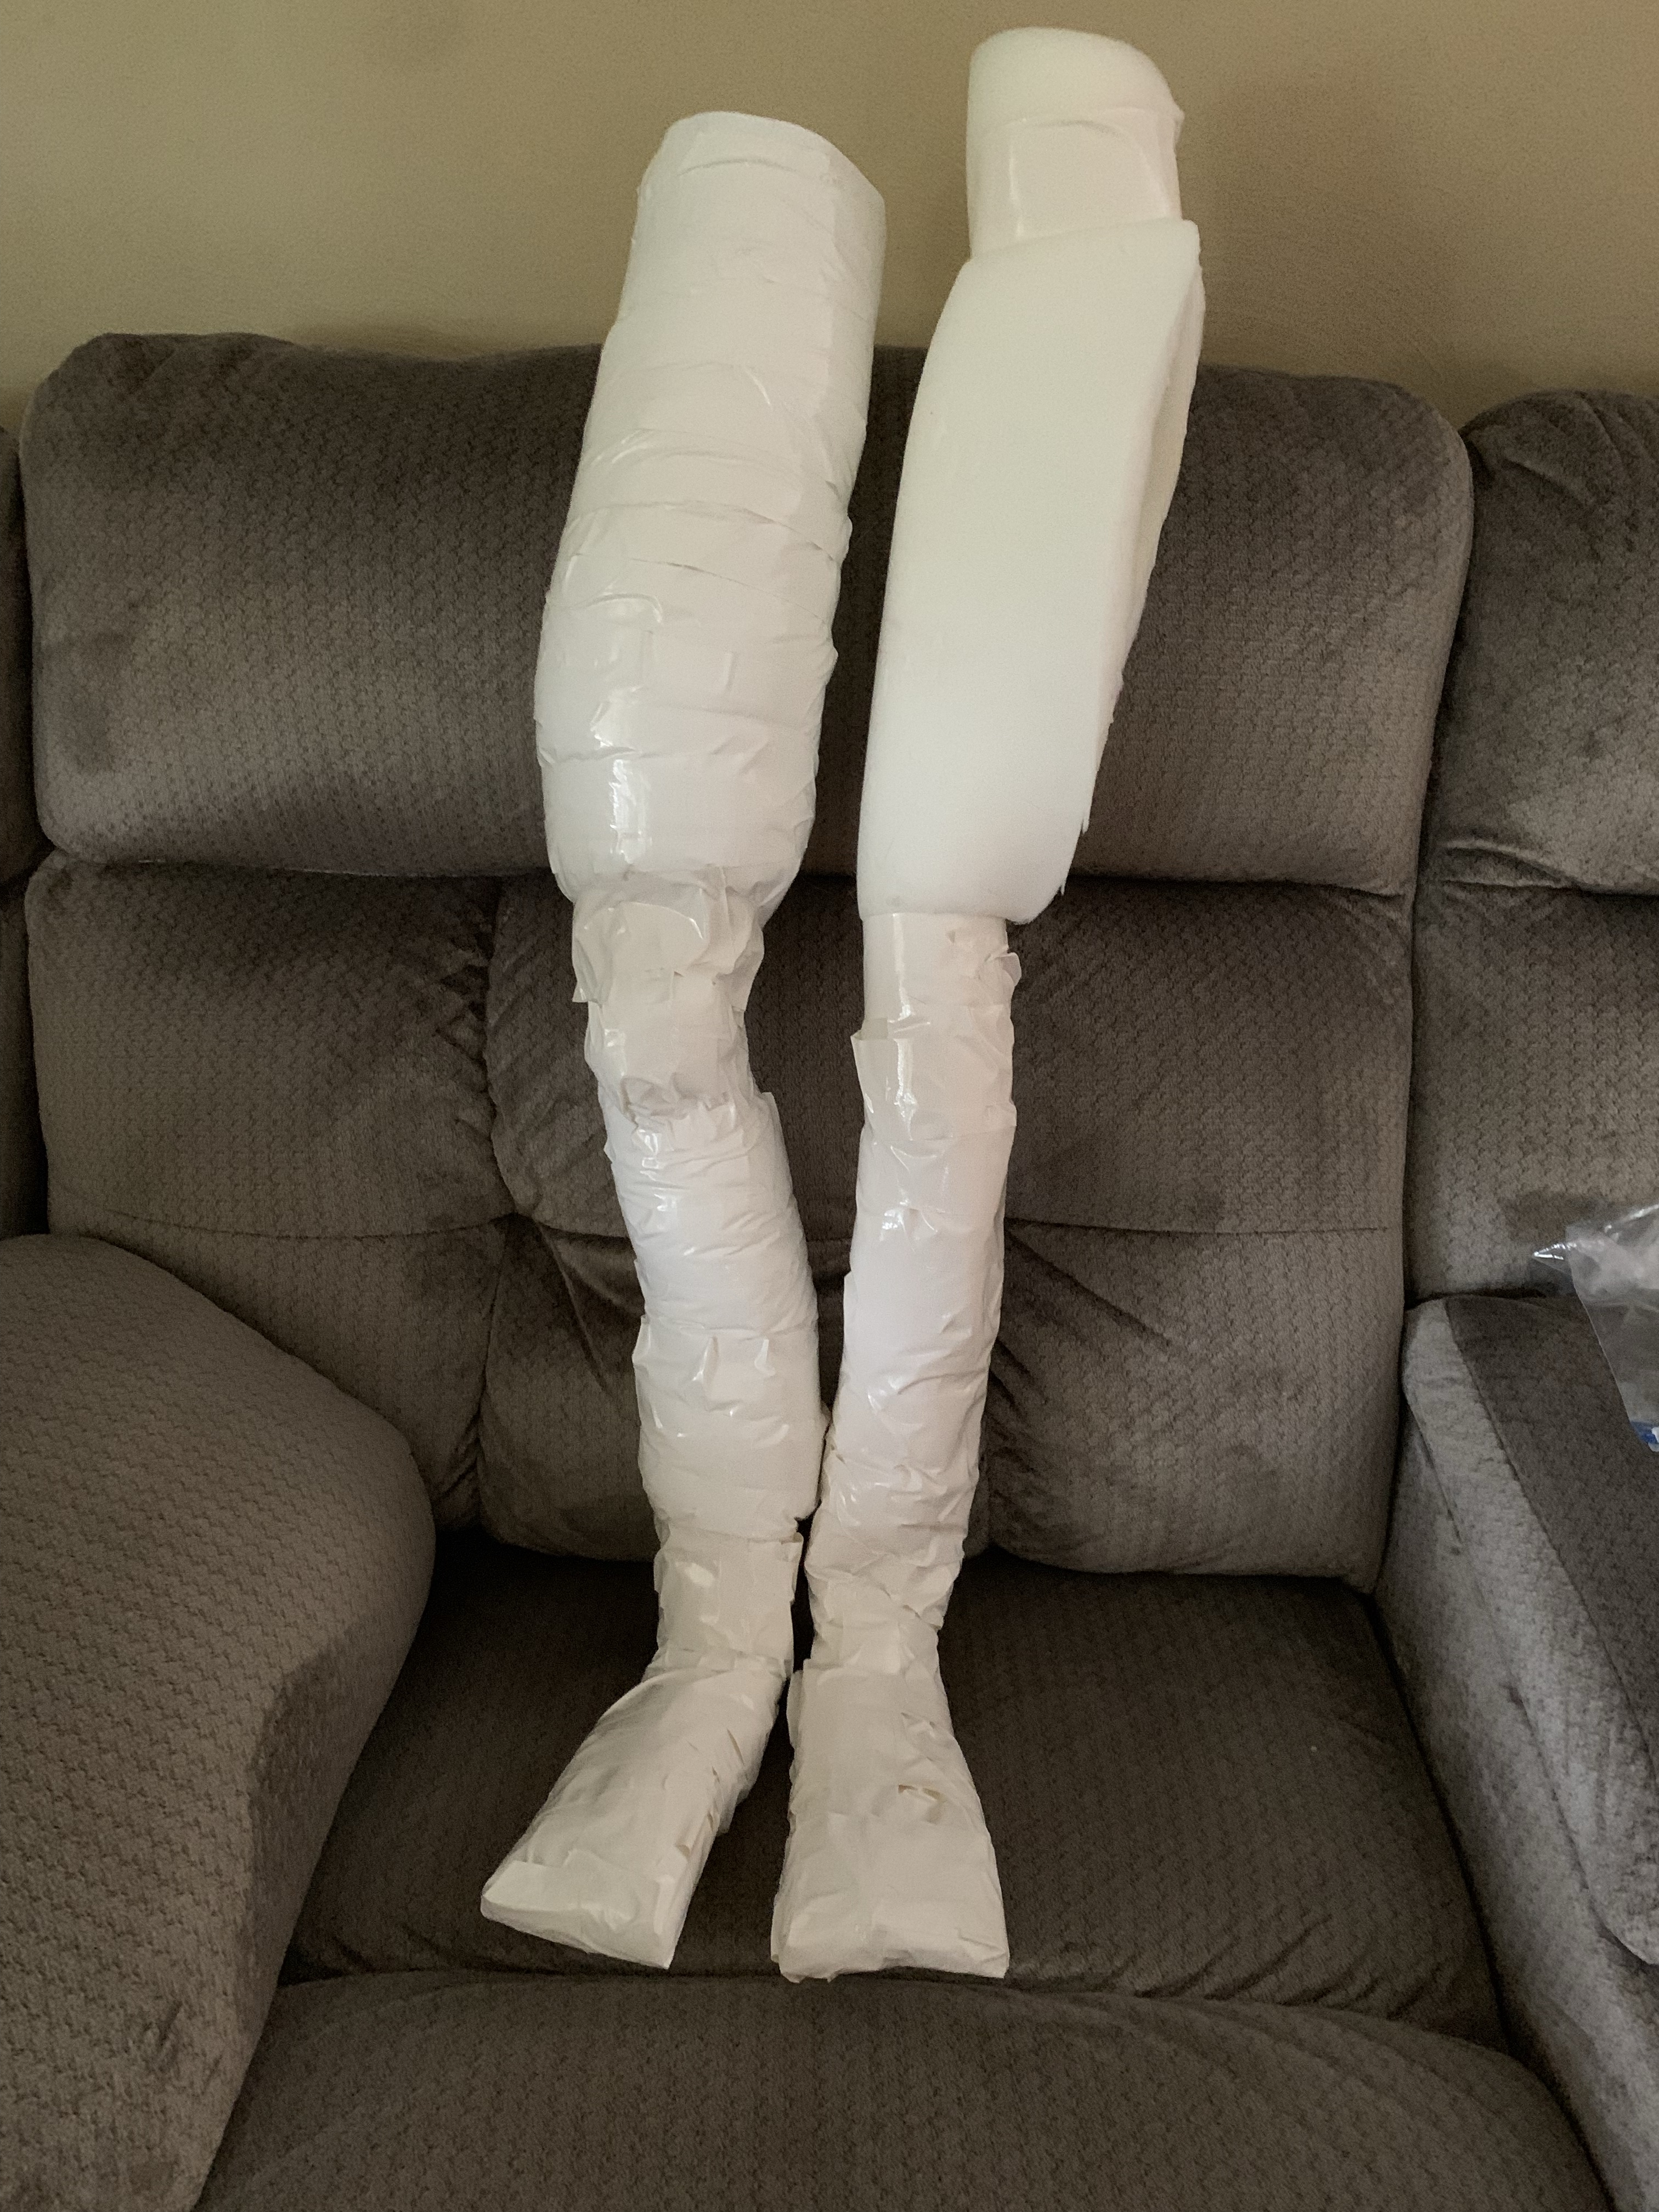
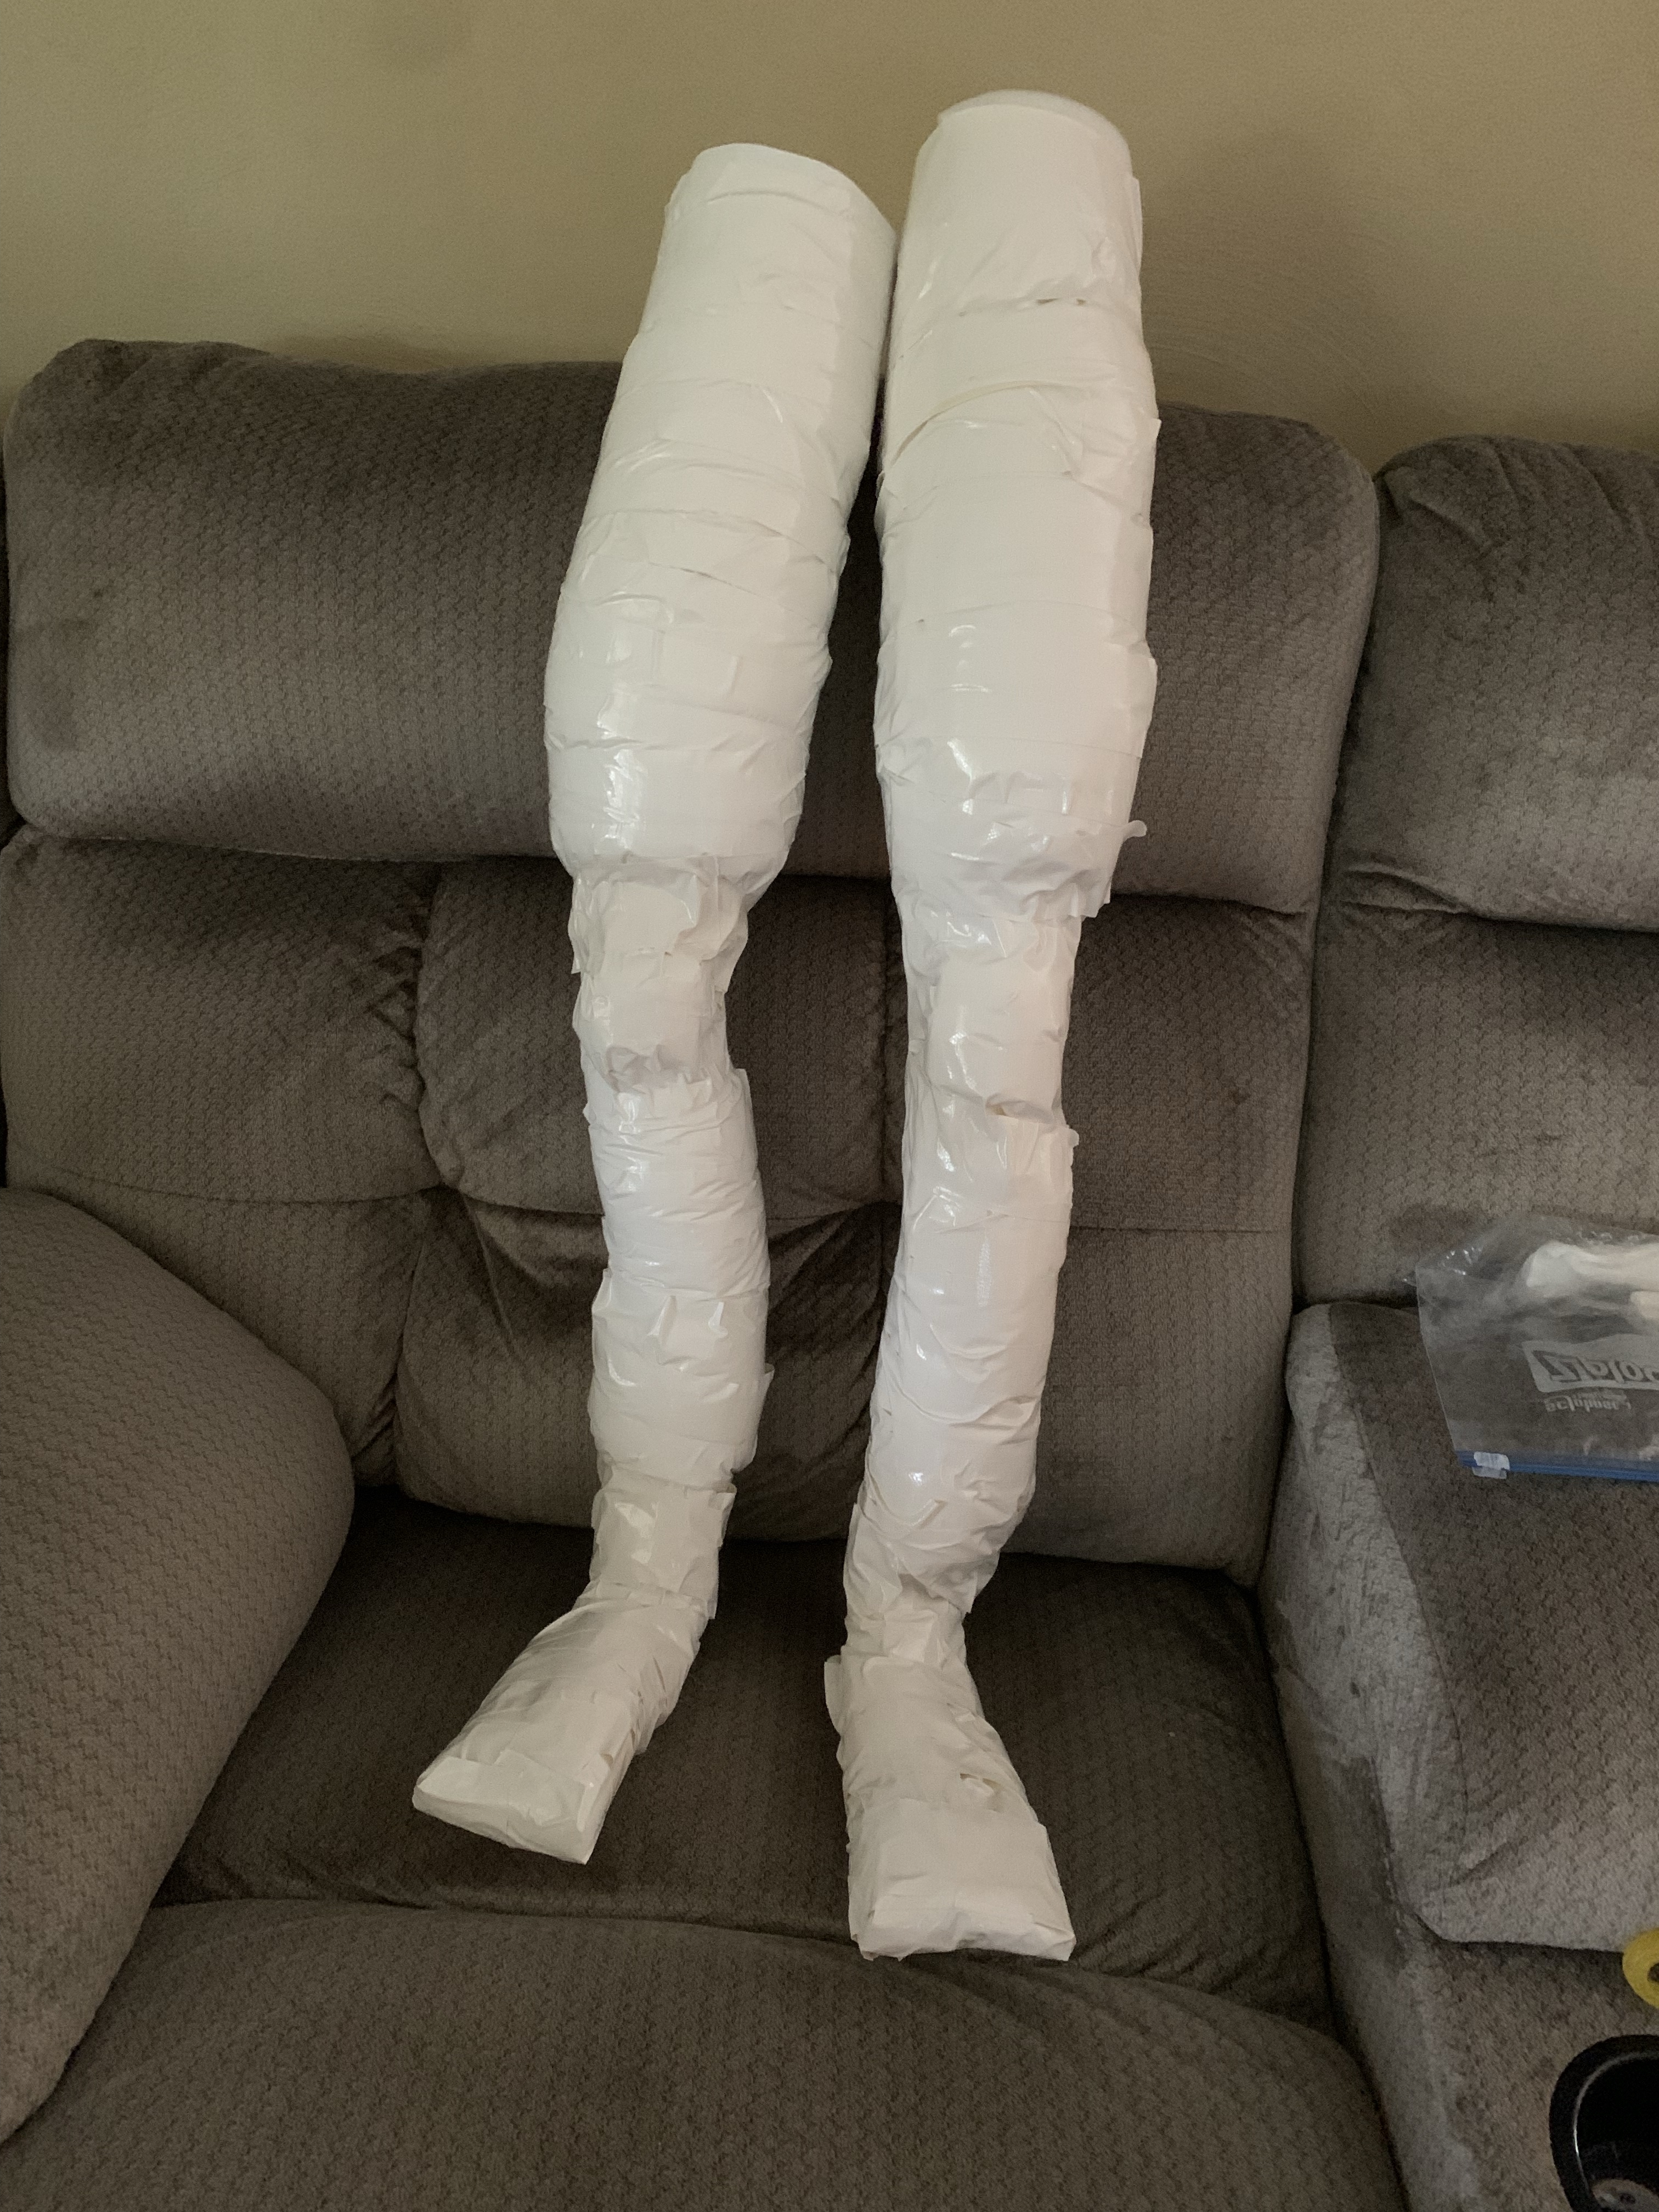
Next up, creating the body. This took a lot of foam and white duct tape. Oh, and a few wire hangers, plus some spooky hands. I started with the arms, then the legs, created the body and then taped them all together. Even Mara Jade jumped in to investigate.
I used brown packing paper, soaked in water and wrinkled up to glue on. Before papering the body and legs I speared the body with a broom handle because I wanted to use an umbrella stand to hold him up.
Once the “skin” was on I started painting, and painting, and painting. Plus I attached the head to the broom handle also.
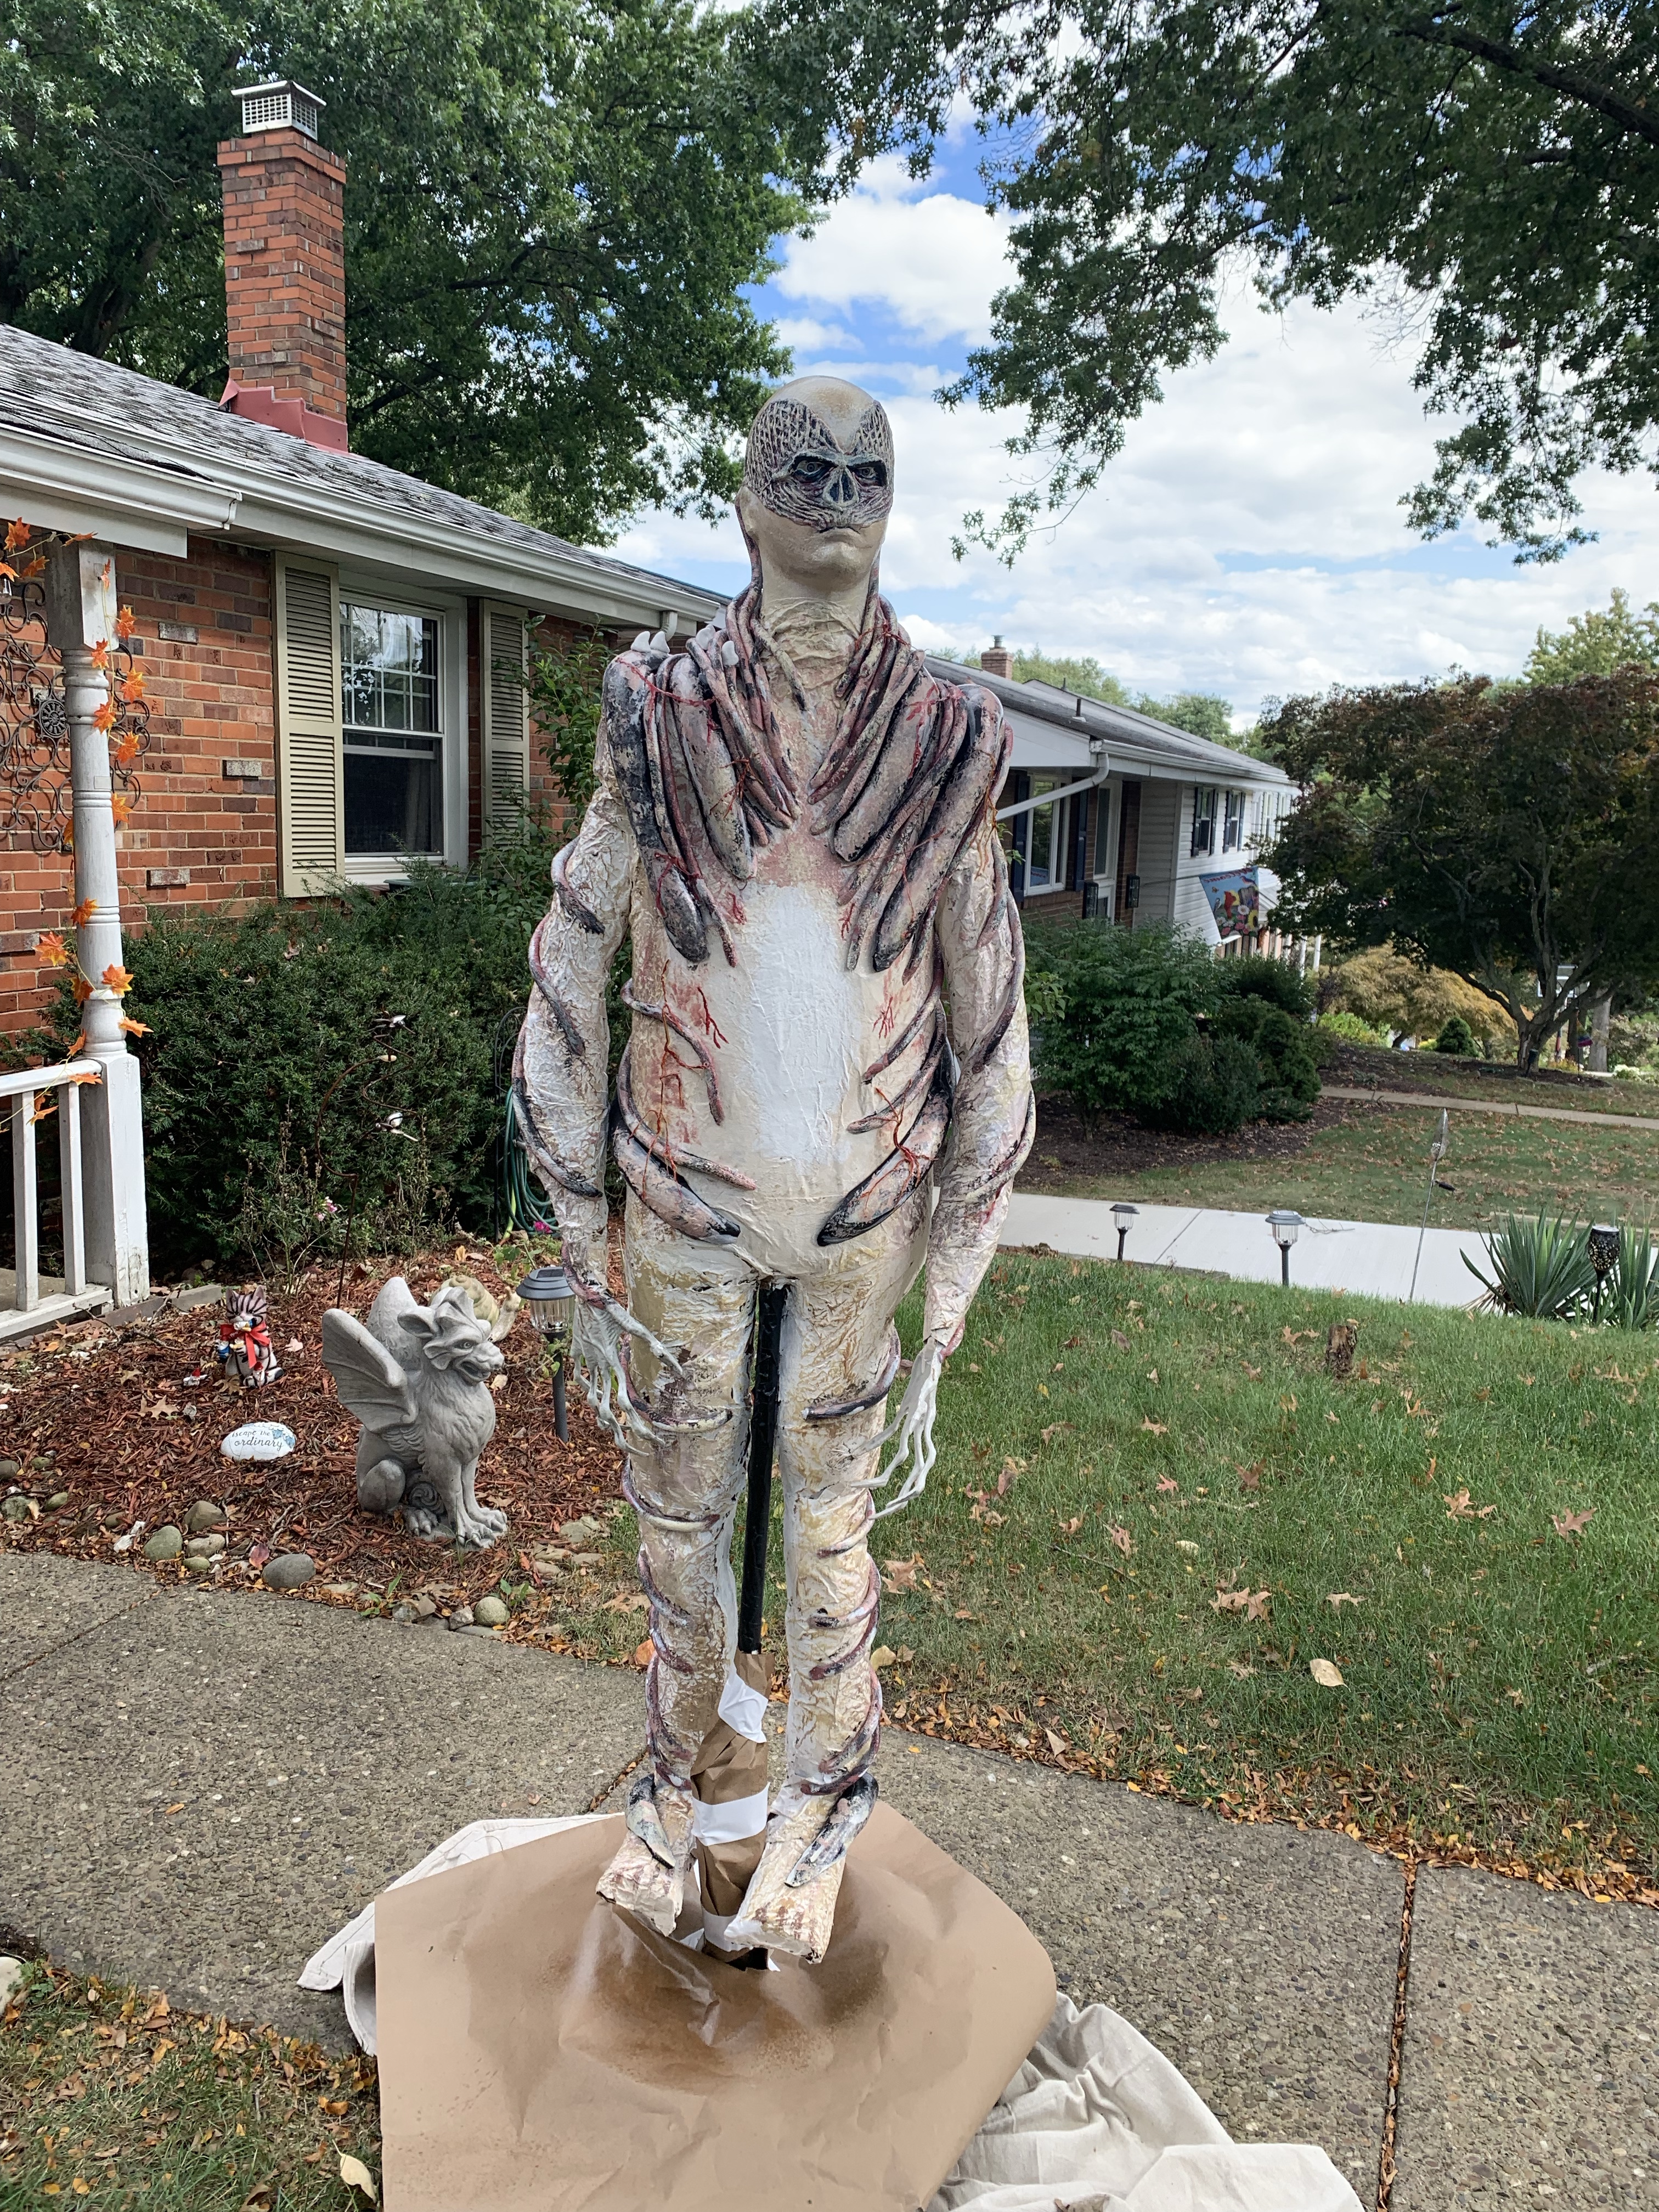
I already made many vines for the house and to attach him to the house. I used lots of cut foam, clothesline, black duct tape, and electrical tape.
But, I found some great YouTube videos from Cris Alex, with lots of the embellishments for Vecna, including the vines, cones, and veins. It really helped me to take him to the next level.
My husband says he is the best thing I’ve ever made, and I have to admit that I’m pretty proud of him.
This year for Halloween I decided to dress up as Eddie Munson. Which then made me start to work on decorating the house in a Stranger Things Season 4 theme for Halloween. I already made Vecna’s Grandfather clock from Episode 1. And I’ve worked on more decorations that I’ll post later. But I also worked my Eddie costume.
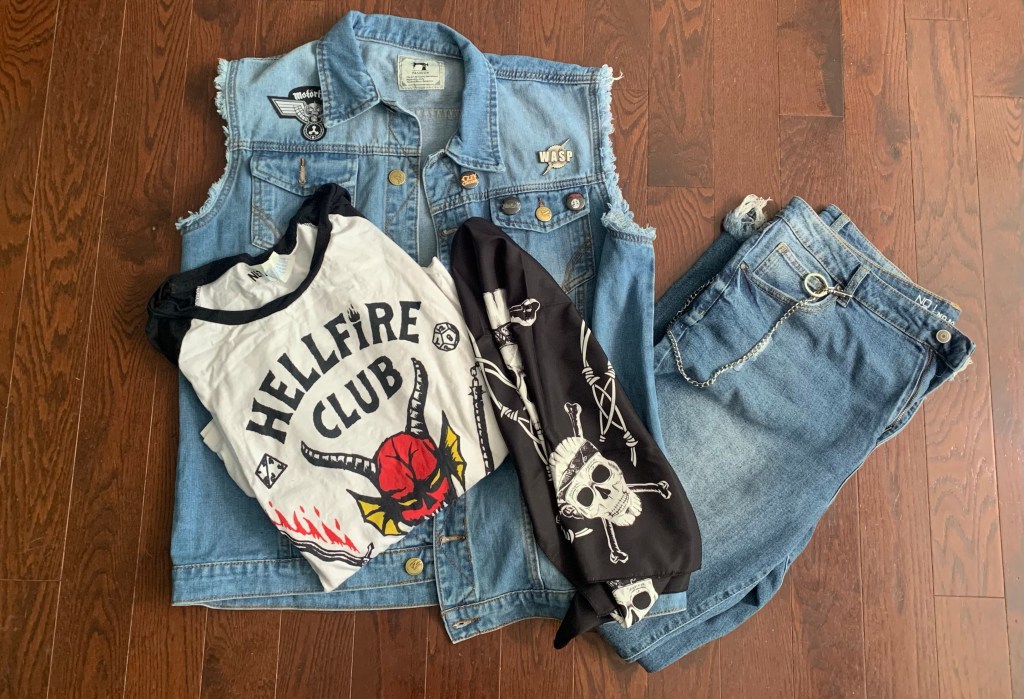
Vest, Jeans, Hellfire Club shirt, Bandana, and chain
It all started in the spring when I bought a Hellfire Club shirt. It was still while the season was airing and I just needed one. Actually, the Hellfire Club shirt I bought in the spring was polyester and I didn’t like it, so I replaced it with this cotton one.
Once I decided to dress up as Eddie, I thought it would be easy. I thought, add a jean vest, some jeans, no problem. But I didn’t realize how in depth his costume was until I watched I watched this video by Cosplay Chris.
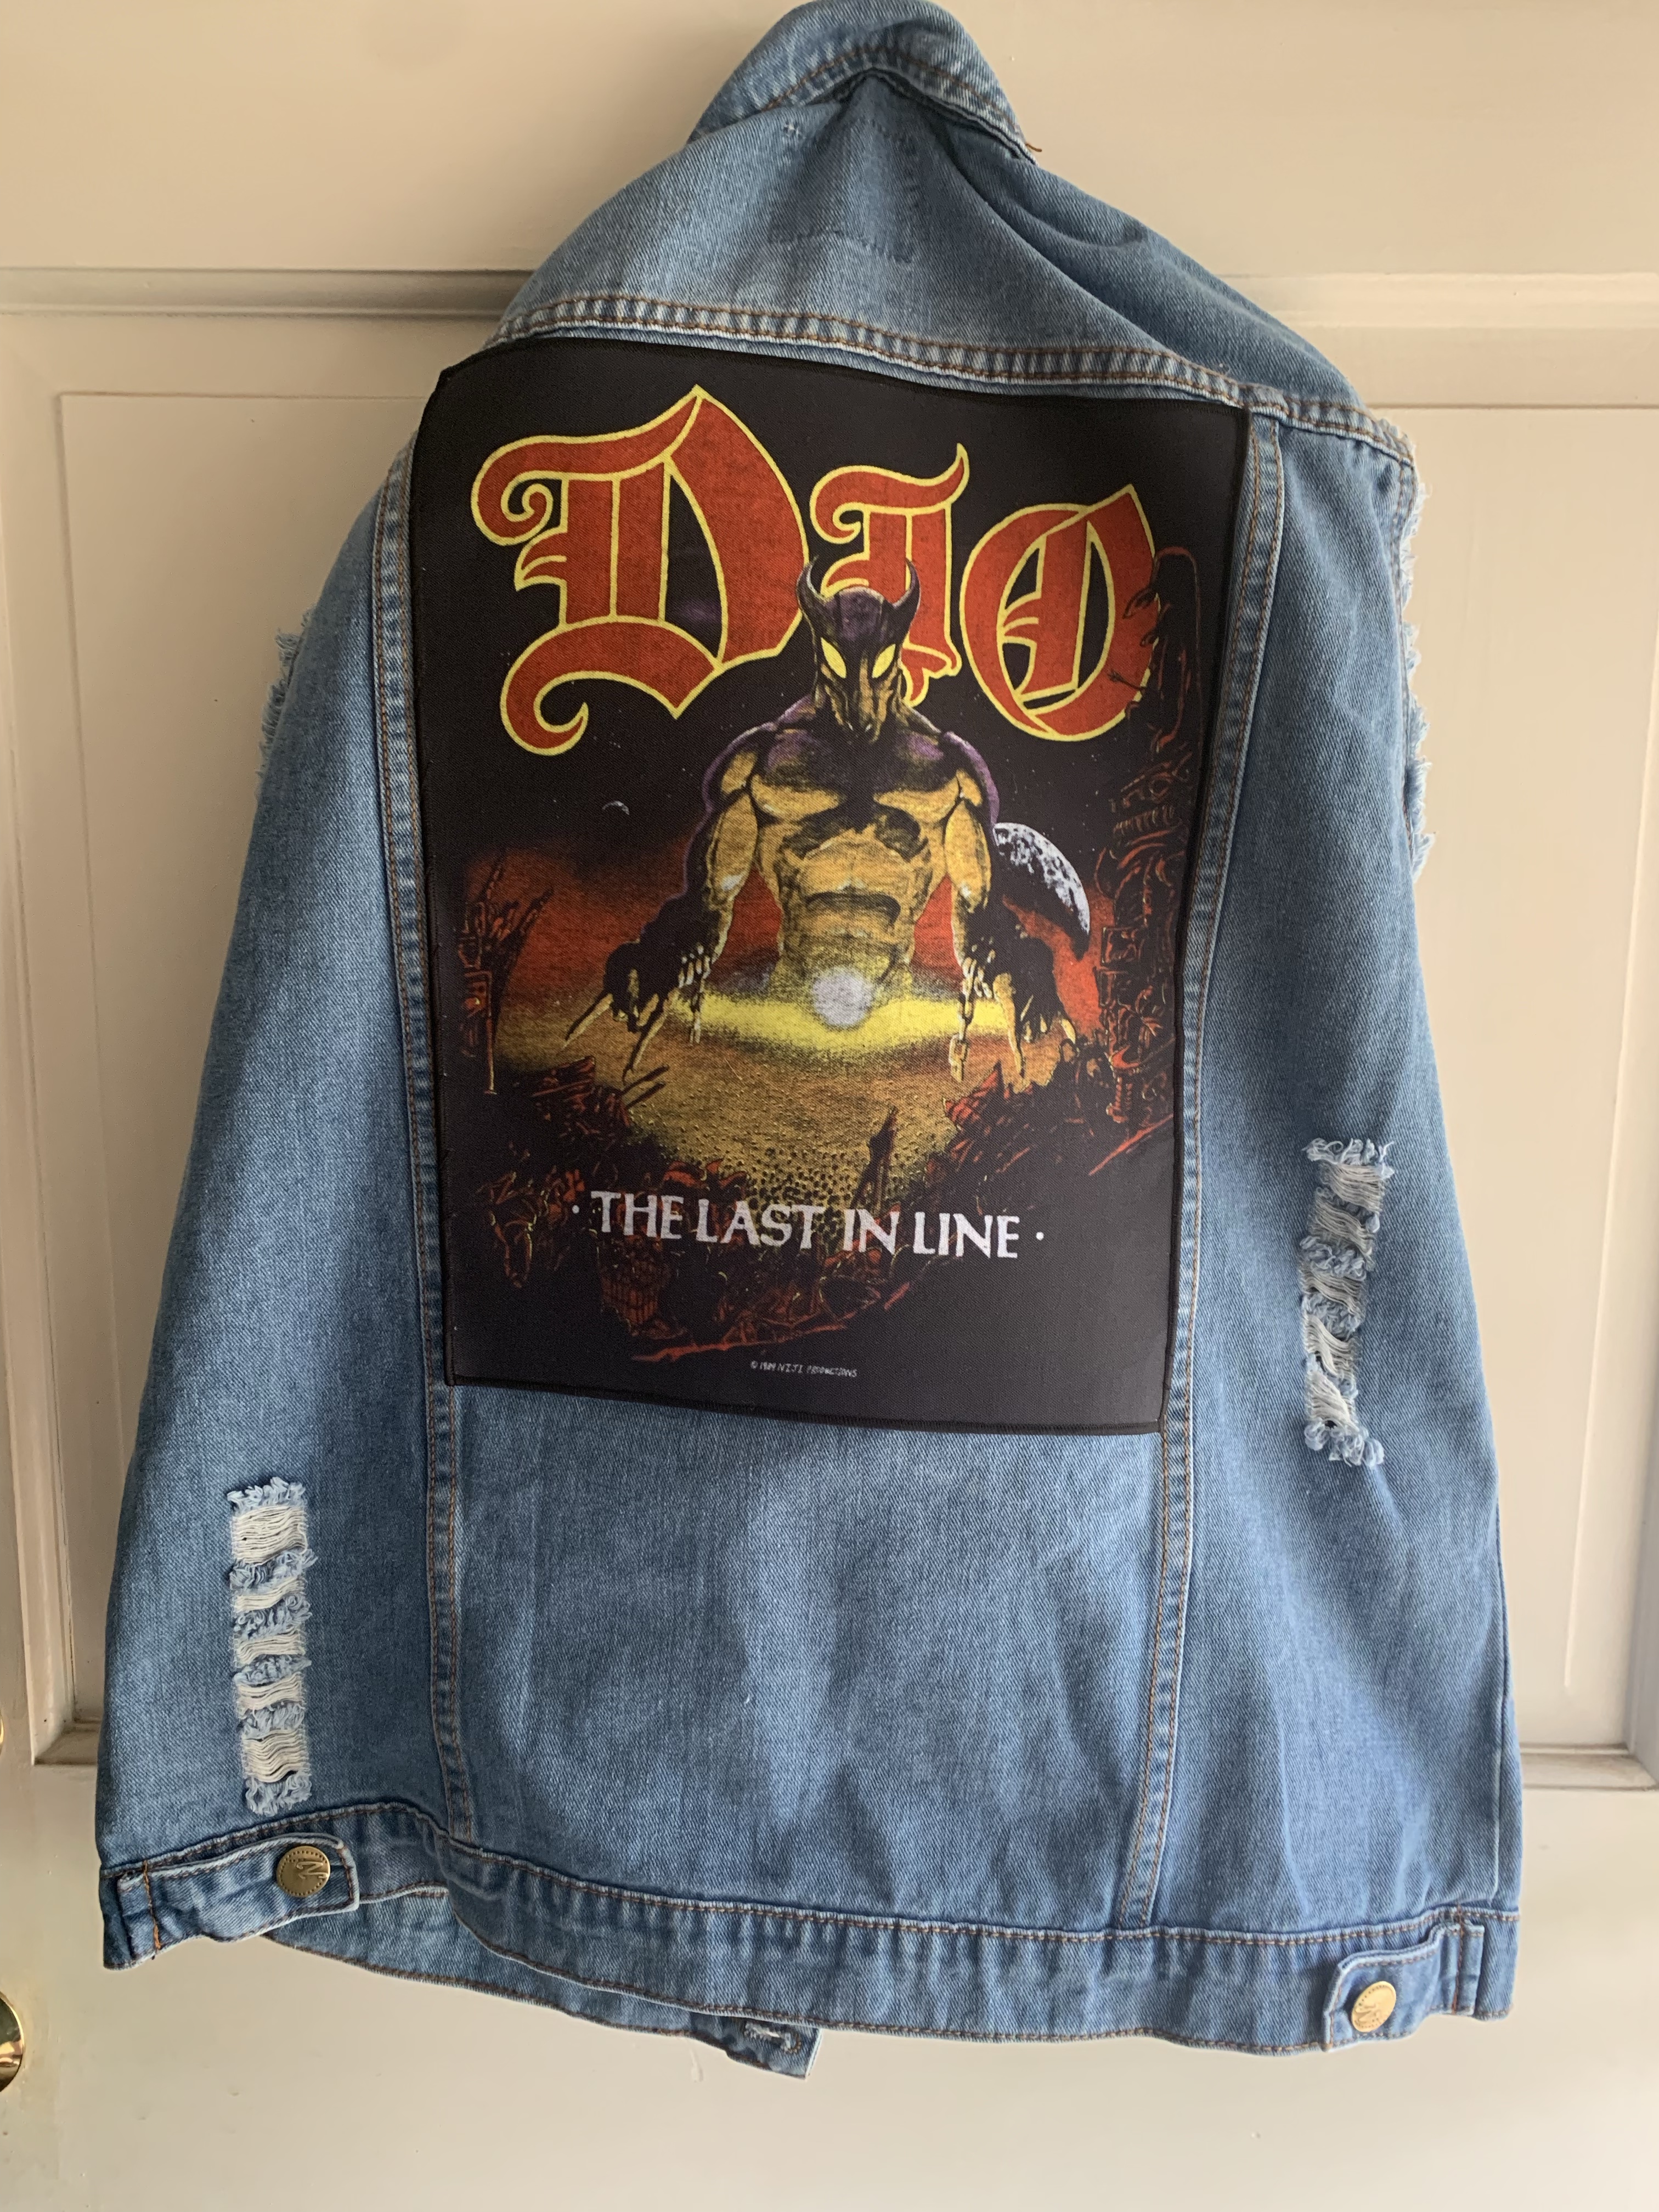
First I made the vest. I bought a cheap jean vest. Next I found the Dio back patch on the Dio Store. I couldn’t really see all the original pins on his vest, so I bought this set of classic 80s metal band pins and I chose Ozzy Osborne, Judas Priest, and Anthrax from the set. I found a replica of the Wasp pin on Ruckus Tees. The Motorhead patch was available on Amazon, but I cut off the Copyright 2022 part. And I bought some iron on adhesive to iron on the patches (although I still needed to sew the edges on the Dio patch, at least the iron on helped to adhere most of the patch onto the vest.
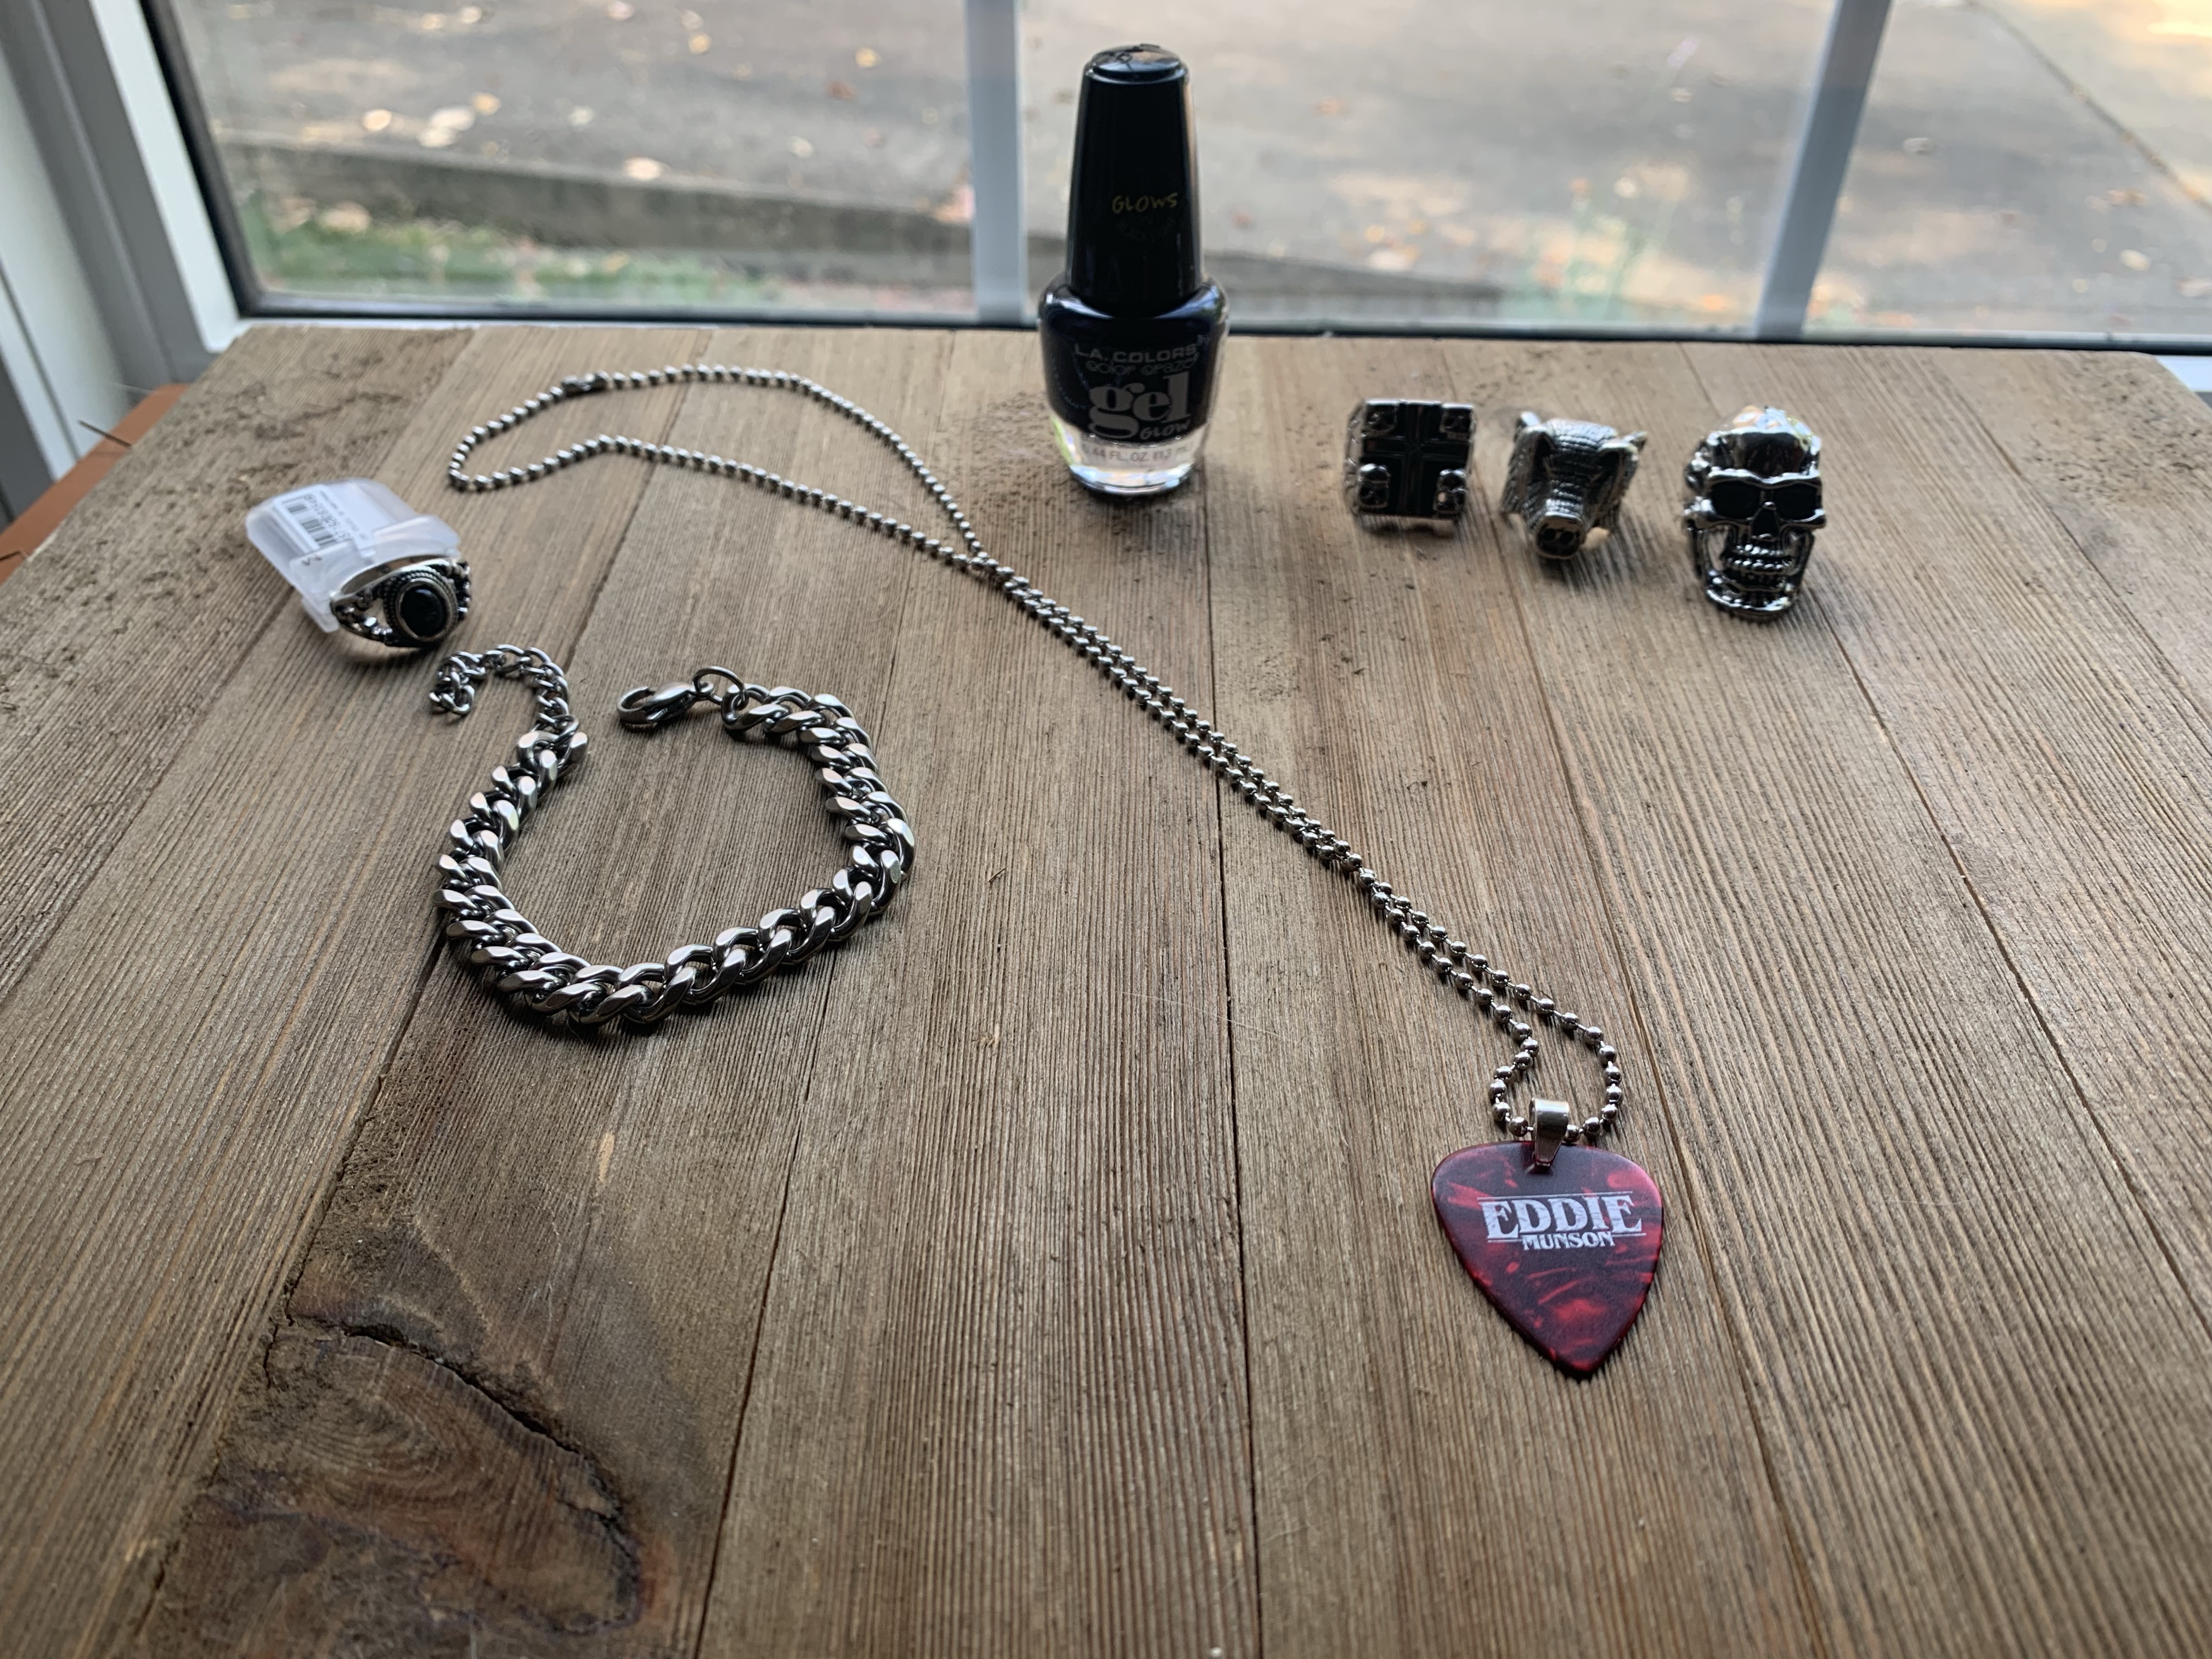
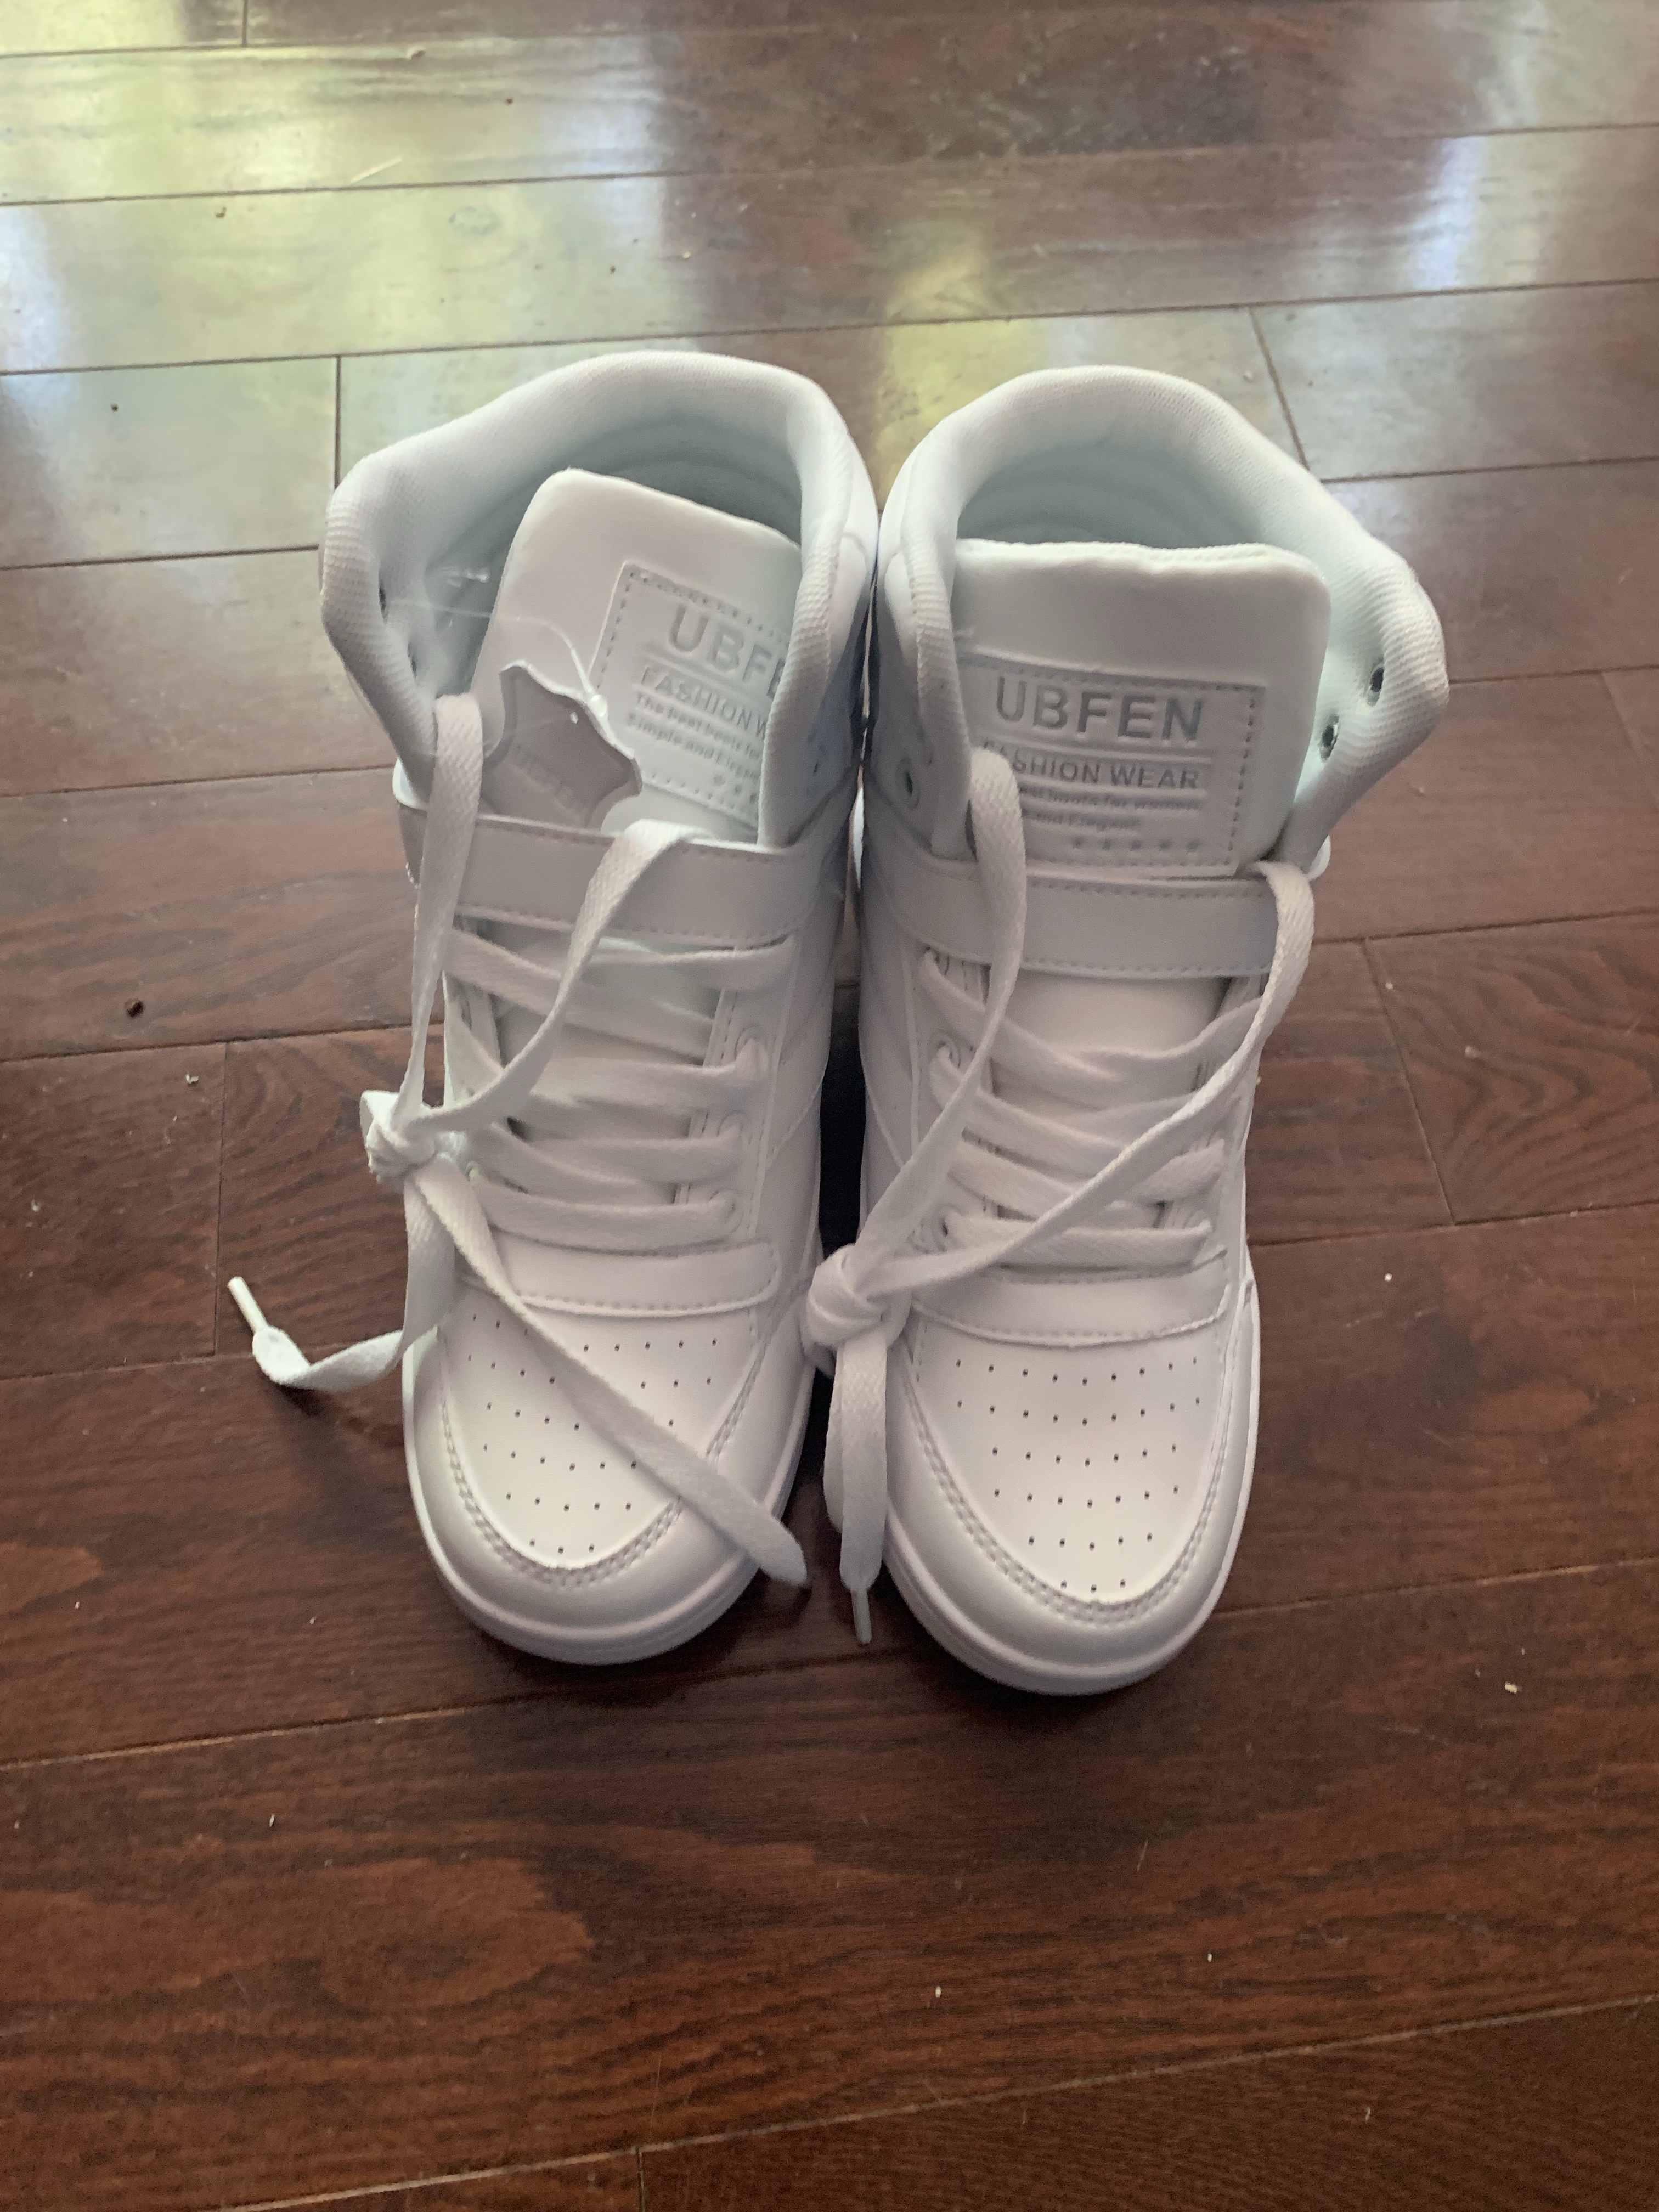
Next up, the accessories. The mood ring was found on Ebay along with the Hog Ring. Unfortunately, when I bought the hog ring, I thought I was getting the full set of 3 rings for $44, but it was $44 for each ring. Since I couldn’t find the hog ring anywhere else, I decided to keep it. I found the tombstone ring on Amazon as well as a skull ring (but not the skull ring and I didn’t want to spend another $44, so it was close enough). If you don’t care about matching the rings closely, you can just grab a bag of rings on Amazon. I found a wallet chain on Amazon as well as a guitar pick necklace with a chain bracelet. Note, the picture on Amazon shows a plain pick, but the one that came says Munson on both sides, oh well, it can with the bracelet. I even found the bandana on Amazon. I also found white “leather” high tops on Amazon (Jaina approves). And don’t forget black nail polish.
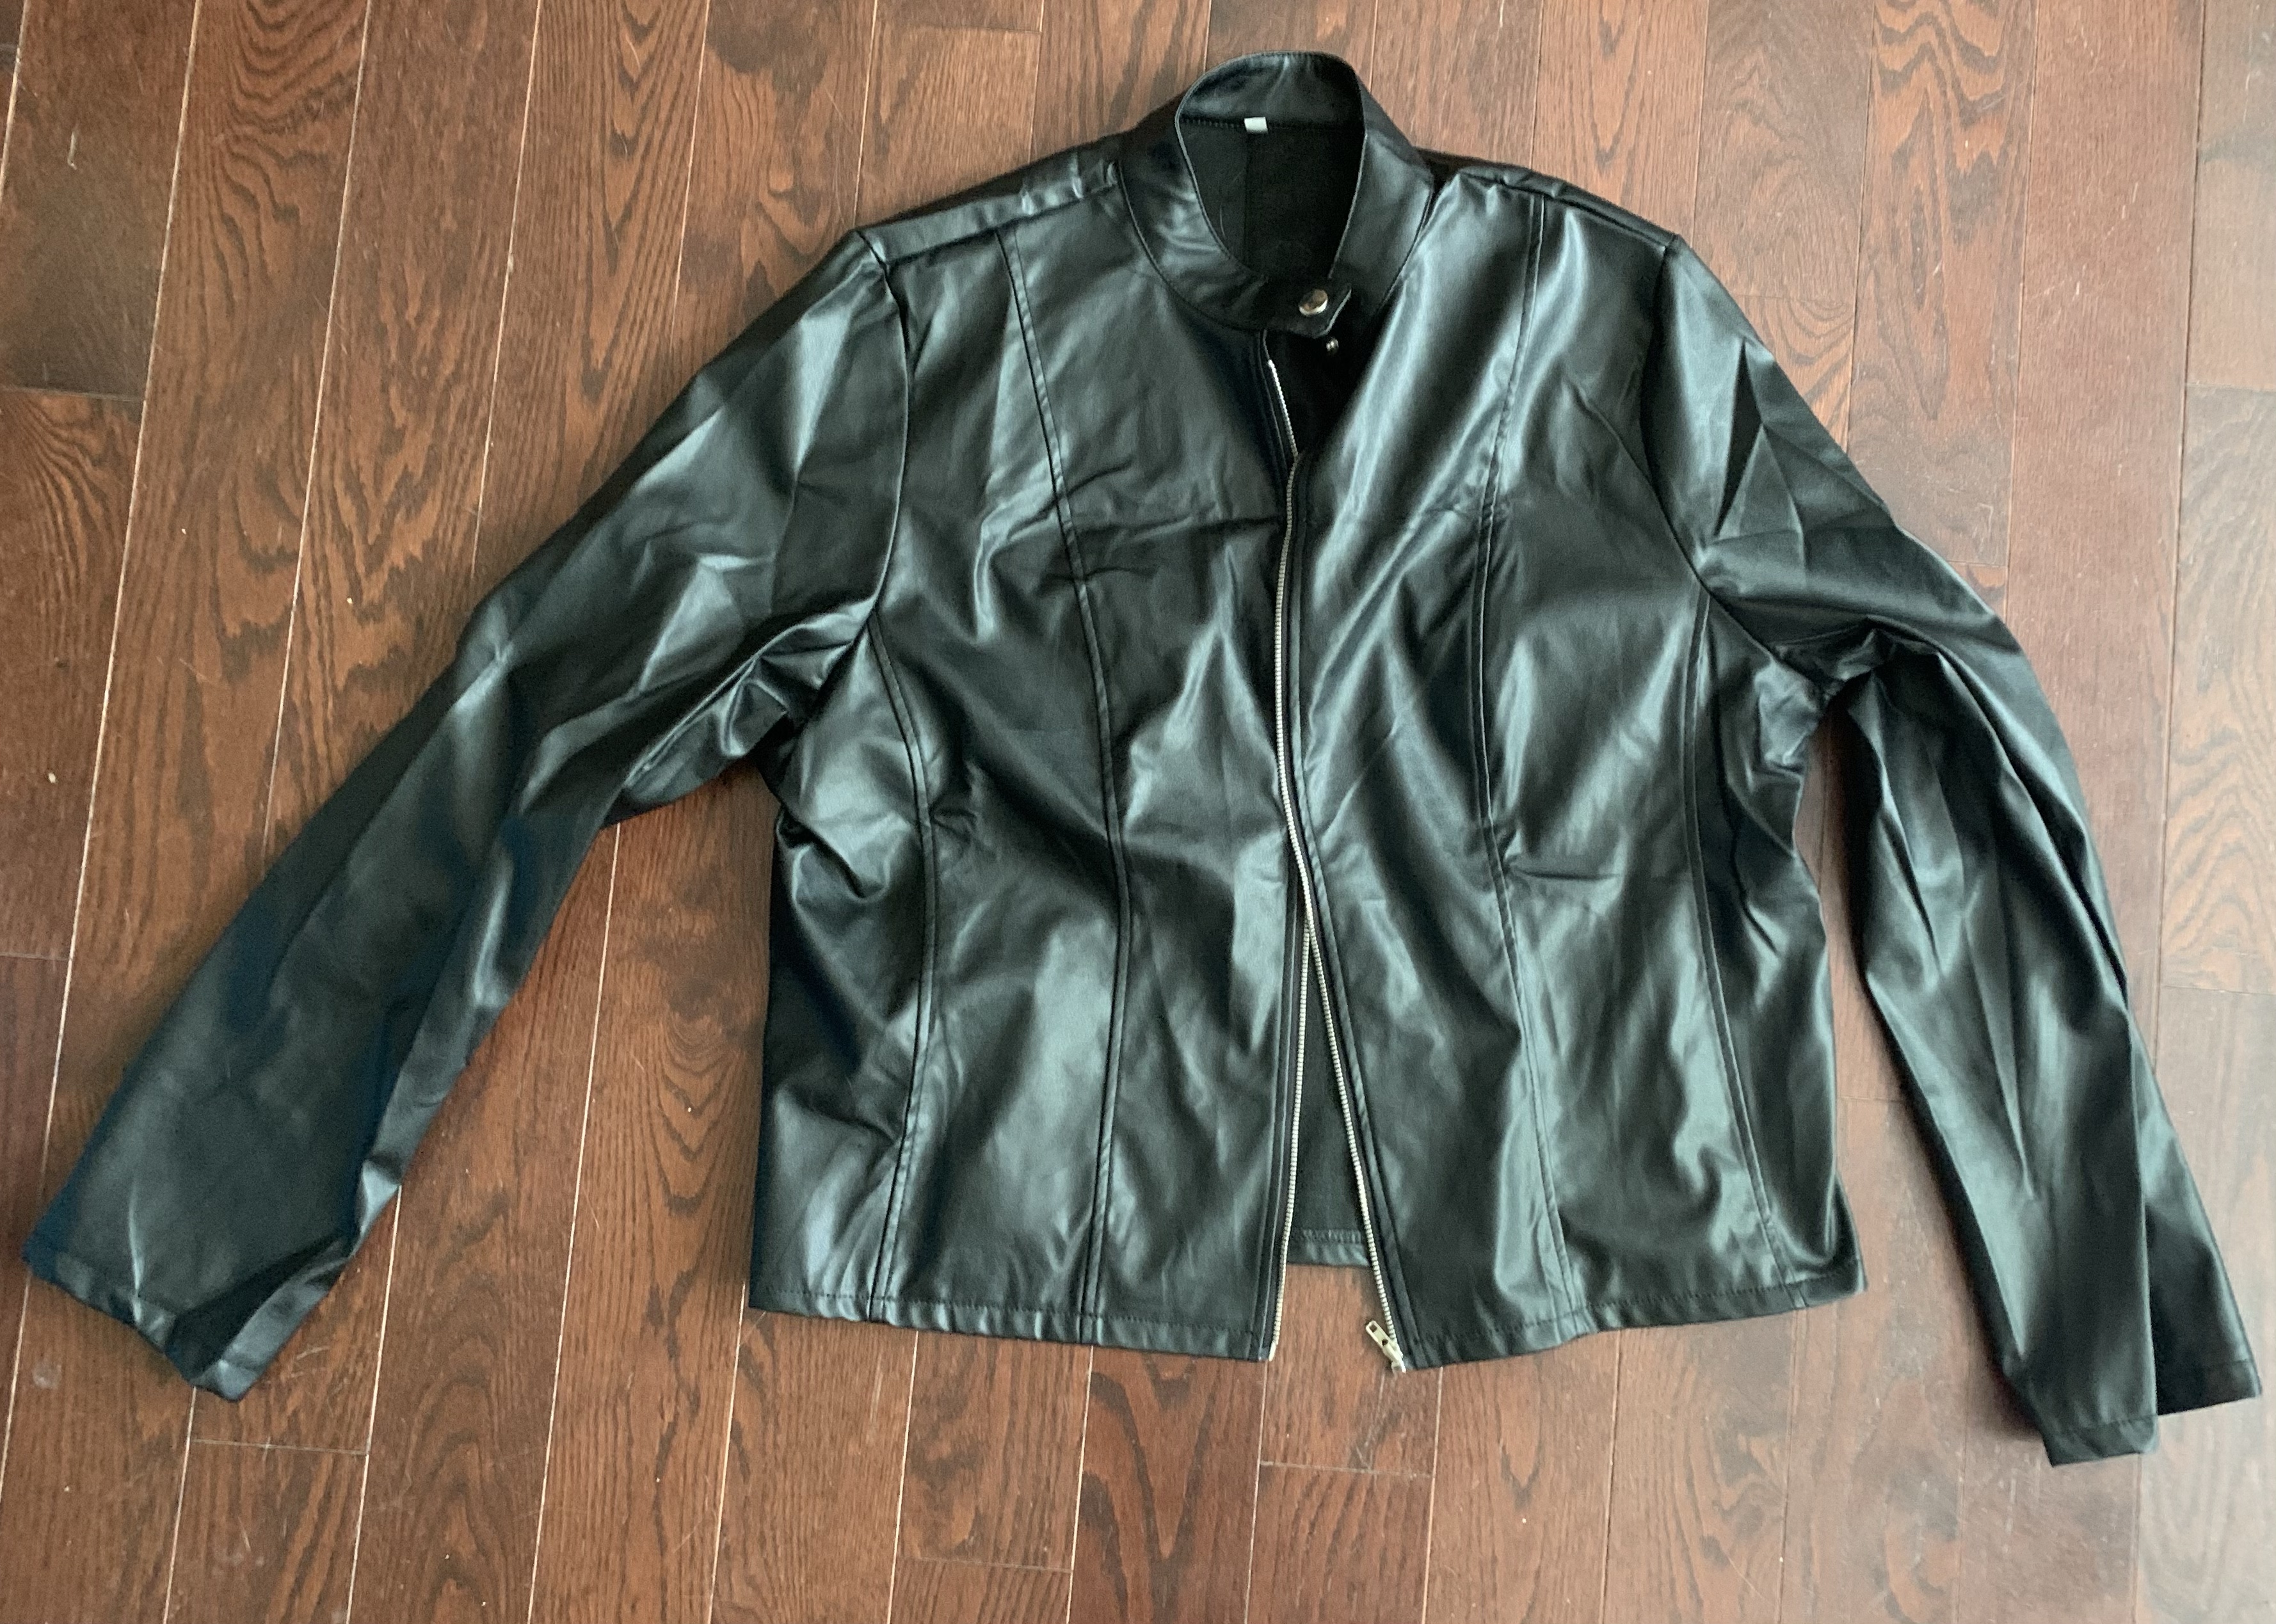
Finishing off the look also requires a pair of ripped jeans (which I had in my closet). Also a black leather jacket. This was the hardest item because I did not want to spend a lot of money on a real leather jacket and part of me wished I held on to my old biker jacket from the 90s. I tried a few from Amazon, but they didn’t fit at all. Finally I found a cheap black “leather” jacket on Walmart.
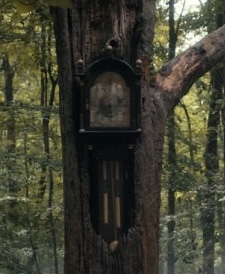
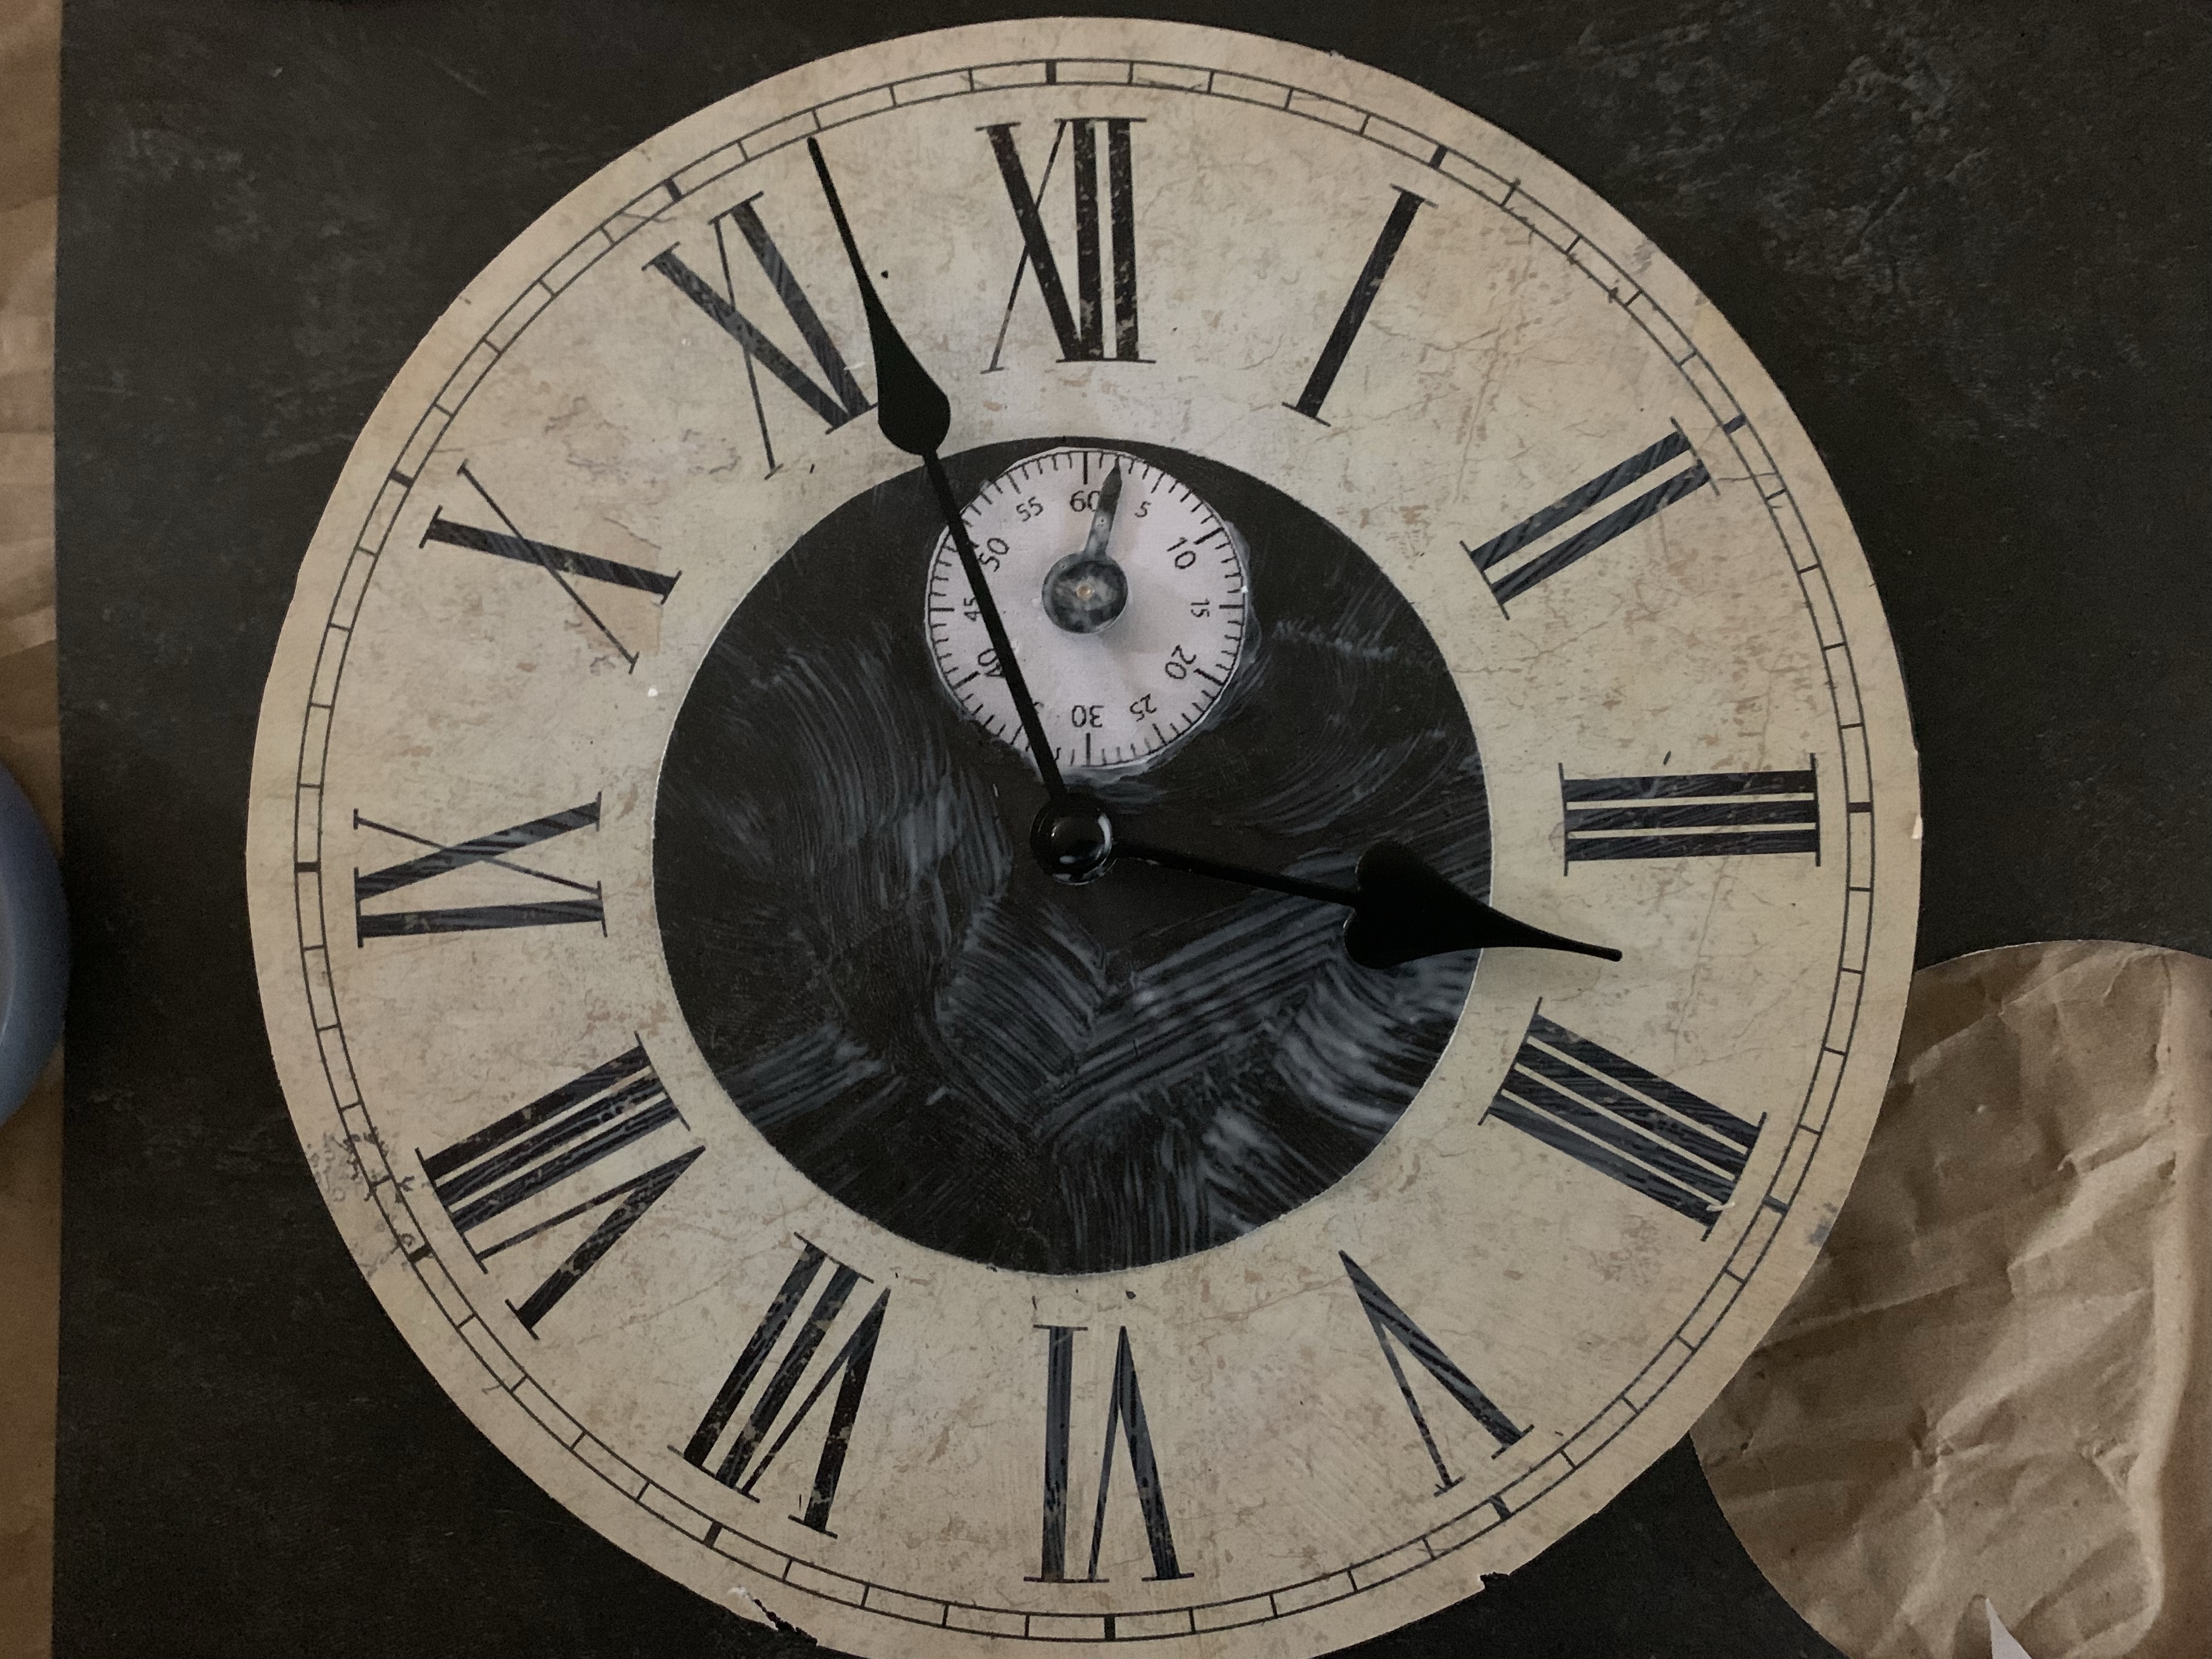
This year’s Halloween theme is Stranger Things Season 4. There are 2 main props I plan to make, plus many decorations I put together. I’ll also cosplay Eddie Munson. The first prop I made was the grandfather clock, which will be hung on a tree, to simulate the first time we see the grandfather clock in the fist episode (I grabbed this photo off the internet to help me see the details to create the clock, as well as several other photos I found).
Materials:
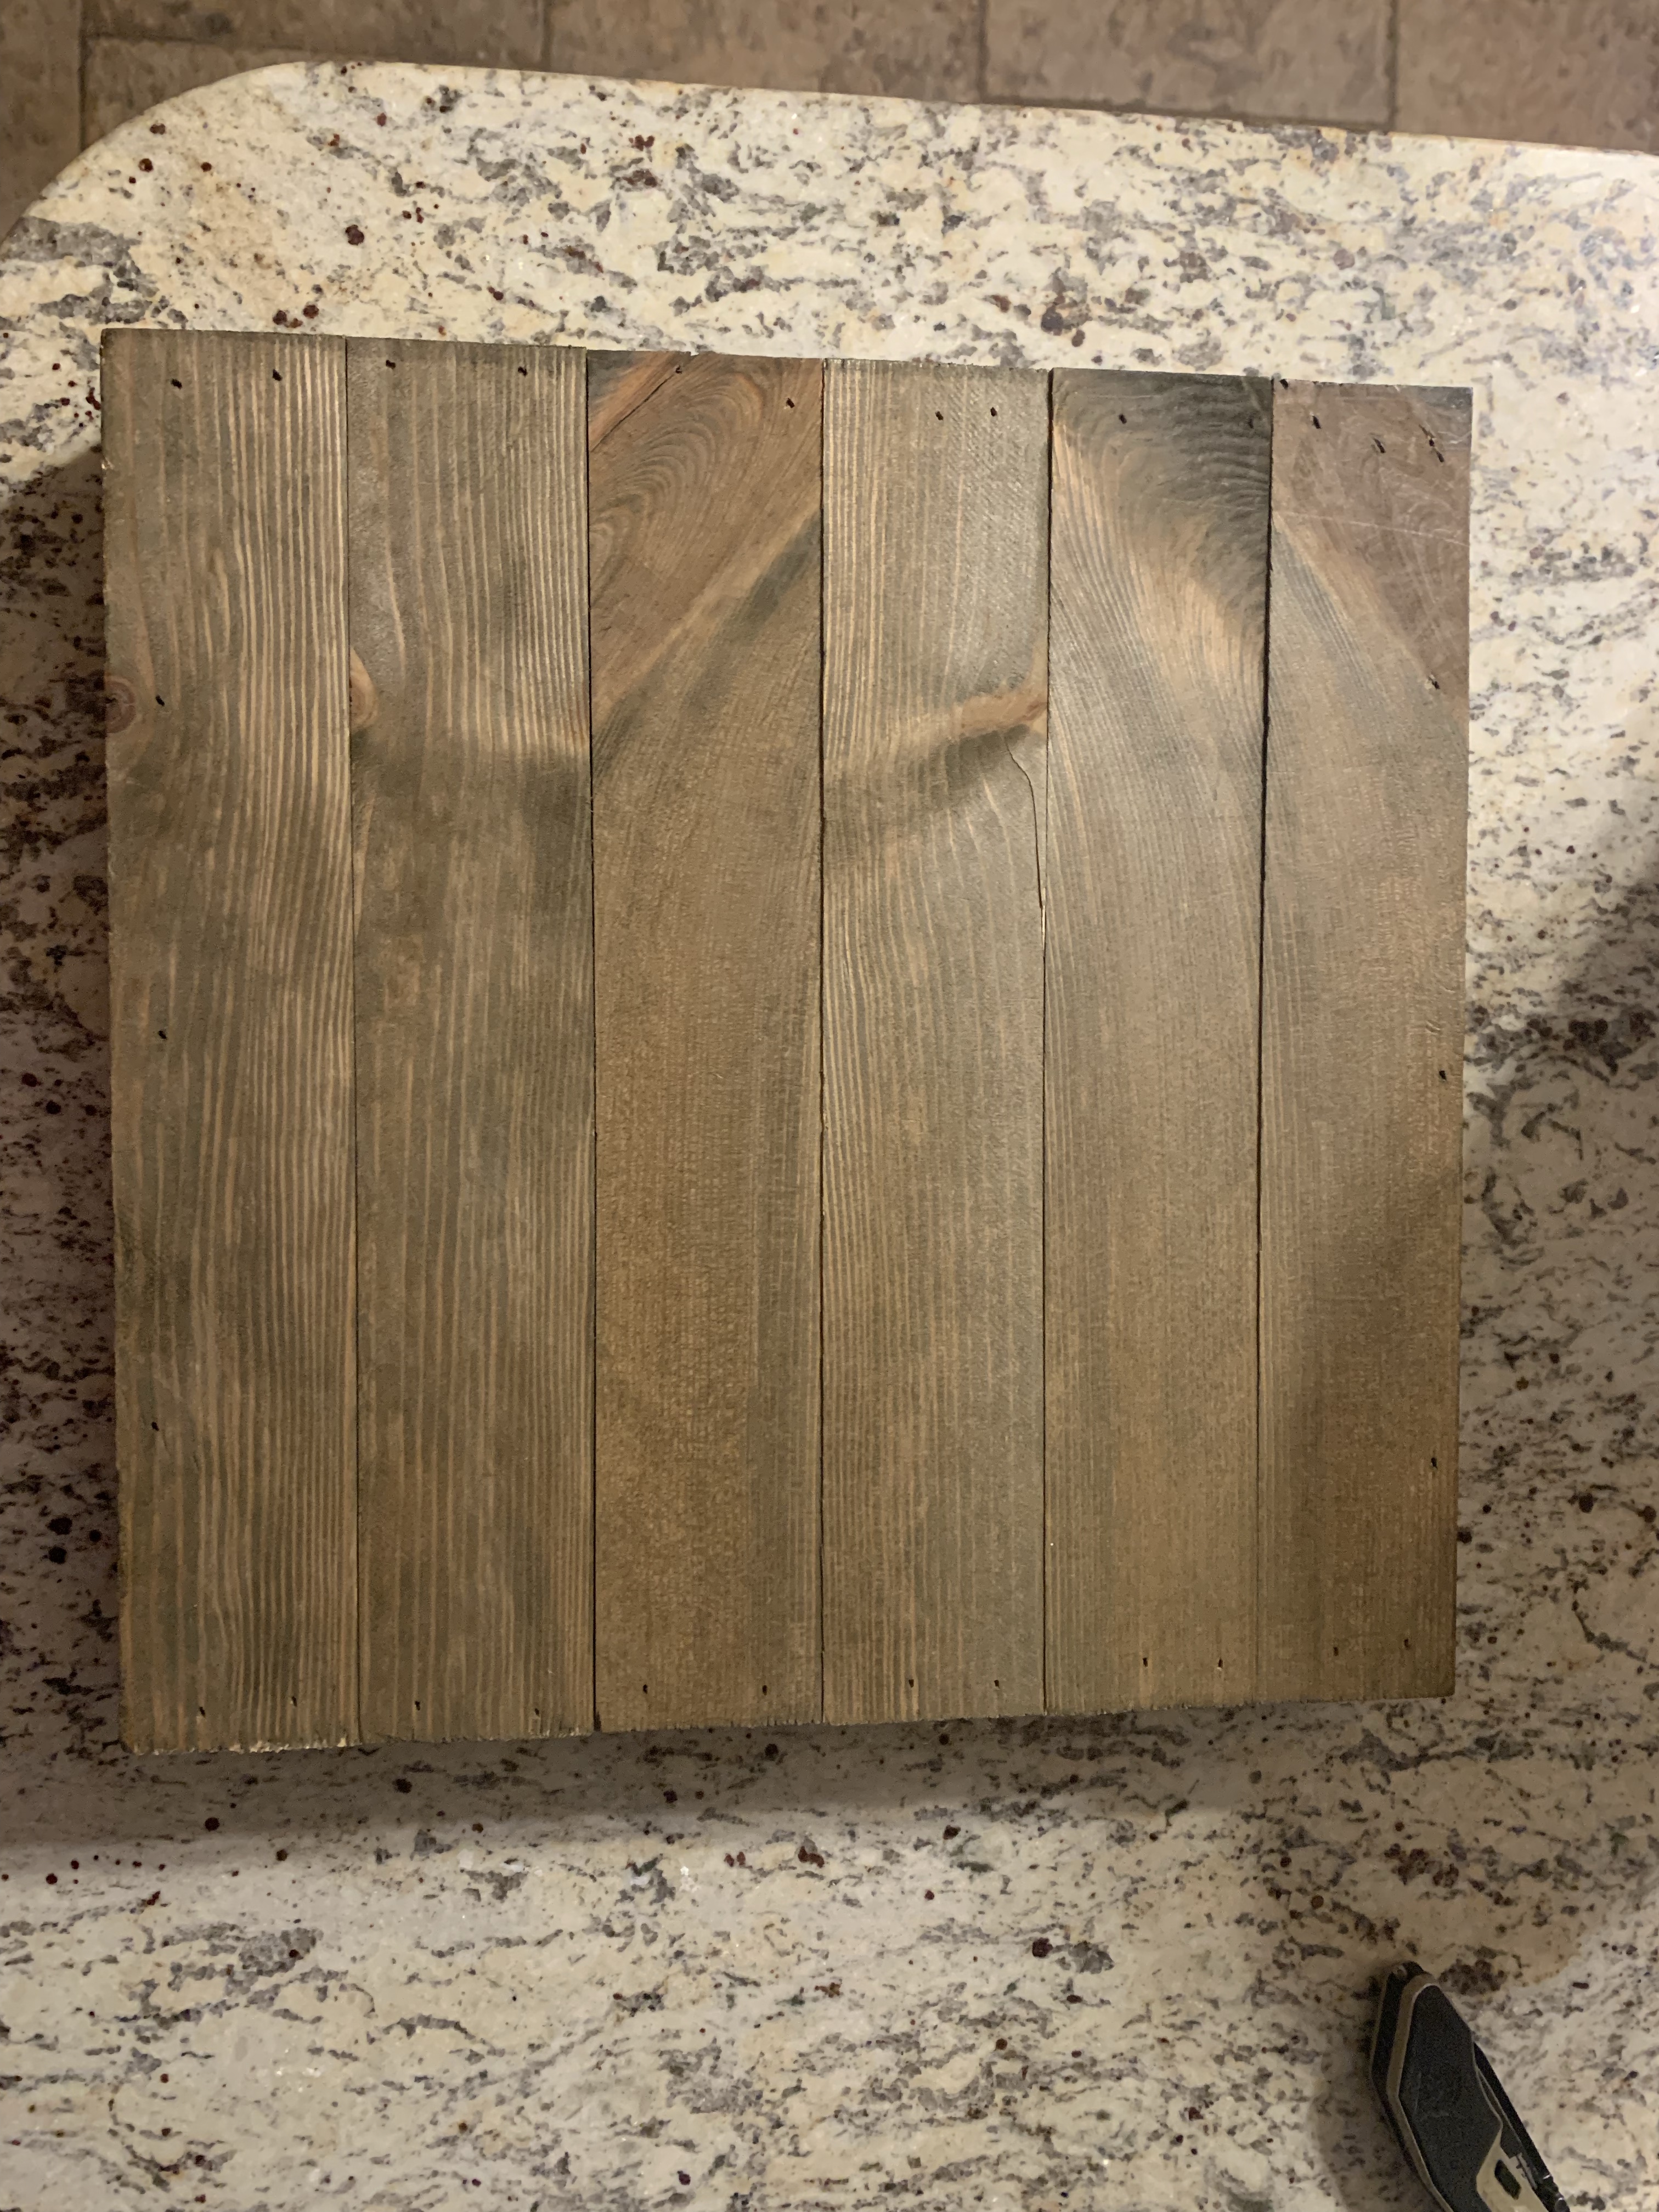
Box
Cheap clock
Gold scrapbooking paper
Black marbled scrapbooking paper
Clock hands
Styrofoam circle
Plexiglass
Cork coaster
3 wood blocks
Styrofoam balls
Dowels
Paint
Glue
Toilet paper rolls
Gold tissue paper (gift paper)
Chains
Grandfather clock pendulum
Sharpie
Spiders
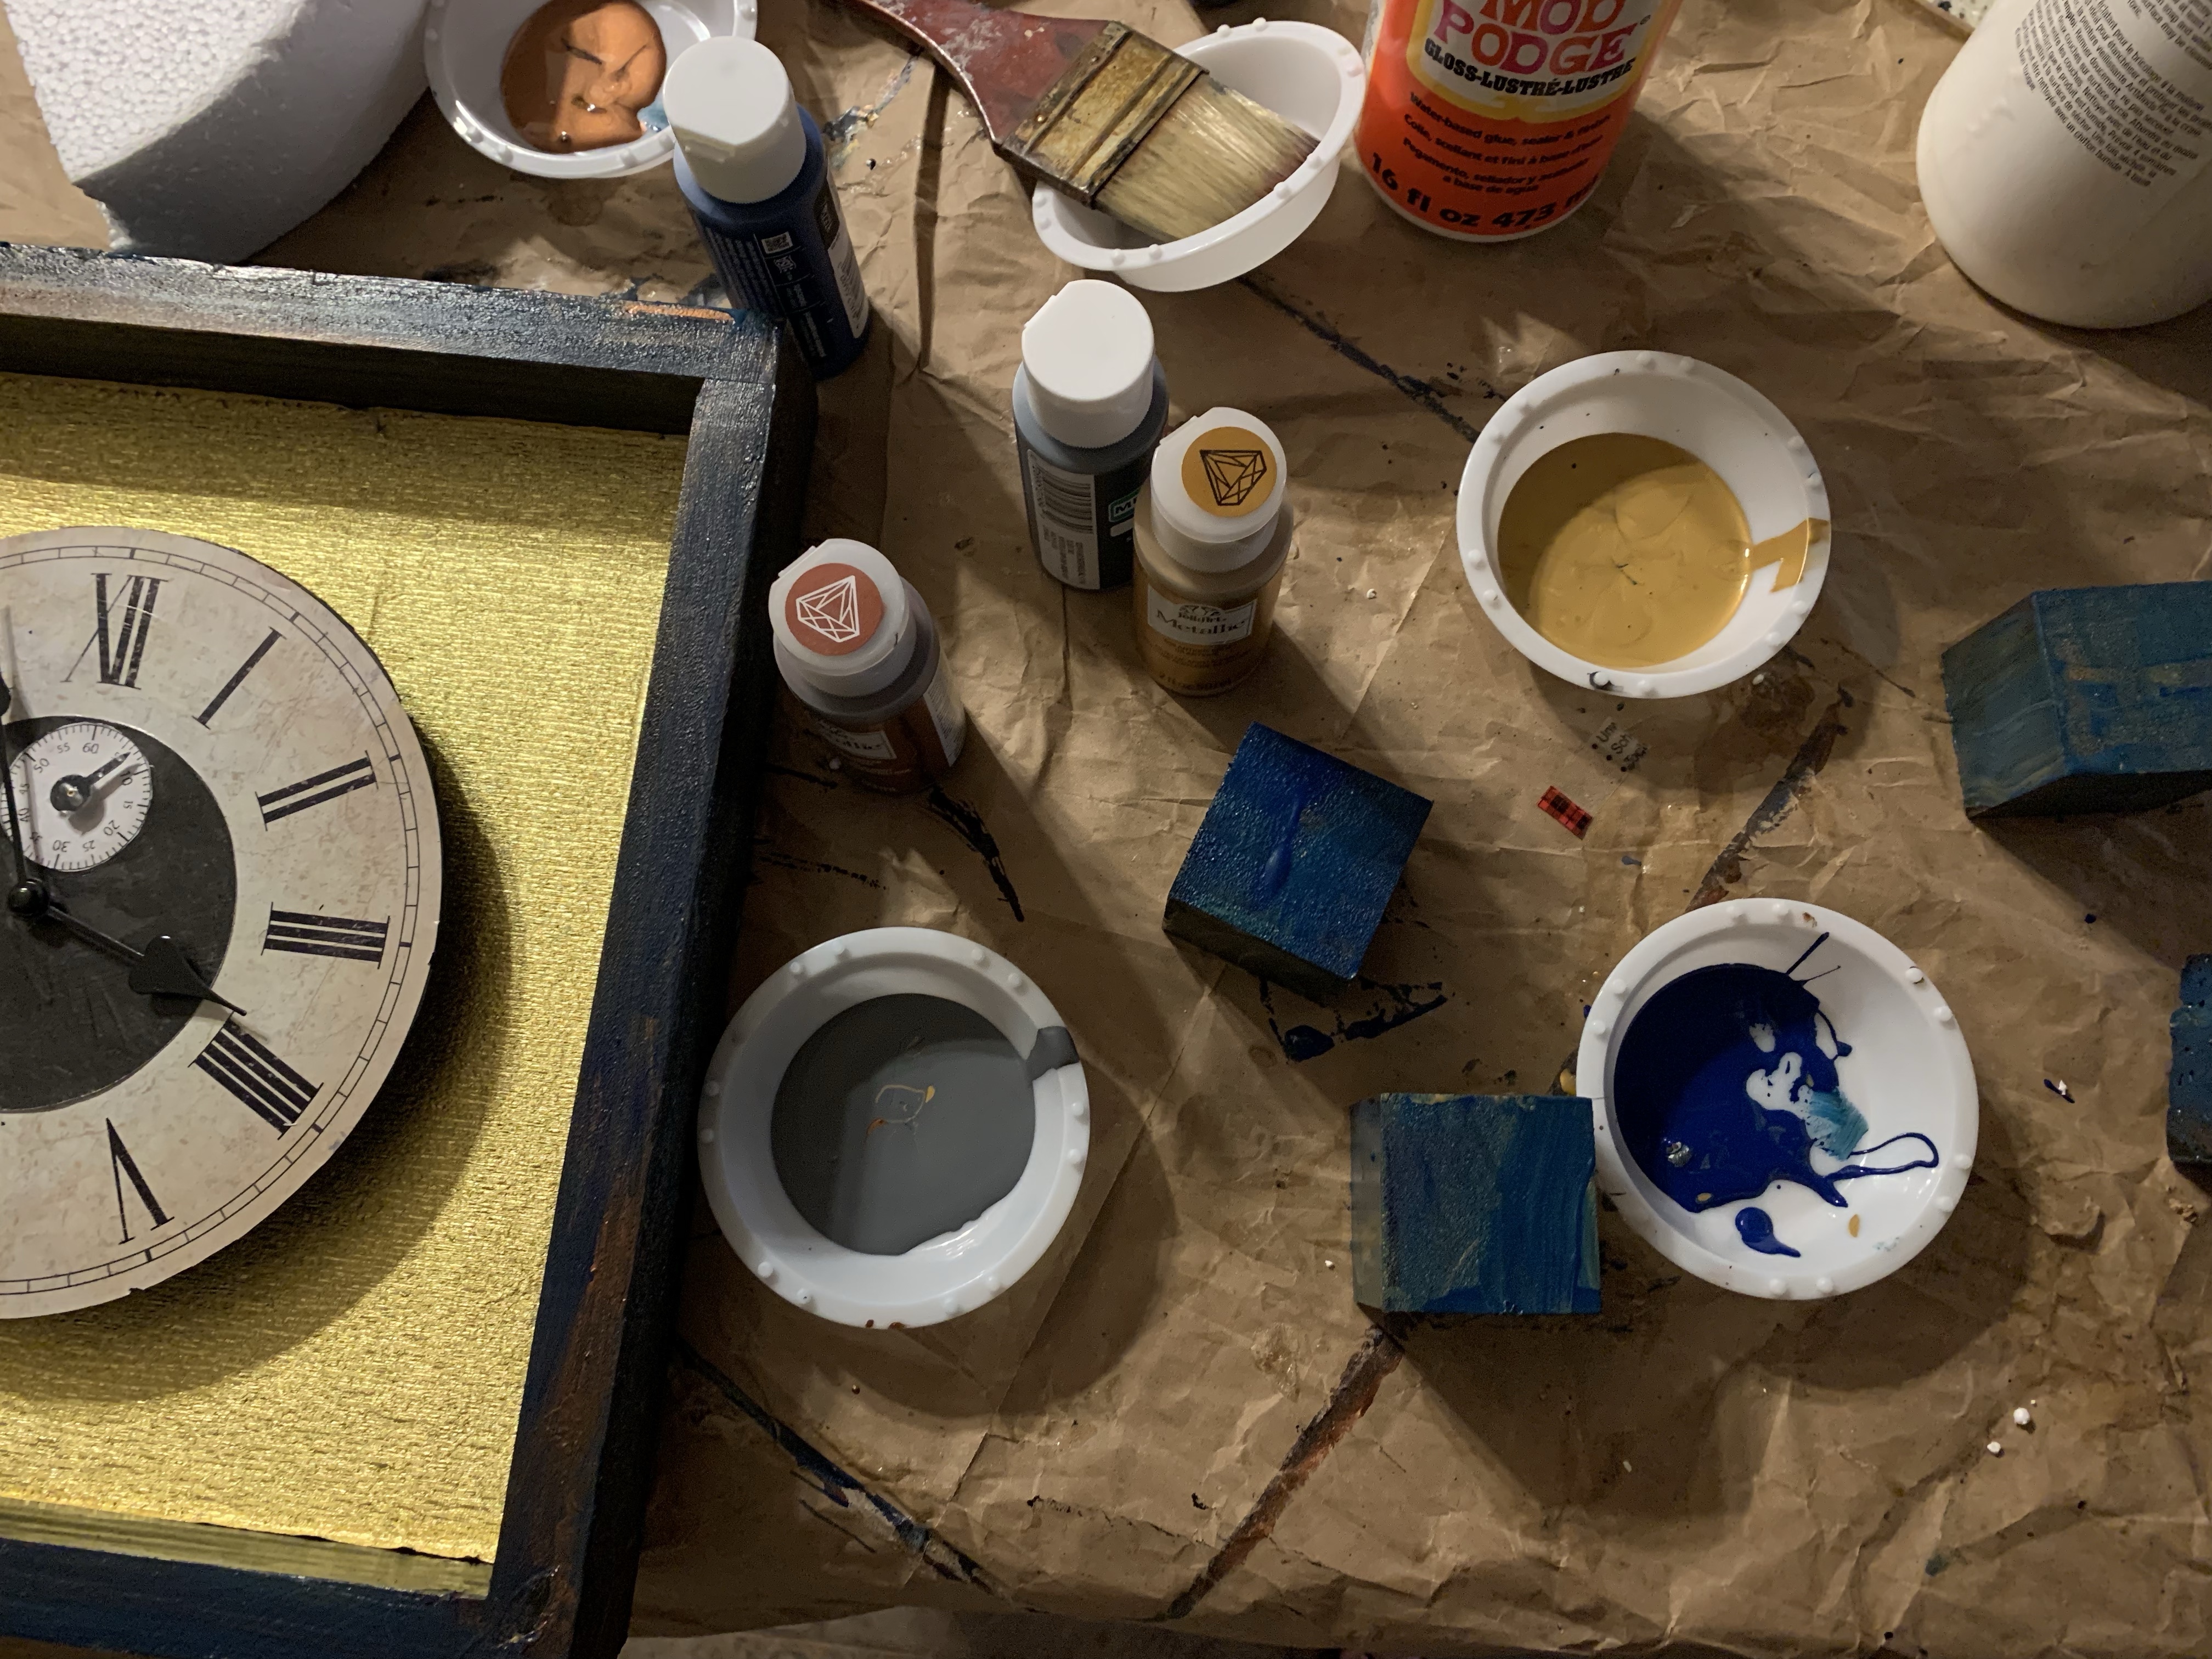
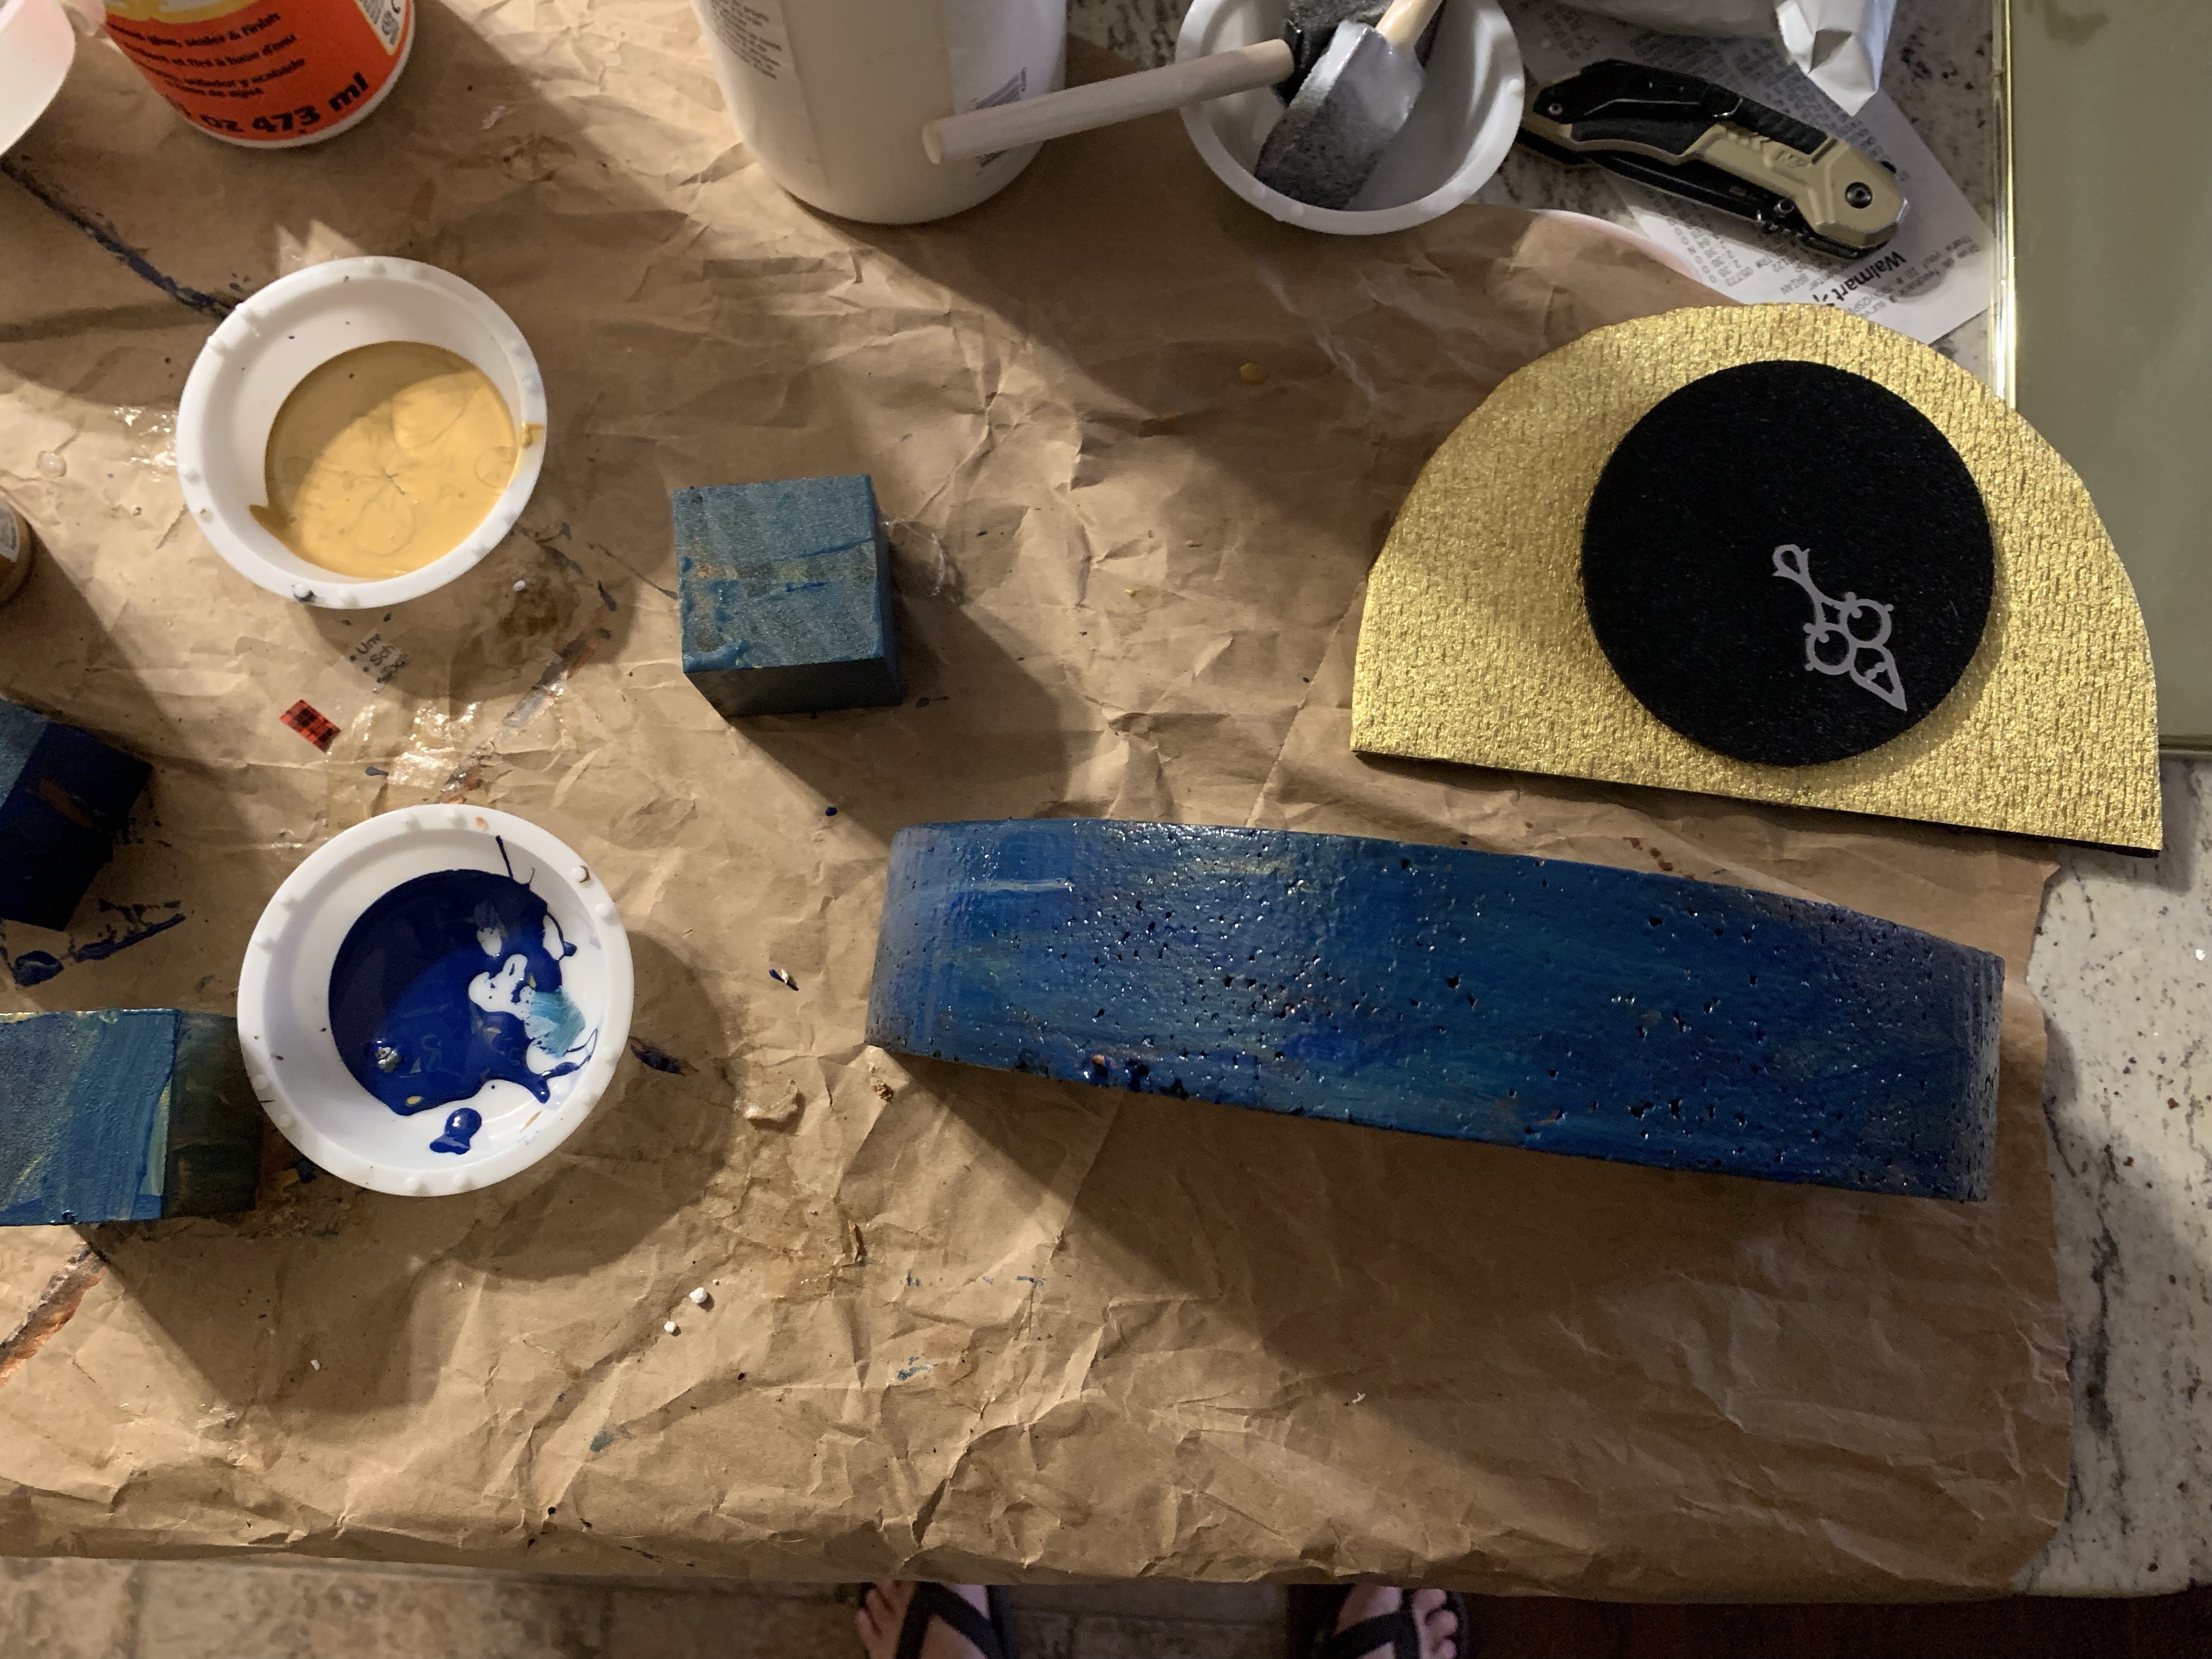
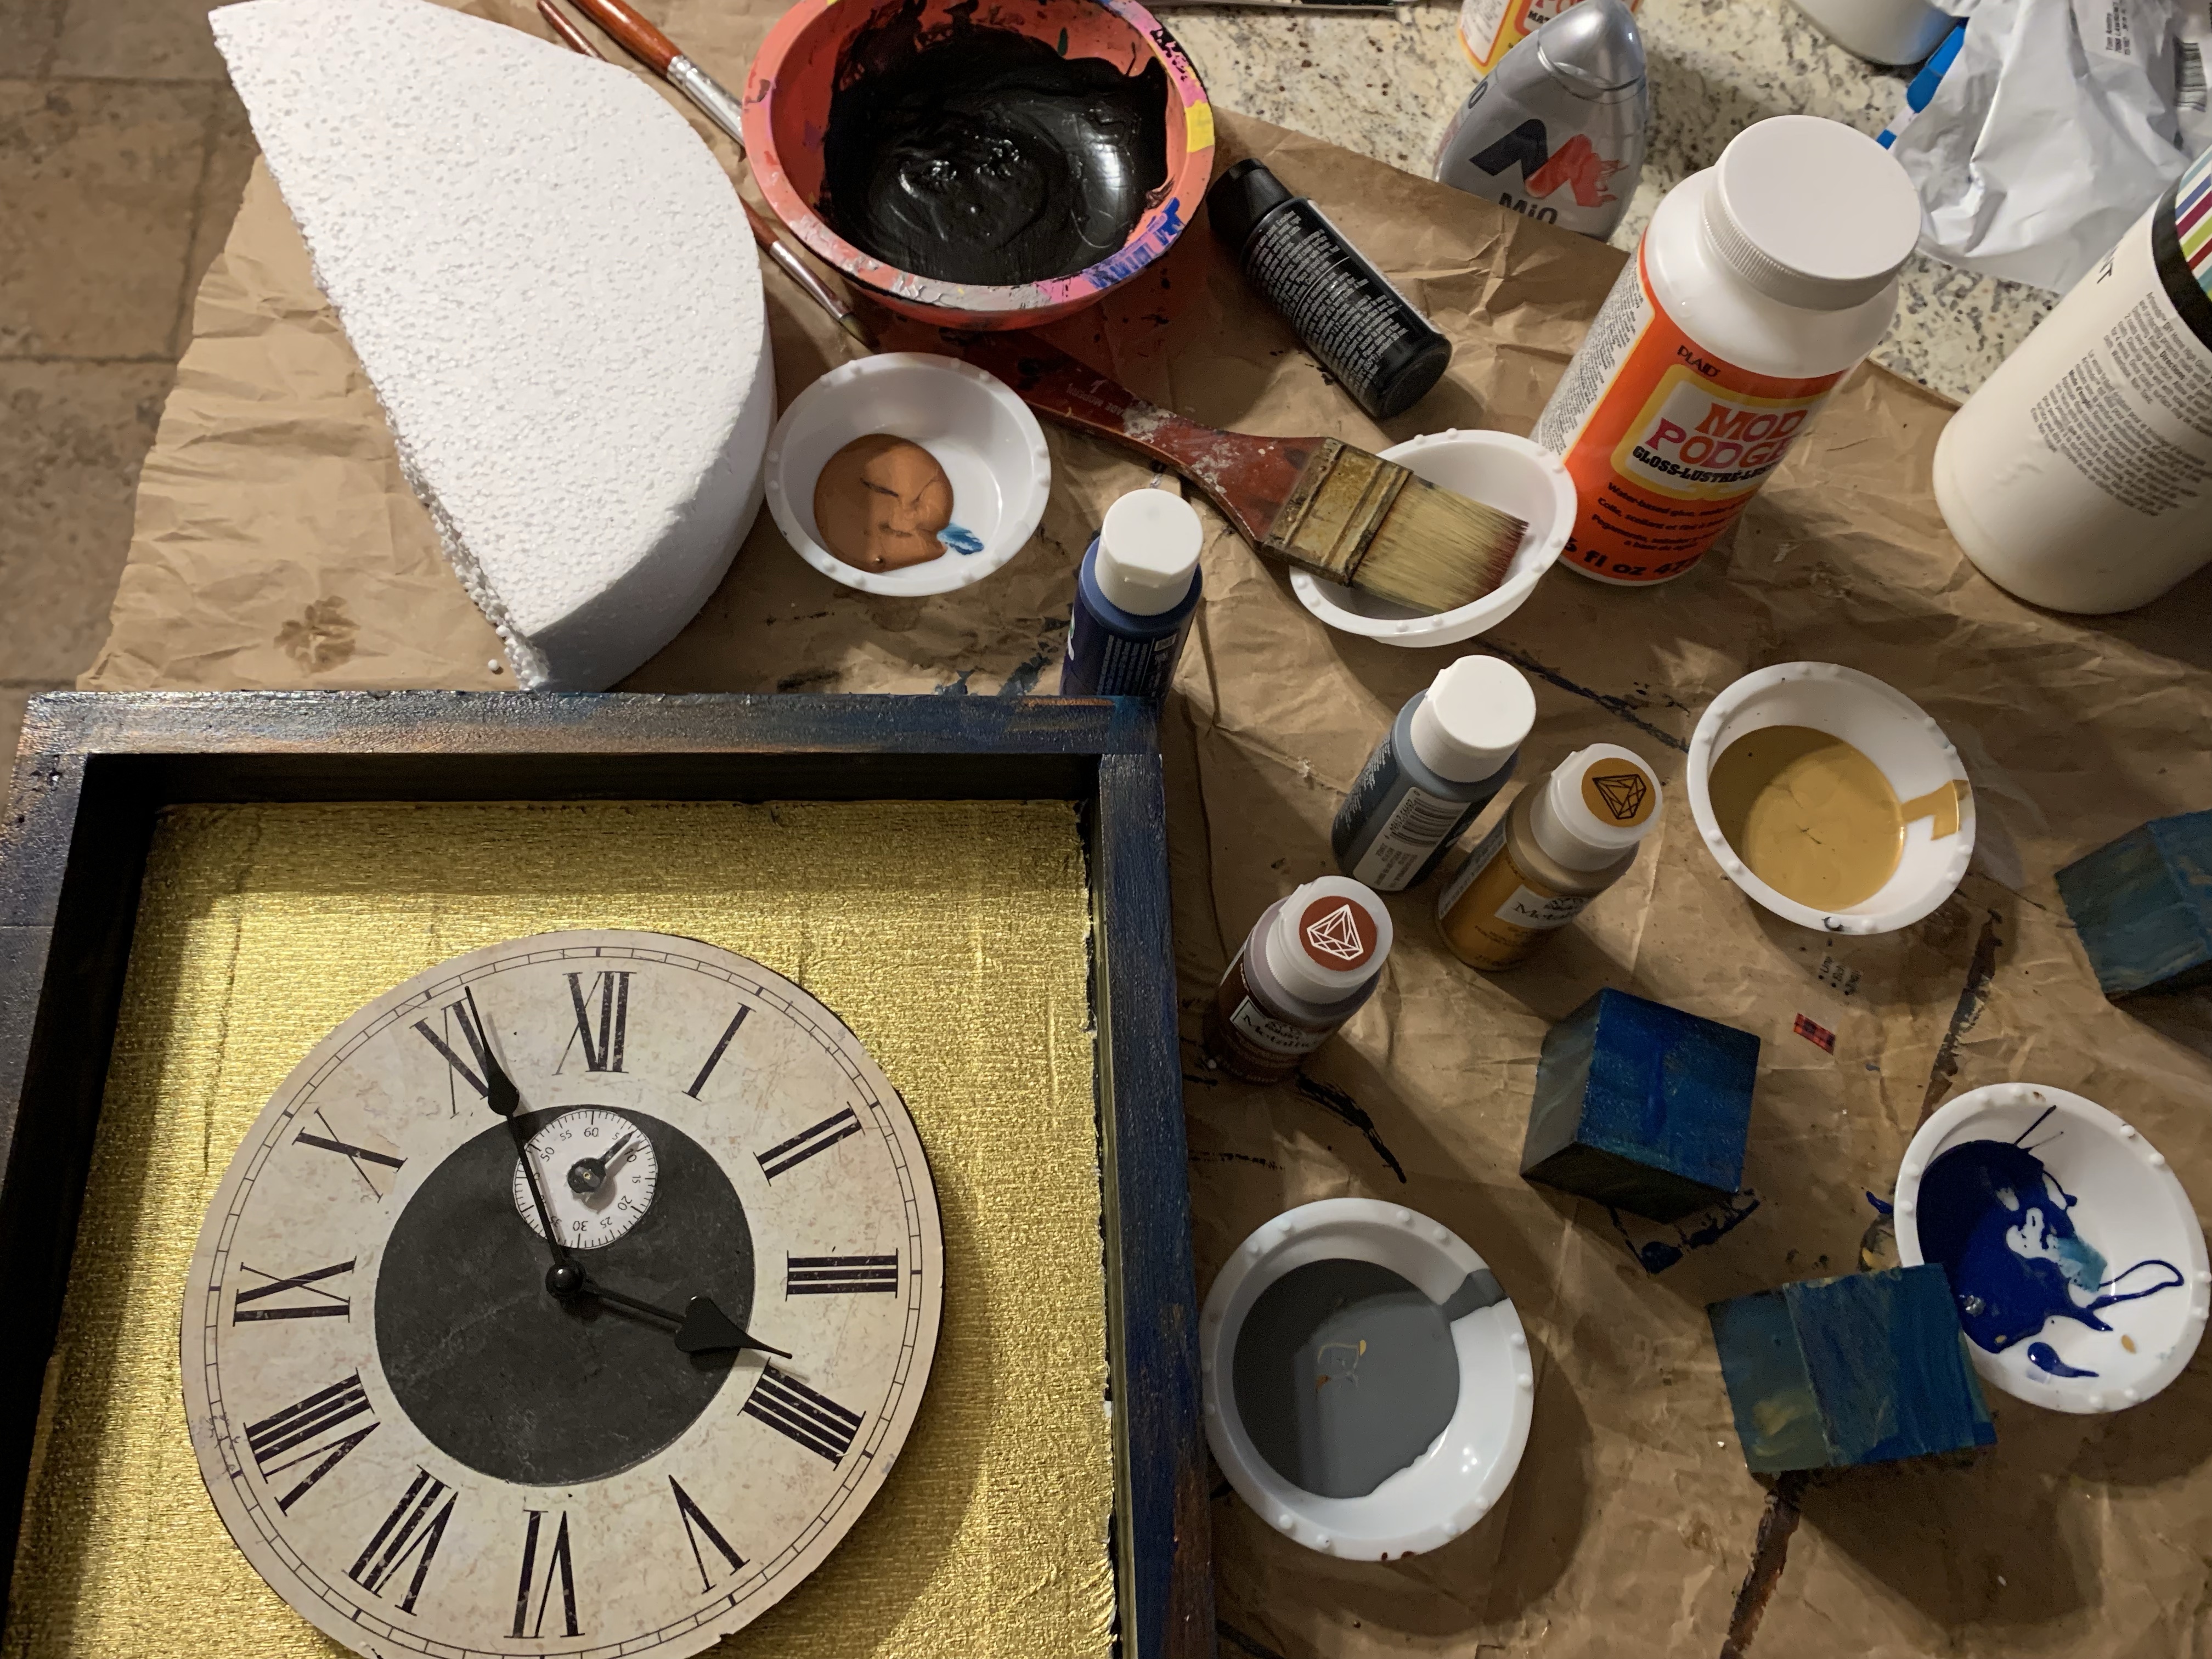
I started with this 12 x 12 box I found at Walmart. This was the exact shape I was looking for, so I started by painting it all black inside and outside. Once the black paint dried I used metallic gold, metallic copper, and dark granite to add stipes/splotches on the black paint, then used the dark blue paint to cover/smooth out the paints. I wanted to give it an old, antiqued look.
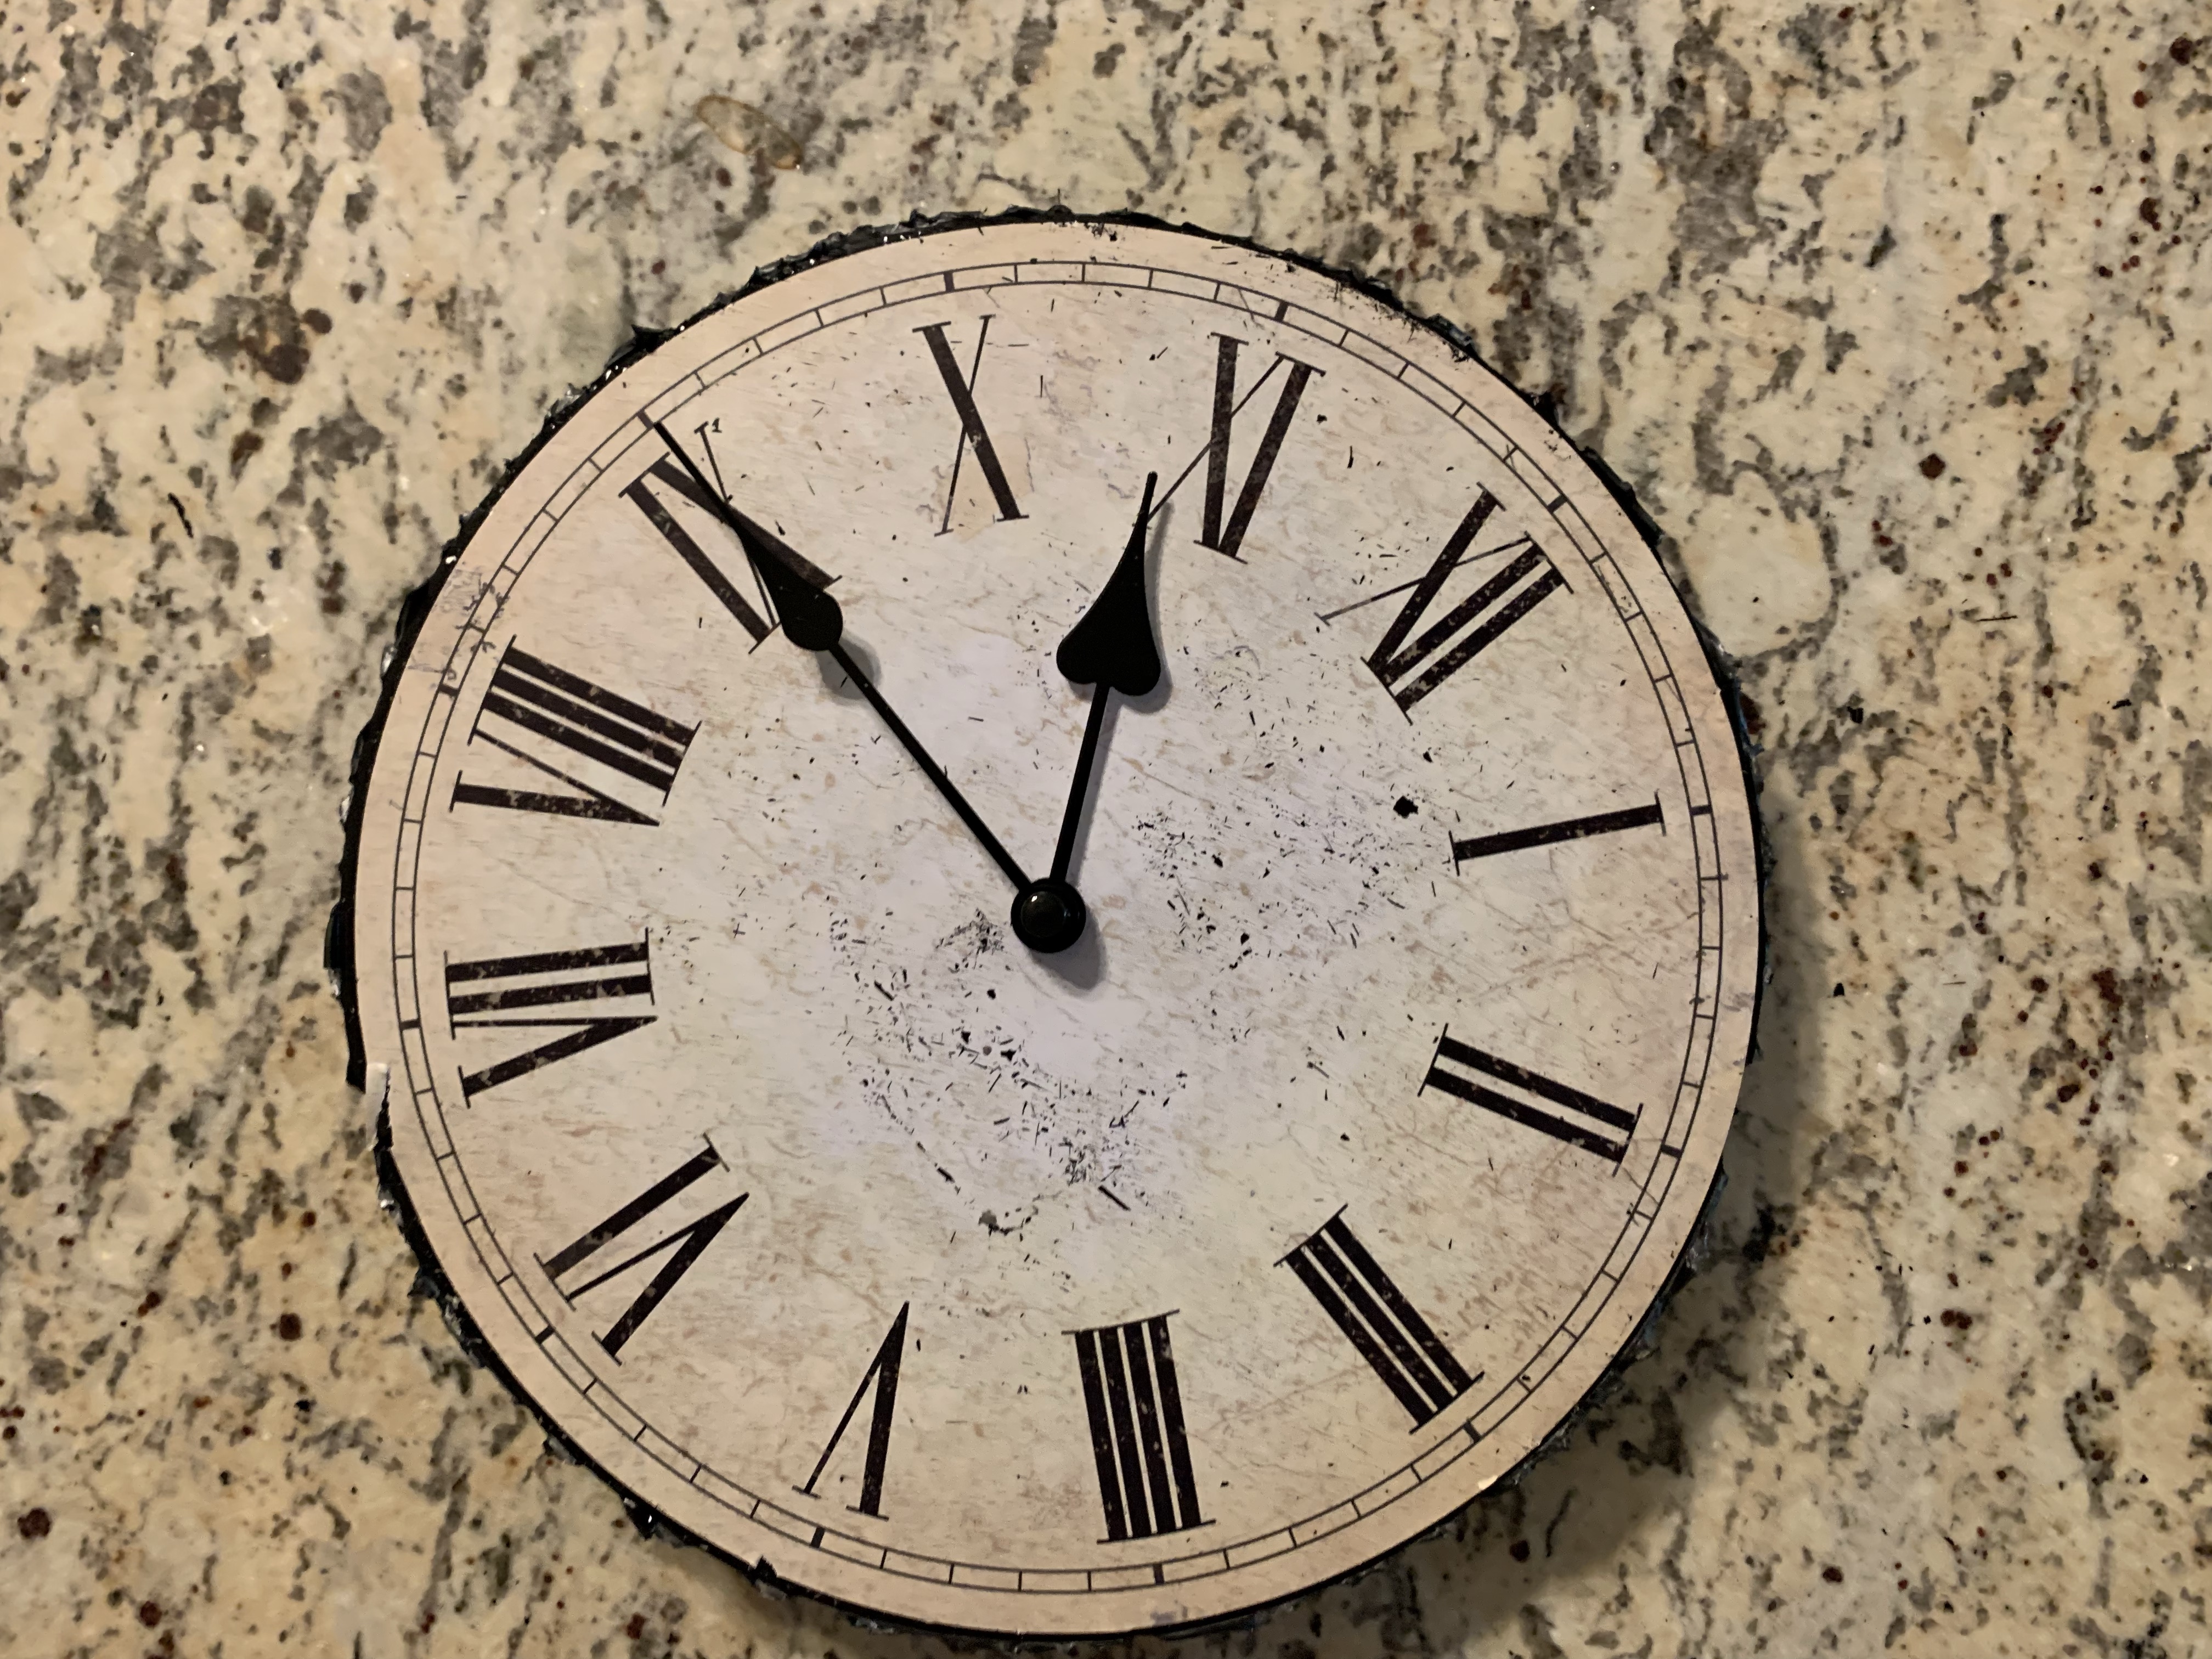
I found a cheap clock that I wanted to use for the clock face, but the clock face was glued onto the plastic, so I had to break off all the plastic bits surrounding the clock face. Then I cut the plastic with scissors to make it as smooth as possible.
I found an image of a seconds dial online and printed that out. I cut the seconds hand from my clock hands kit to a shorter size. I cut the black marble paper in a circle to place on top of the clock face. The black circle was glued on top of the clock face and then the seconds dial was glued on top of that (under the XII). I used a glue gun to glue the seconds hand onto the seconds dial.
I glued the gold scrapbooking paper inside the wood box. Then I used the glue gun to glue the clock face into the wood box.
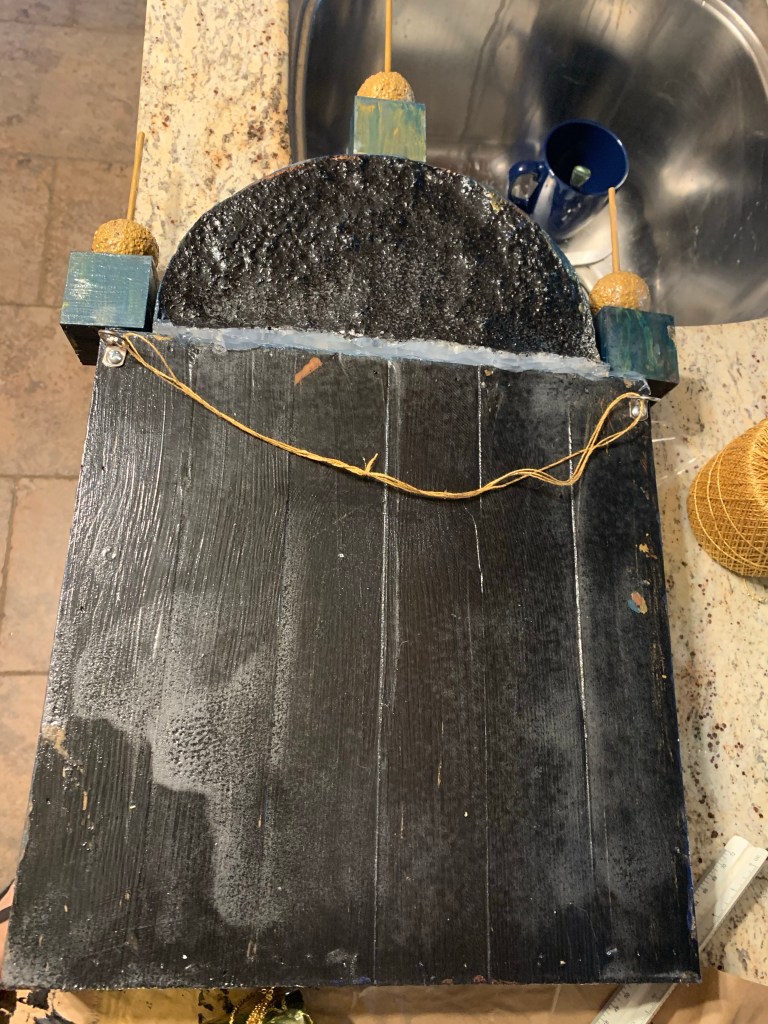
Next, I took the Styrofoam circle and cut it in half to have a half circle. The box was 12 x 12, so I got a 10″ diameter circle, so I’d have 2 extra inches at the top. I painted the Styrofoam the same way I painted the box, as well as the 3 wood blocks. At the same time I had a piece of card board that I cut to fit inside the half circle. I glued more gold scrapbooking paper to the cardboard. I took the cork coaster and painted it black The minutes hand from my clock hand set was glued on top of this. Then this was glued on top of the gold cardboard. Then the gold cardboard was glued to the Styrofoam with a glue gun. Now the whole thing was glued together, on top of the clock box, using a glue gun.
To make the Grandfather clock weights, I used toilet paper rolls and glued the gold wrap on top of them. I made four. I also bought an actual pendulum, so I didn’t make one, but as a back up I would have used another cork coaster and the gold wrap, if I had to make one.
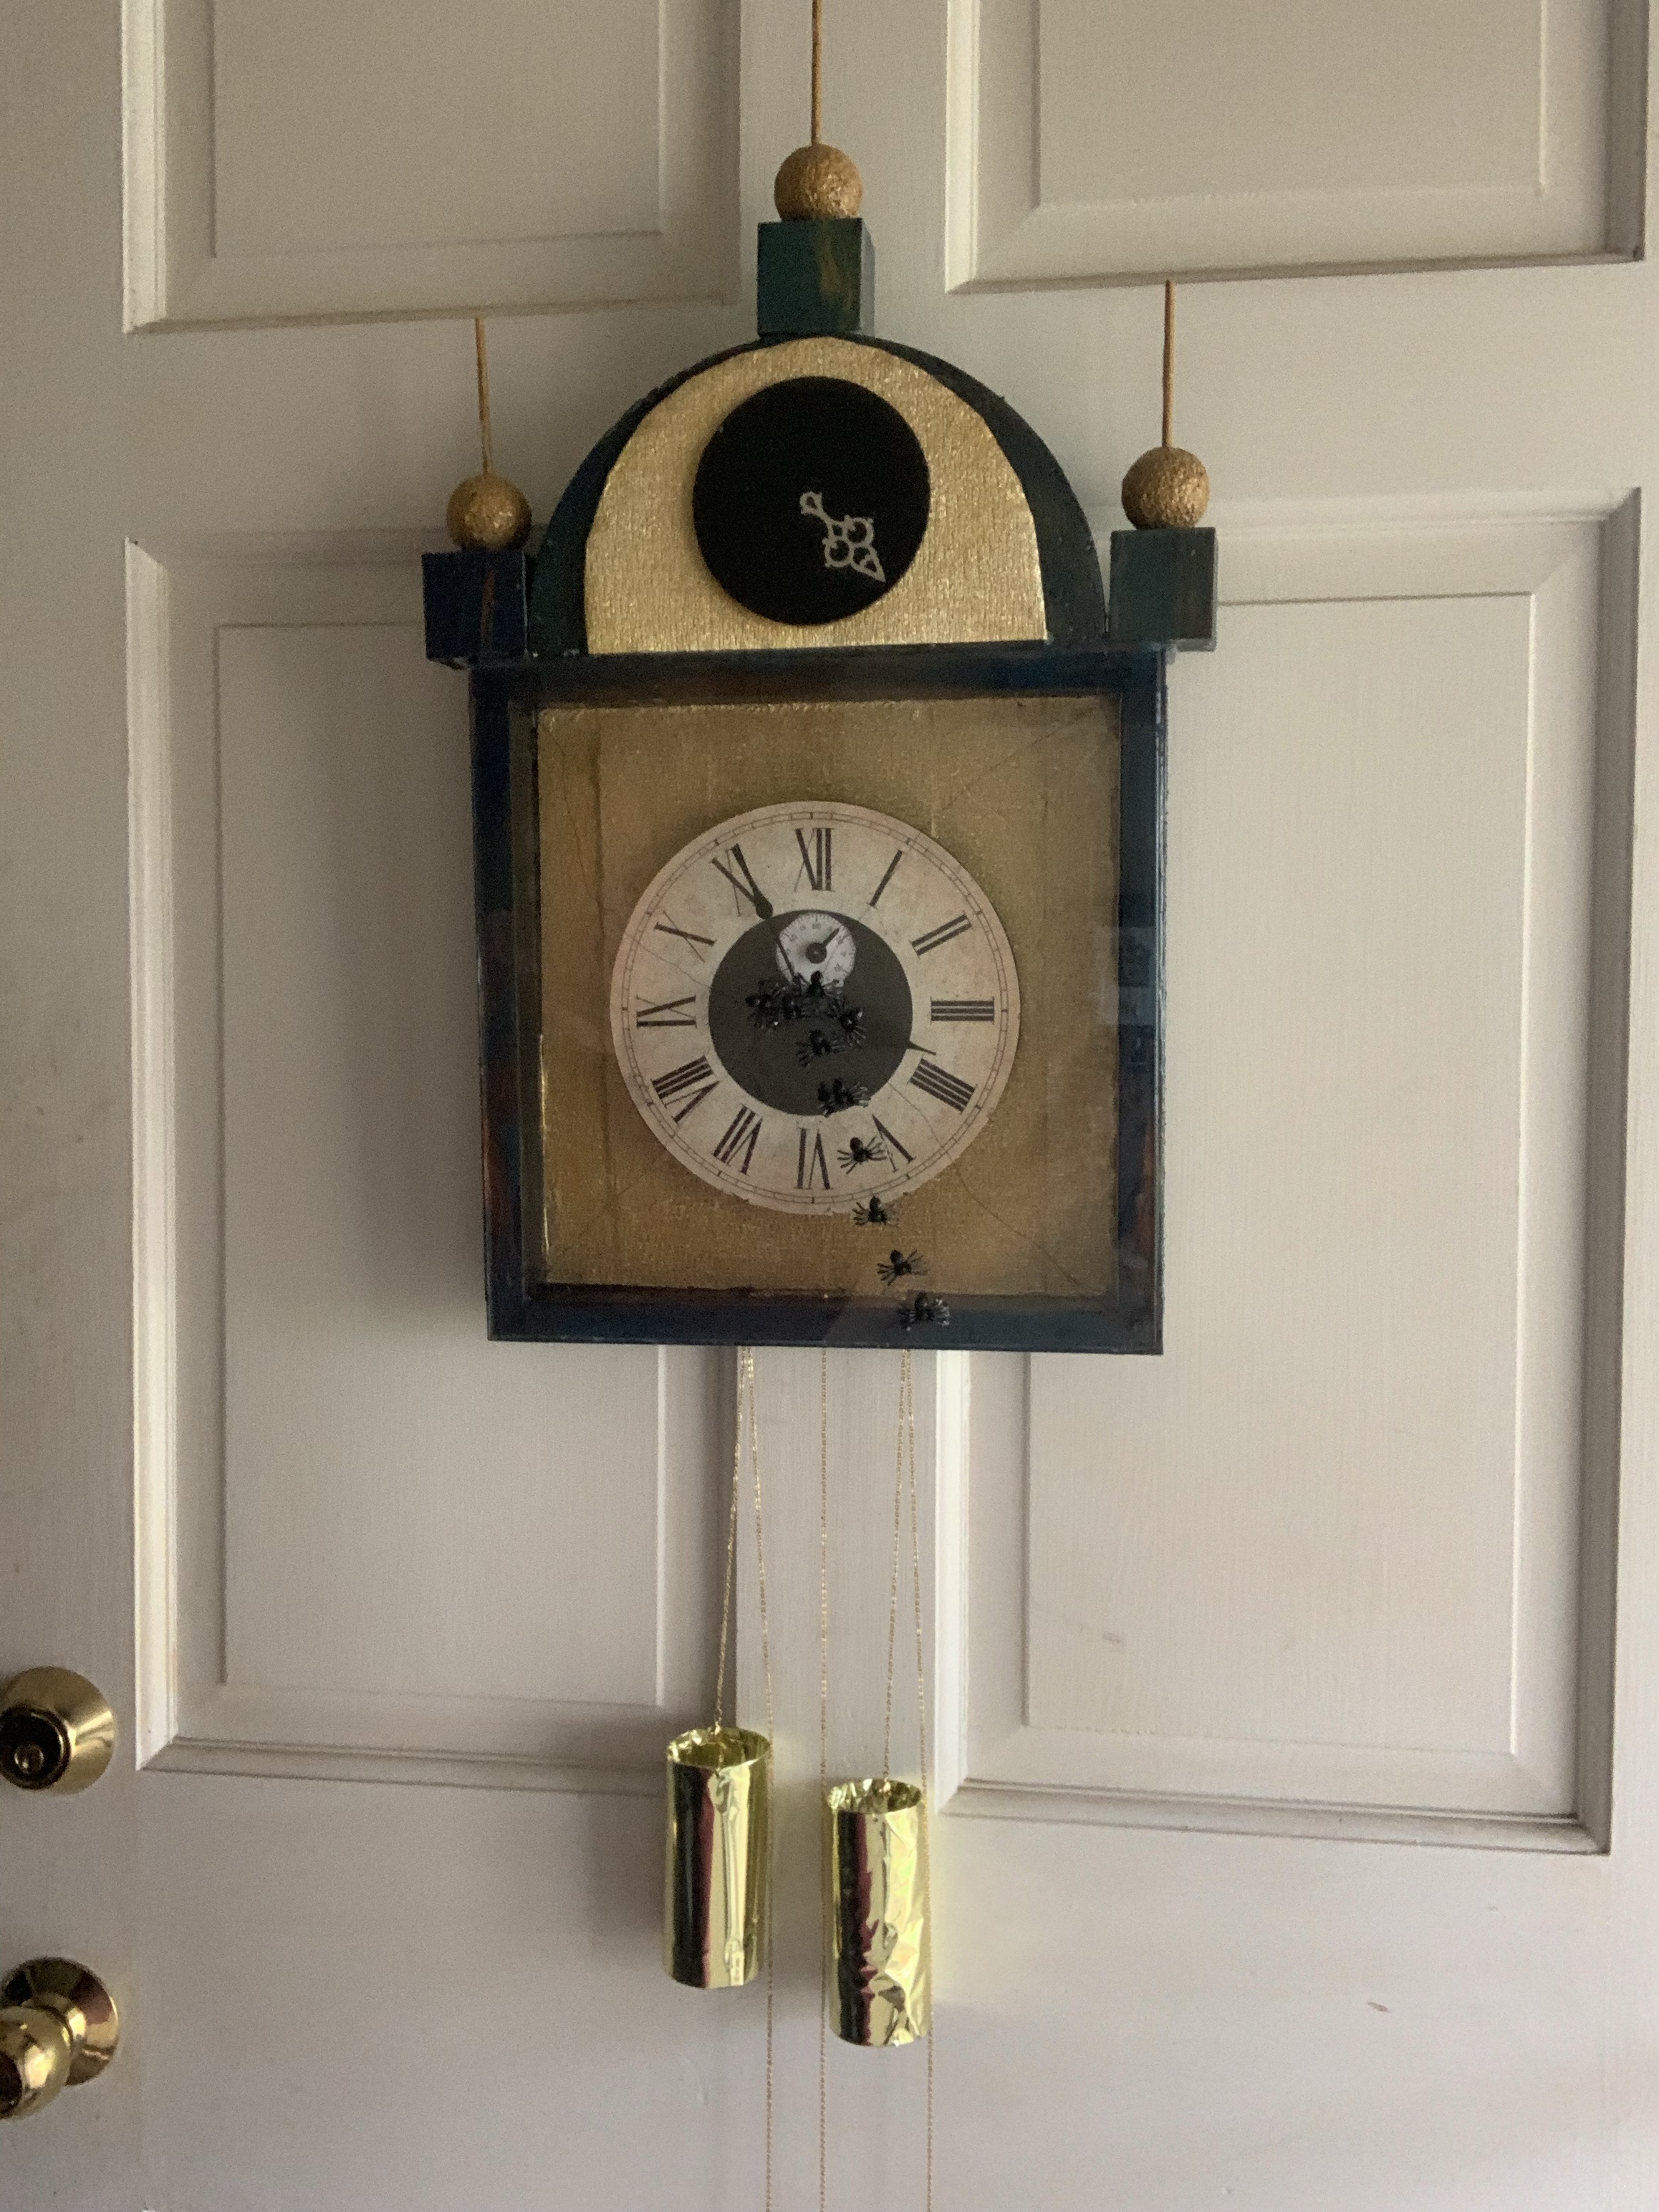
I drilled holes in the bottom of the box so the weight and pendulum chains could hang through. I attached the chains, weights and the pendulum to the box. Next I glued the plexiglass on top of the block. I specifically purchased a 12 x 12 size so I wouldn’t have to cut it. Originally I wanted to crack or break it so I’d have the cracks in the glass, but the plexiglass was too strong. Probably best anyway because it probably would have been harder to glue that on if it were broken.
I used a sharpie to draw the cracks in the glass. Then I glued little spiders on the plexiglass. I tried to use a spray rubber to help protect the clock from the elements since it will be outside for a month. Unfortunately, despite the layers of paint and sealers that I had on the Styrofoam, it still started to melt a little when I applied the rubber spray.
I bought some shellac, so I will likely add more waterproofing before hanging up the decorations in October, but for now, the clock is done and is waiting to be hung on the tree.
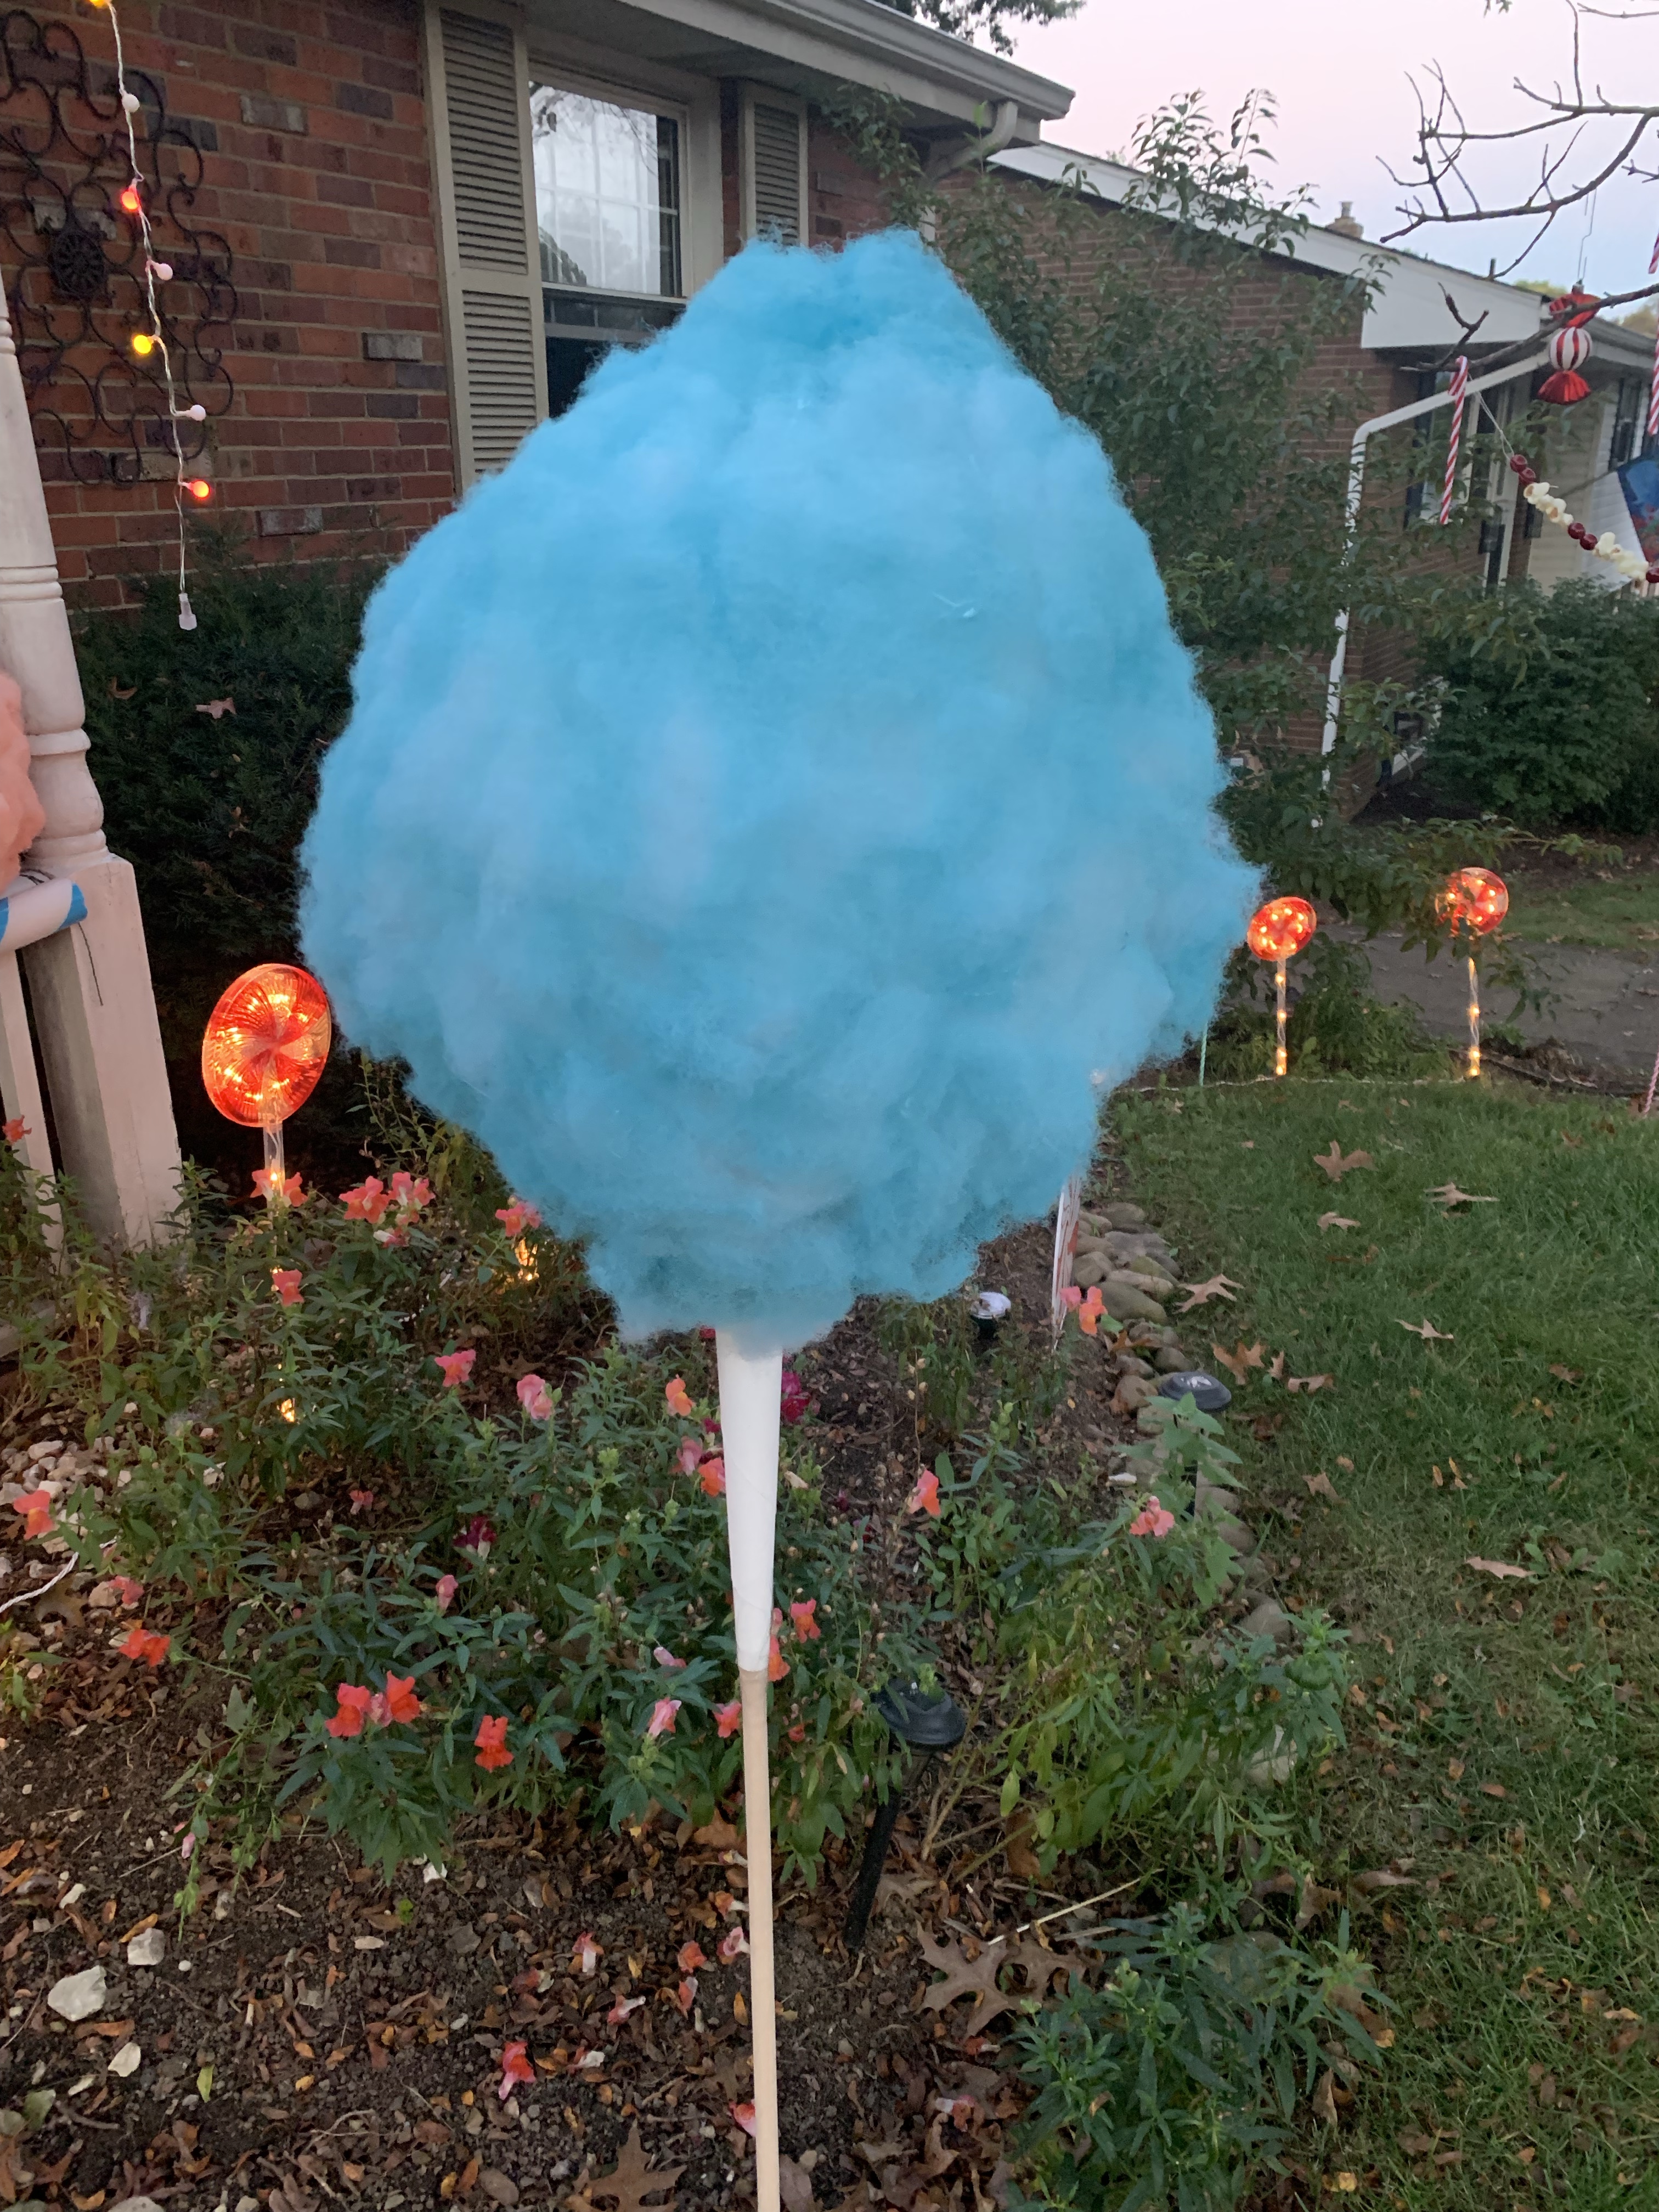
The second Hansel and Gretel prop I made for Halloween this year were giant cotton candy inspired by this pin. It doesn’t look like that blog is available anymore, but making these is actually pretty easy, as long as you don’t mind hot glue gun burns.
Materials:
Wood dowels (to stake the cotton candy in the ground)
Plastic Poster Board (plastic to be weather proof outside)
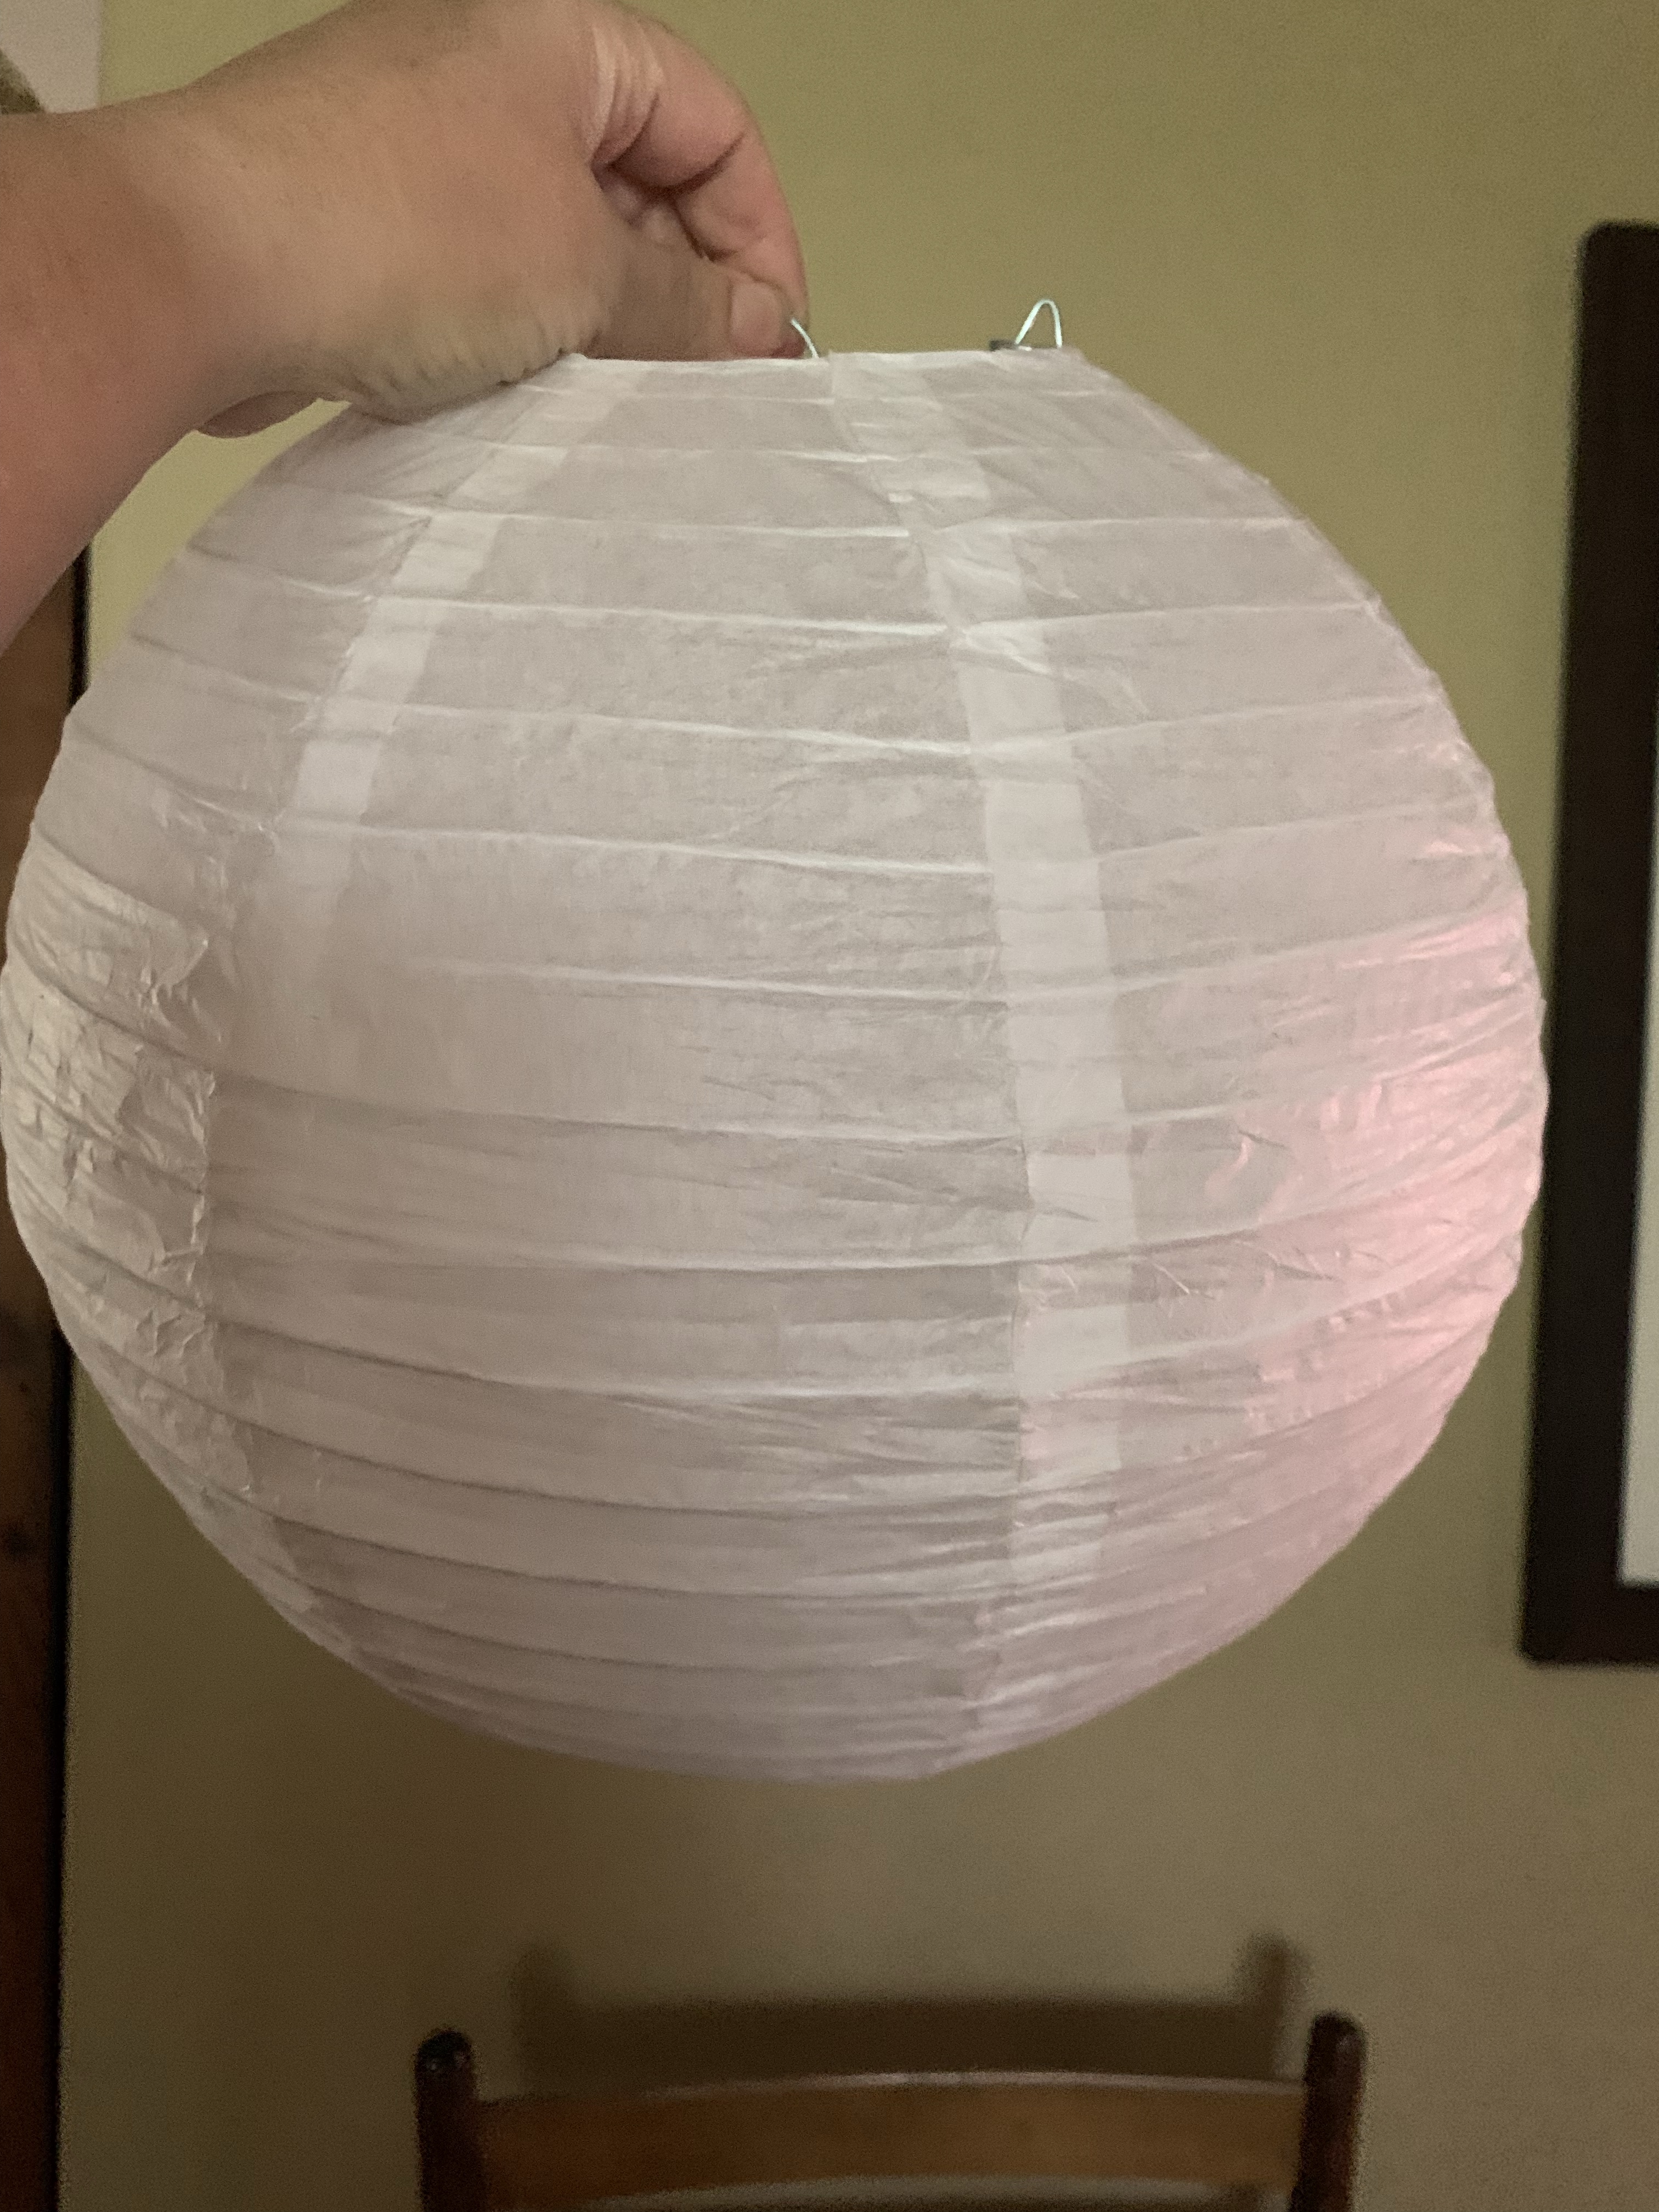
Chinese Paper Lanterns (not the wishing lanterns, the round decorative lanterns)
Poly-fil
Hot Glue
Spray Paint
Large Gift Basket Bag (Optional)
Bow (Optional)
To start, roll the poster board into a cotton candy cone shape. There are some You tune videos out there if you need help. I tried to make sure there was a large enough hole in the cone that my wood dowel would fit into. Tape the cone down and slide the wood dowel into the cone. Then I taped the cone onto the wood dowel.
Next put together the Chinese paper lantern. I slide the dowel and cone into the lantern from the top and then hooked the lantern onto the top of the cone.
Now you will take pieces of the Poly-fil and glue them onto the lantern using the hot glue gun. If you really want to make a nice cotton candy, I think some wool roving would really look like cotton candy, but since I was making several of these, that was a bit expensive to try. It will take a lot of gluing and a lot of hot glue to make each cotton candy, I even went and bought a larger gun that uses larger sticks to make it faster to make.
Once all the Poly-fil is on the lantern, just spray paint the color you want. I did pink and blue.
To finish it off, use a large gift basket bag and bow (optional). I have bags on all of them to protect them from the weather, but they don’t all have bows, only a few came with the gift bags.
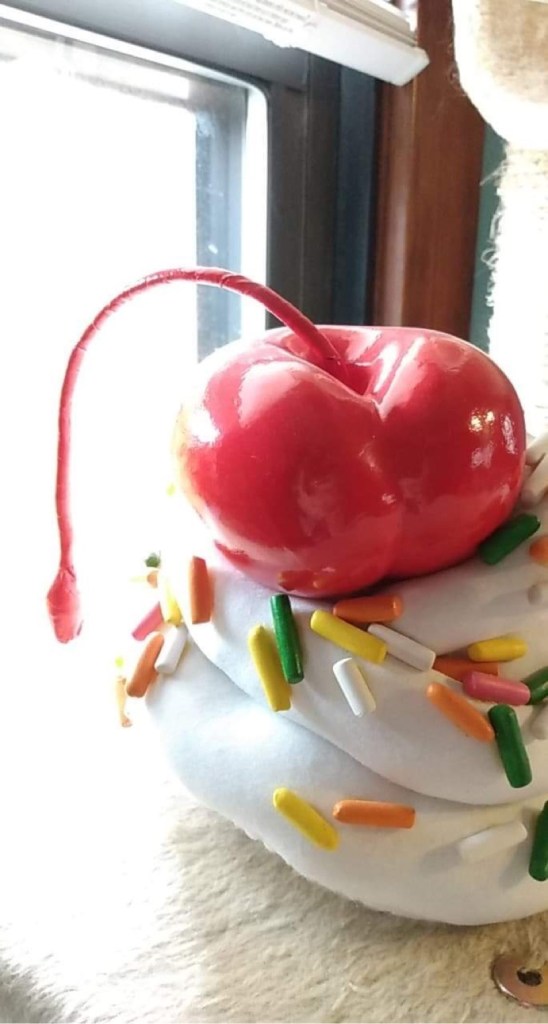
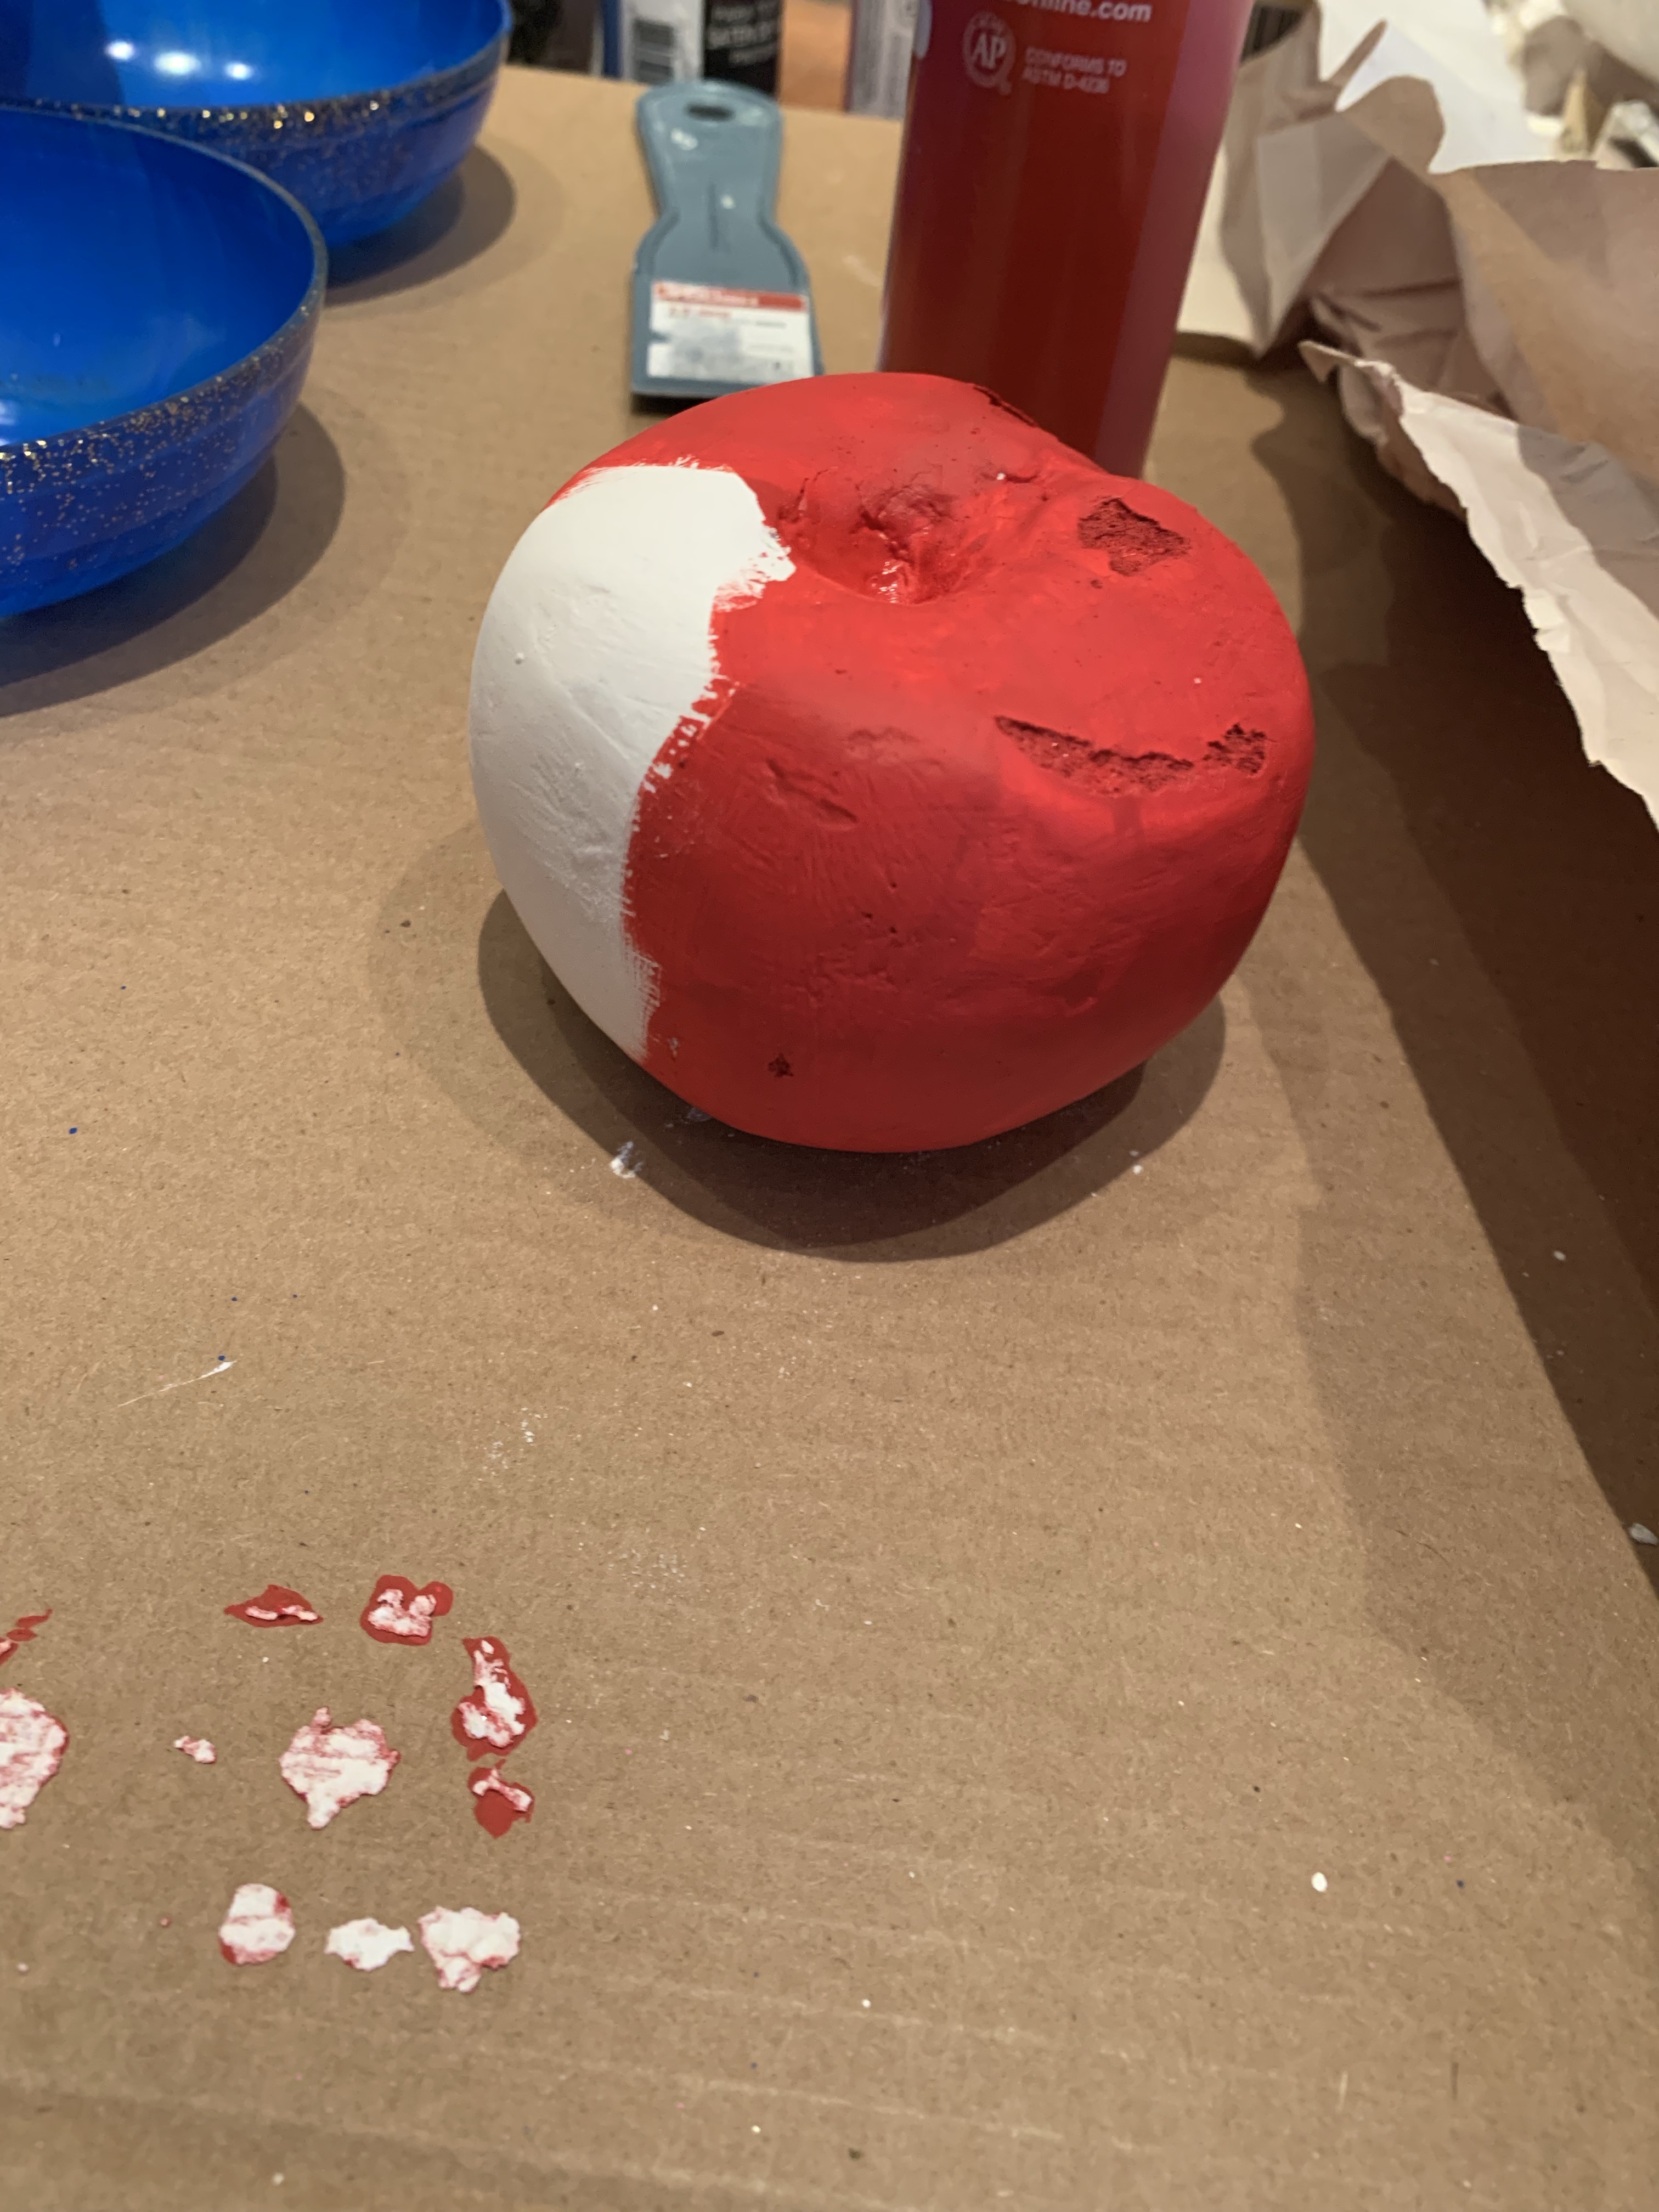
This year’s Halloween theme is Hansel and Gretel. My first prop that I made were large cupcakes, inspired by this pin. To make my cupcakes I decided they needed to be topped with cherries.
So a few years ago my friend Trish and her friend’s dressed up as banana splits, they each had different costumes and Trish made them hats topped with these amazing cherries she made. Trish is an artist and a Multimedia Designer at my company (super talented), so I asked her how she made her cherries, see one of her amazing banana split hats, below.
Banana Split Hat and cherry made by Trisha Fritz
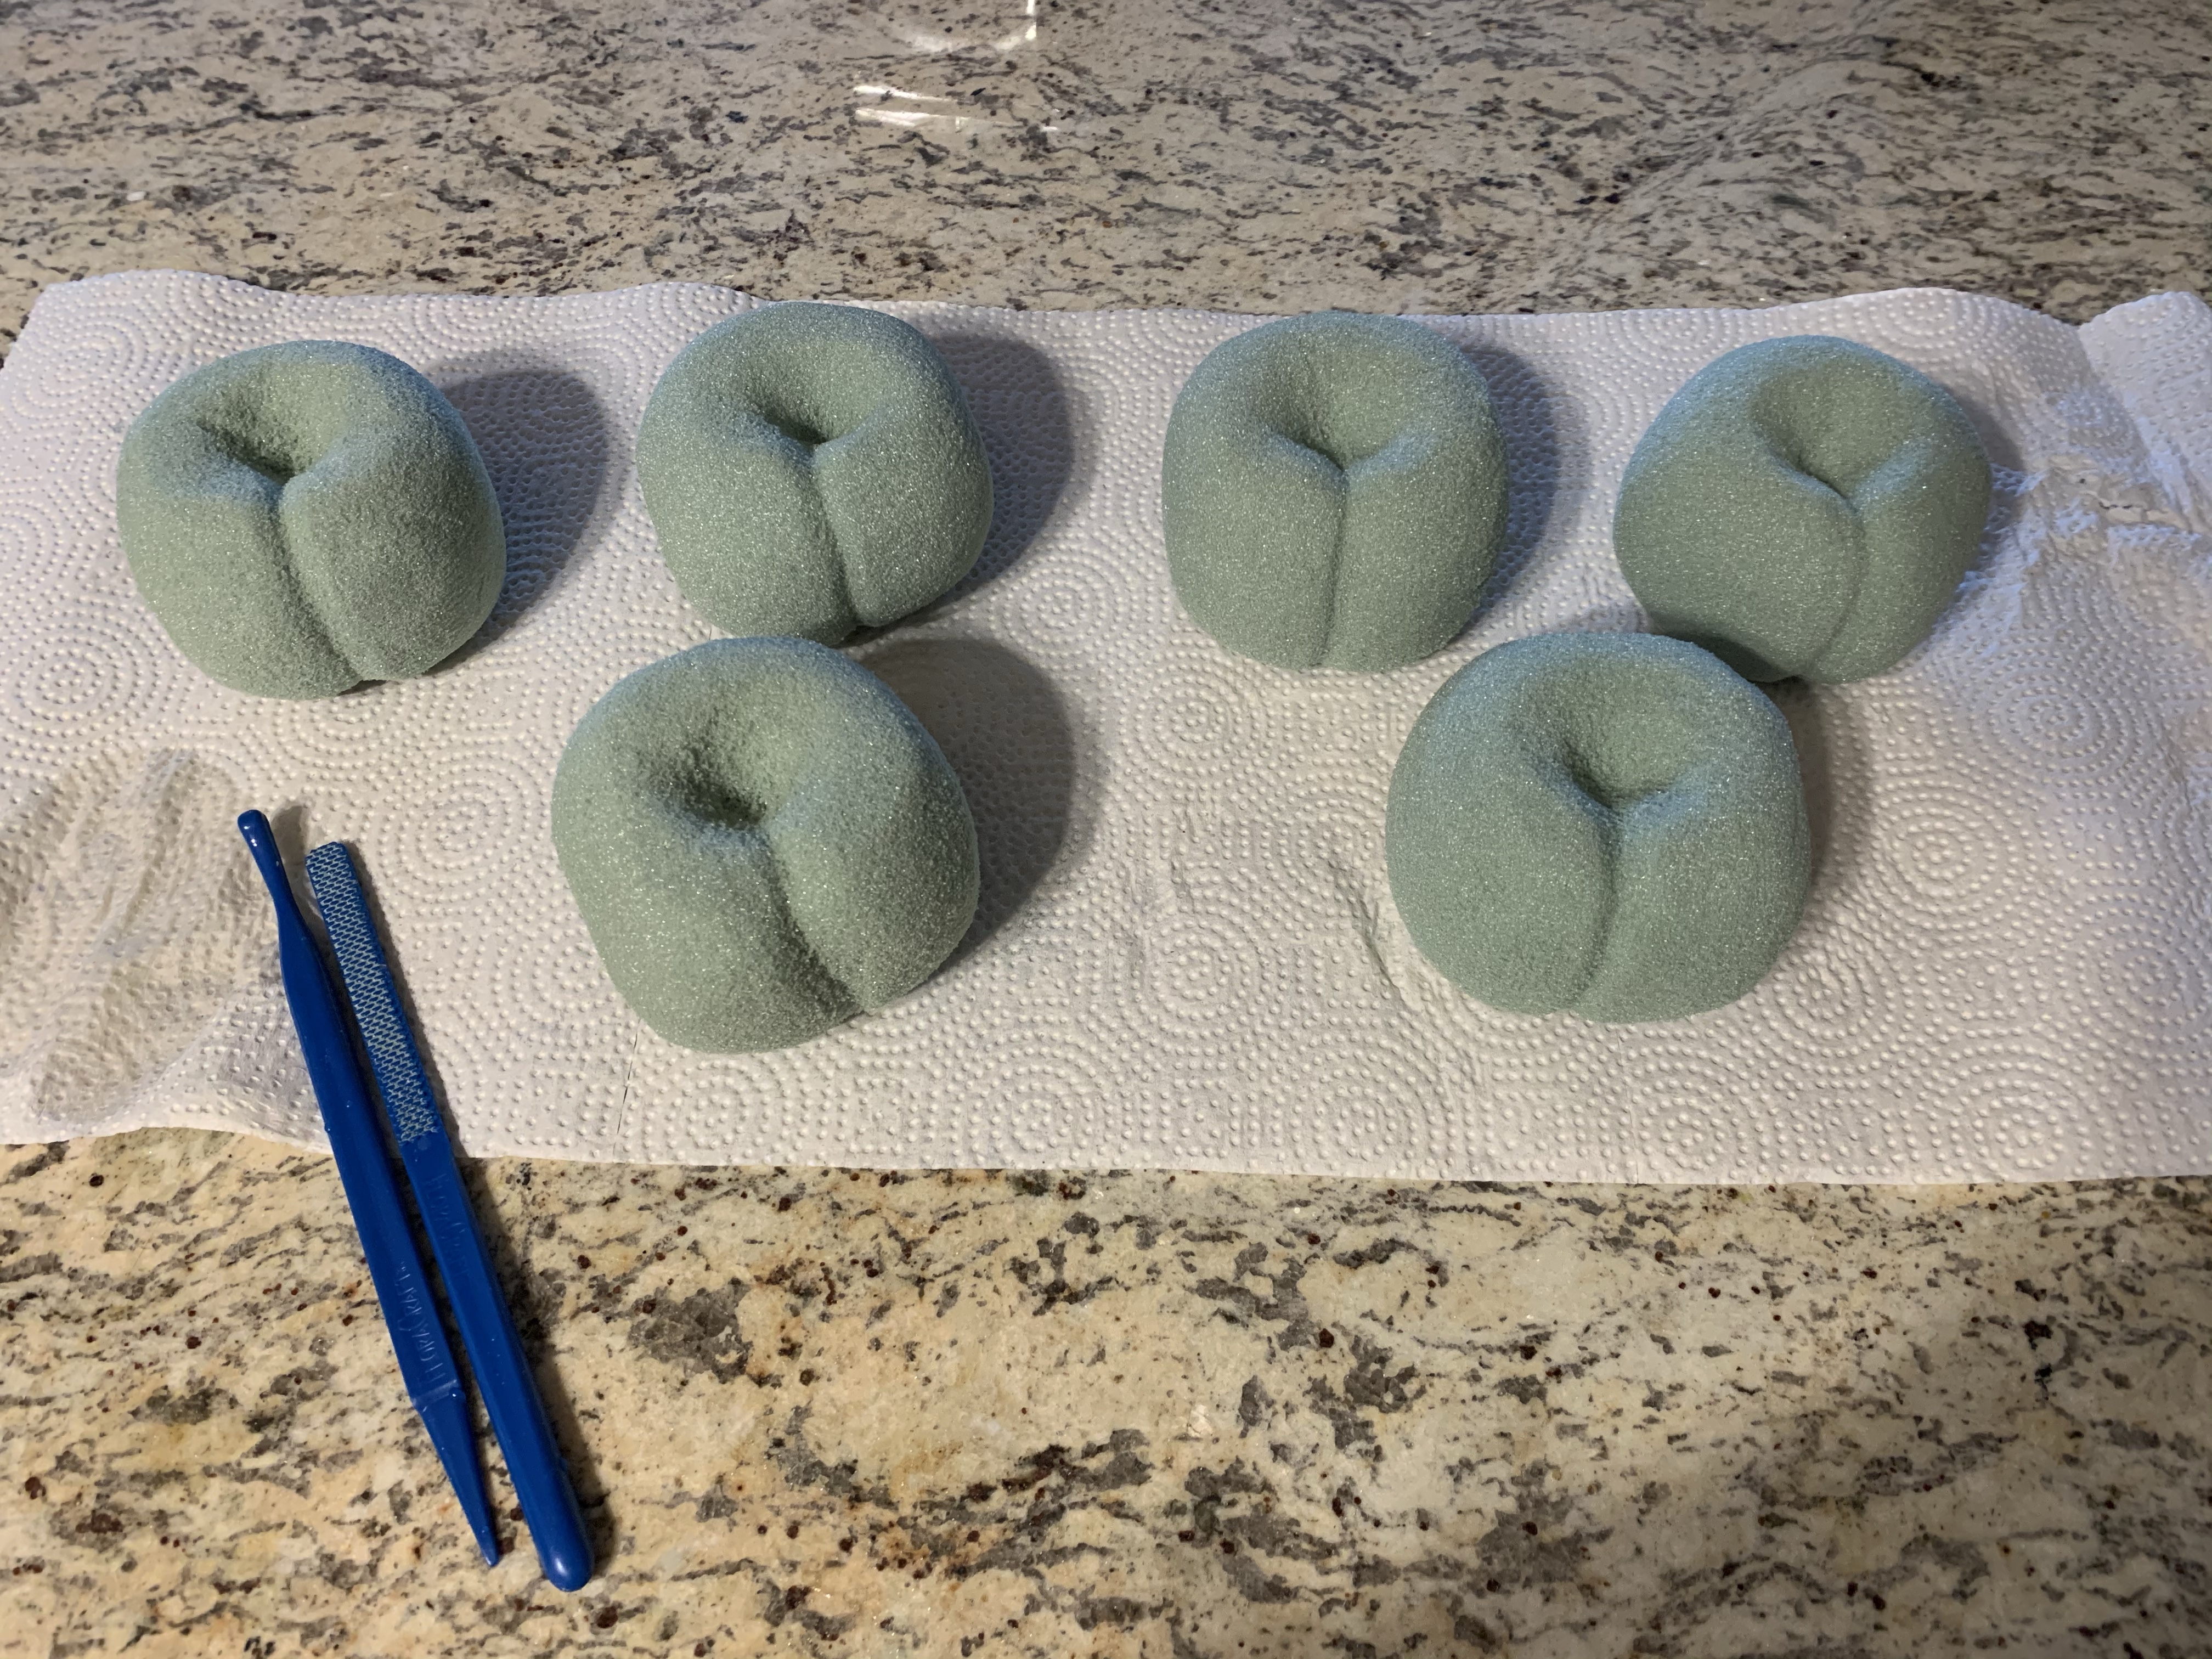
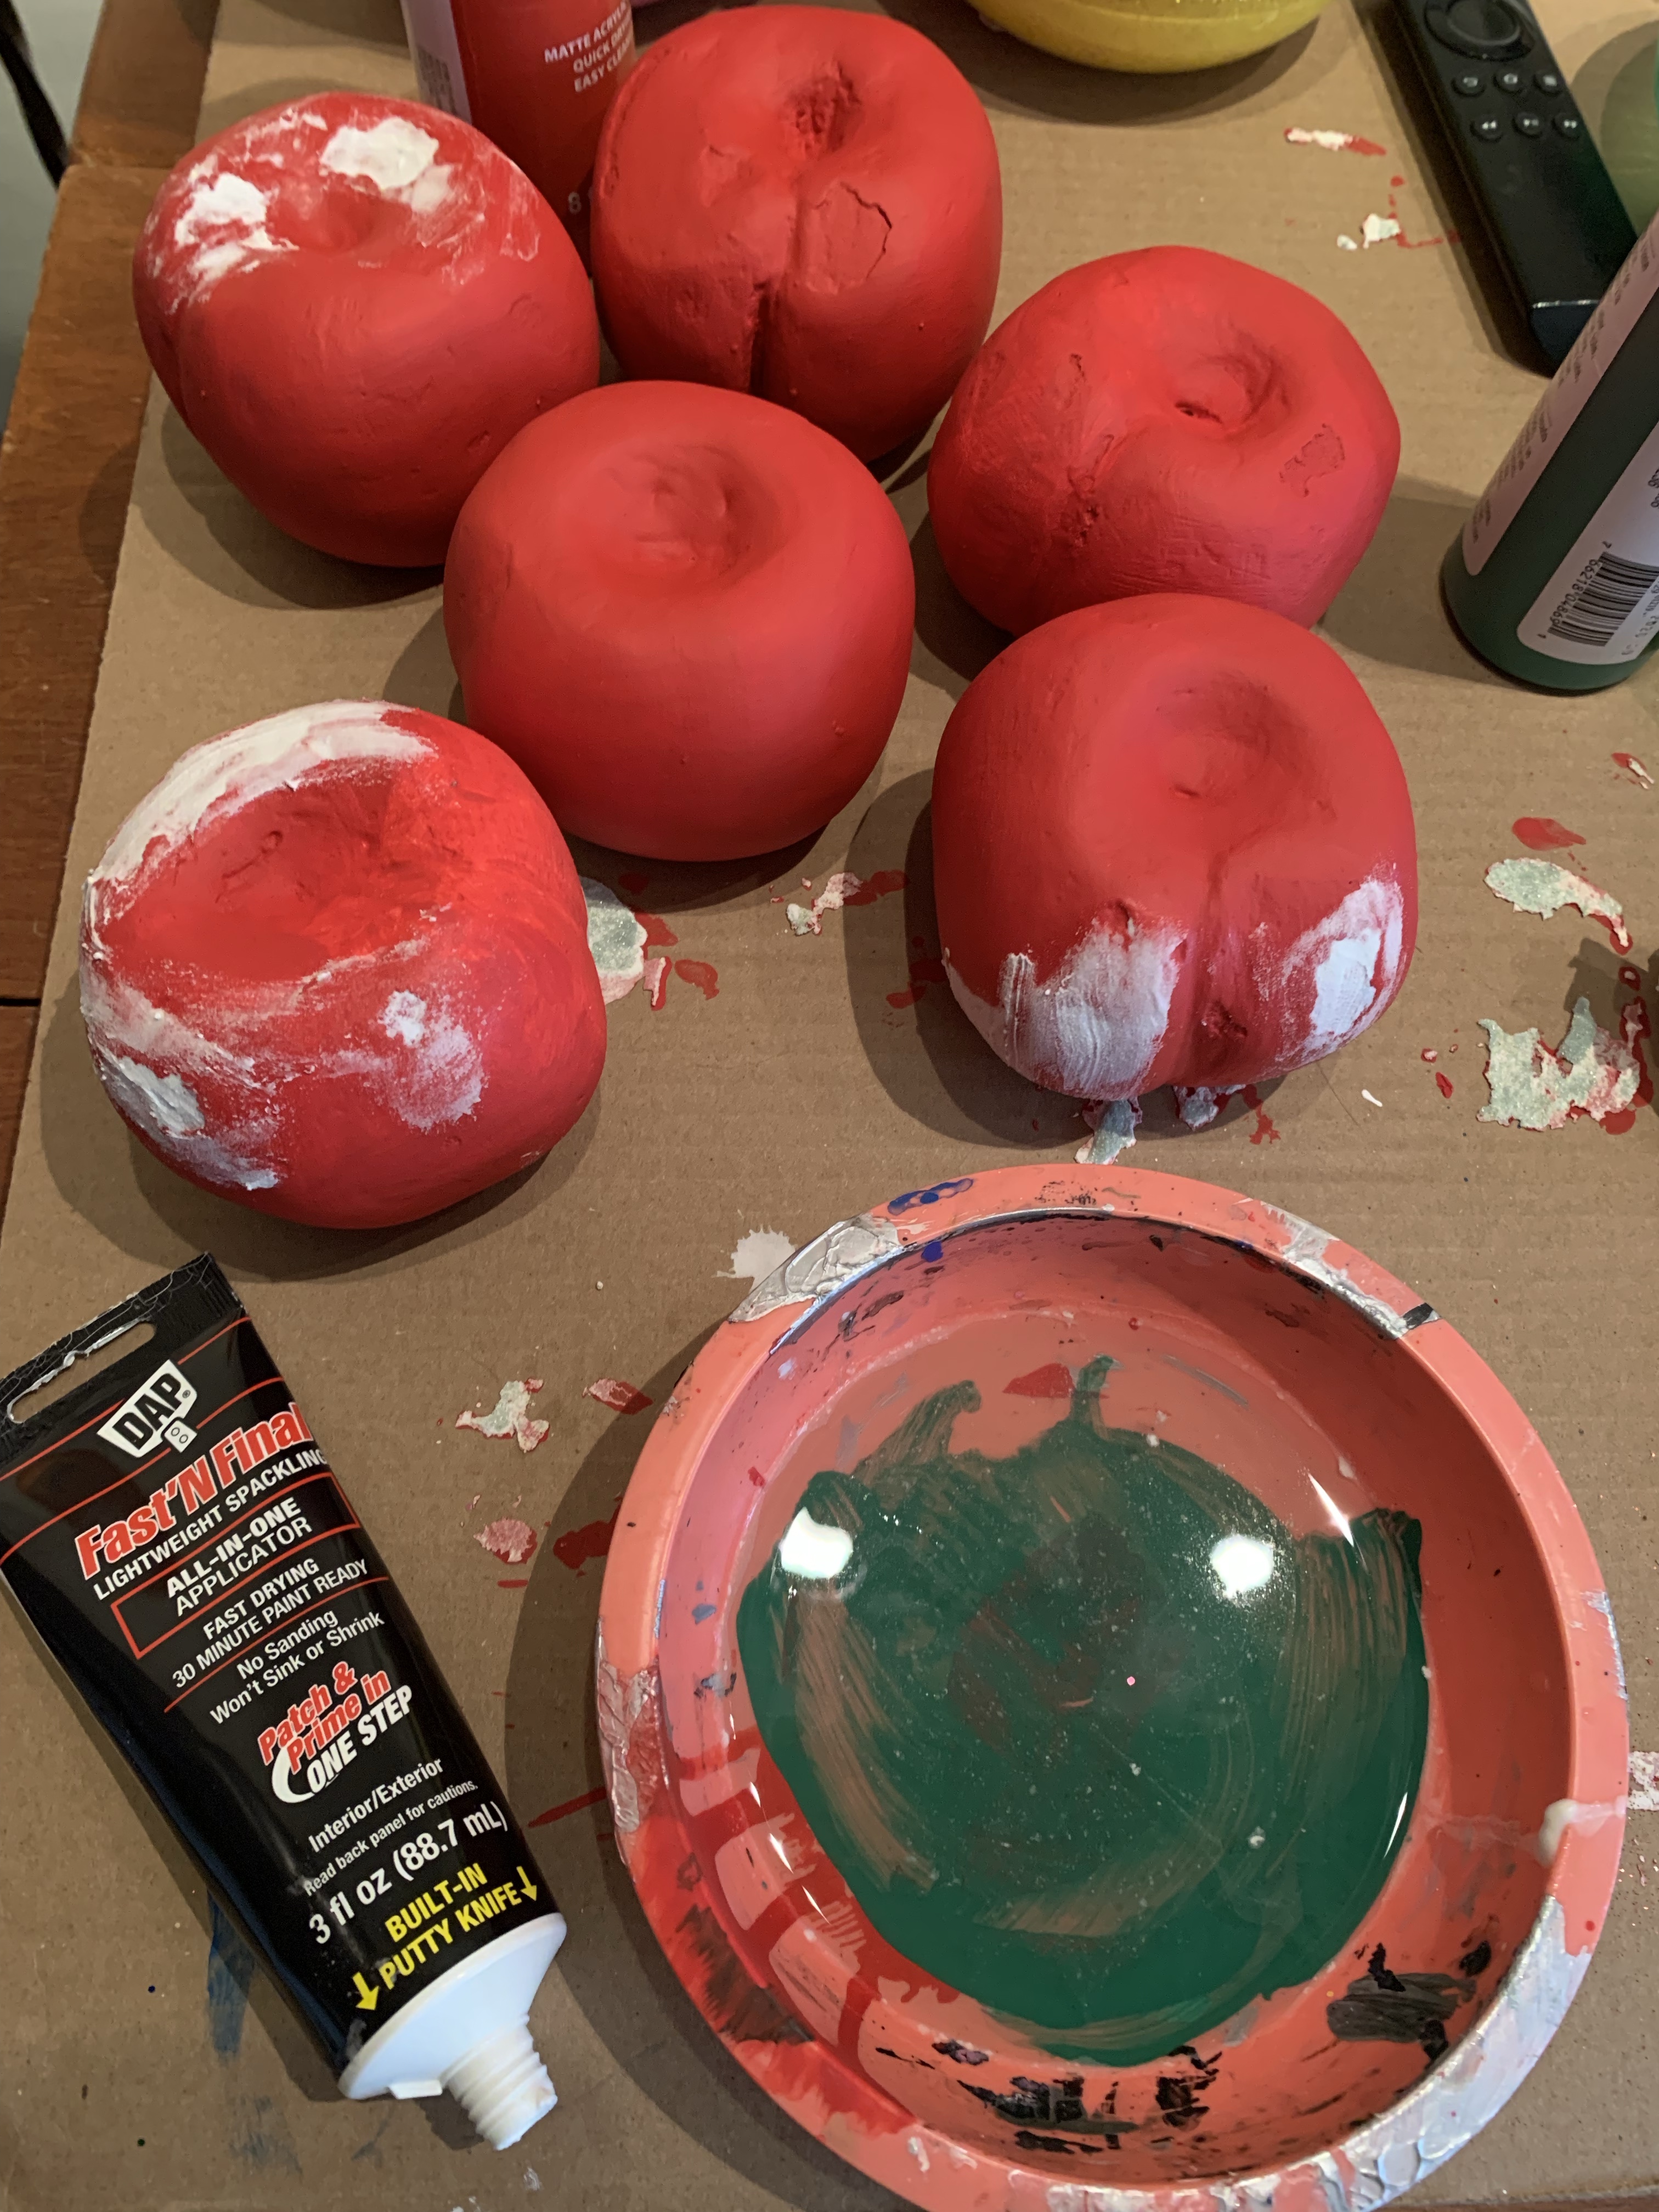
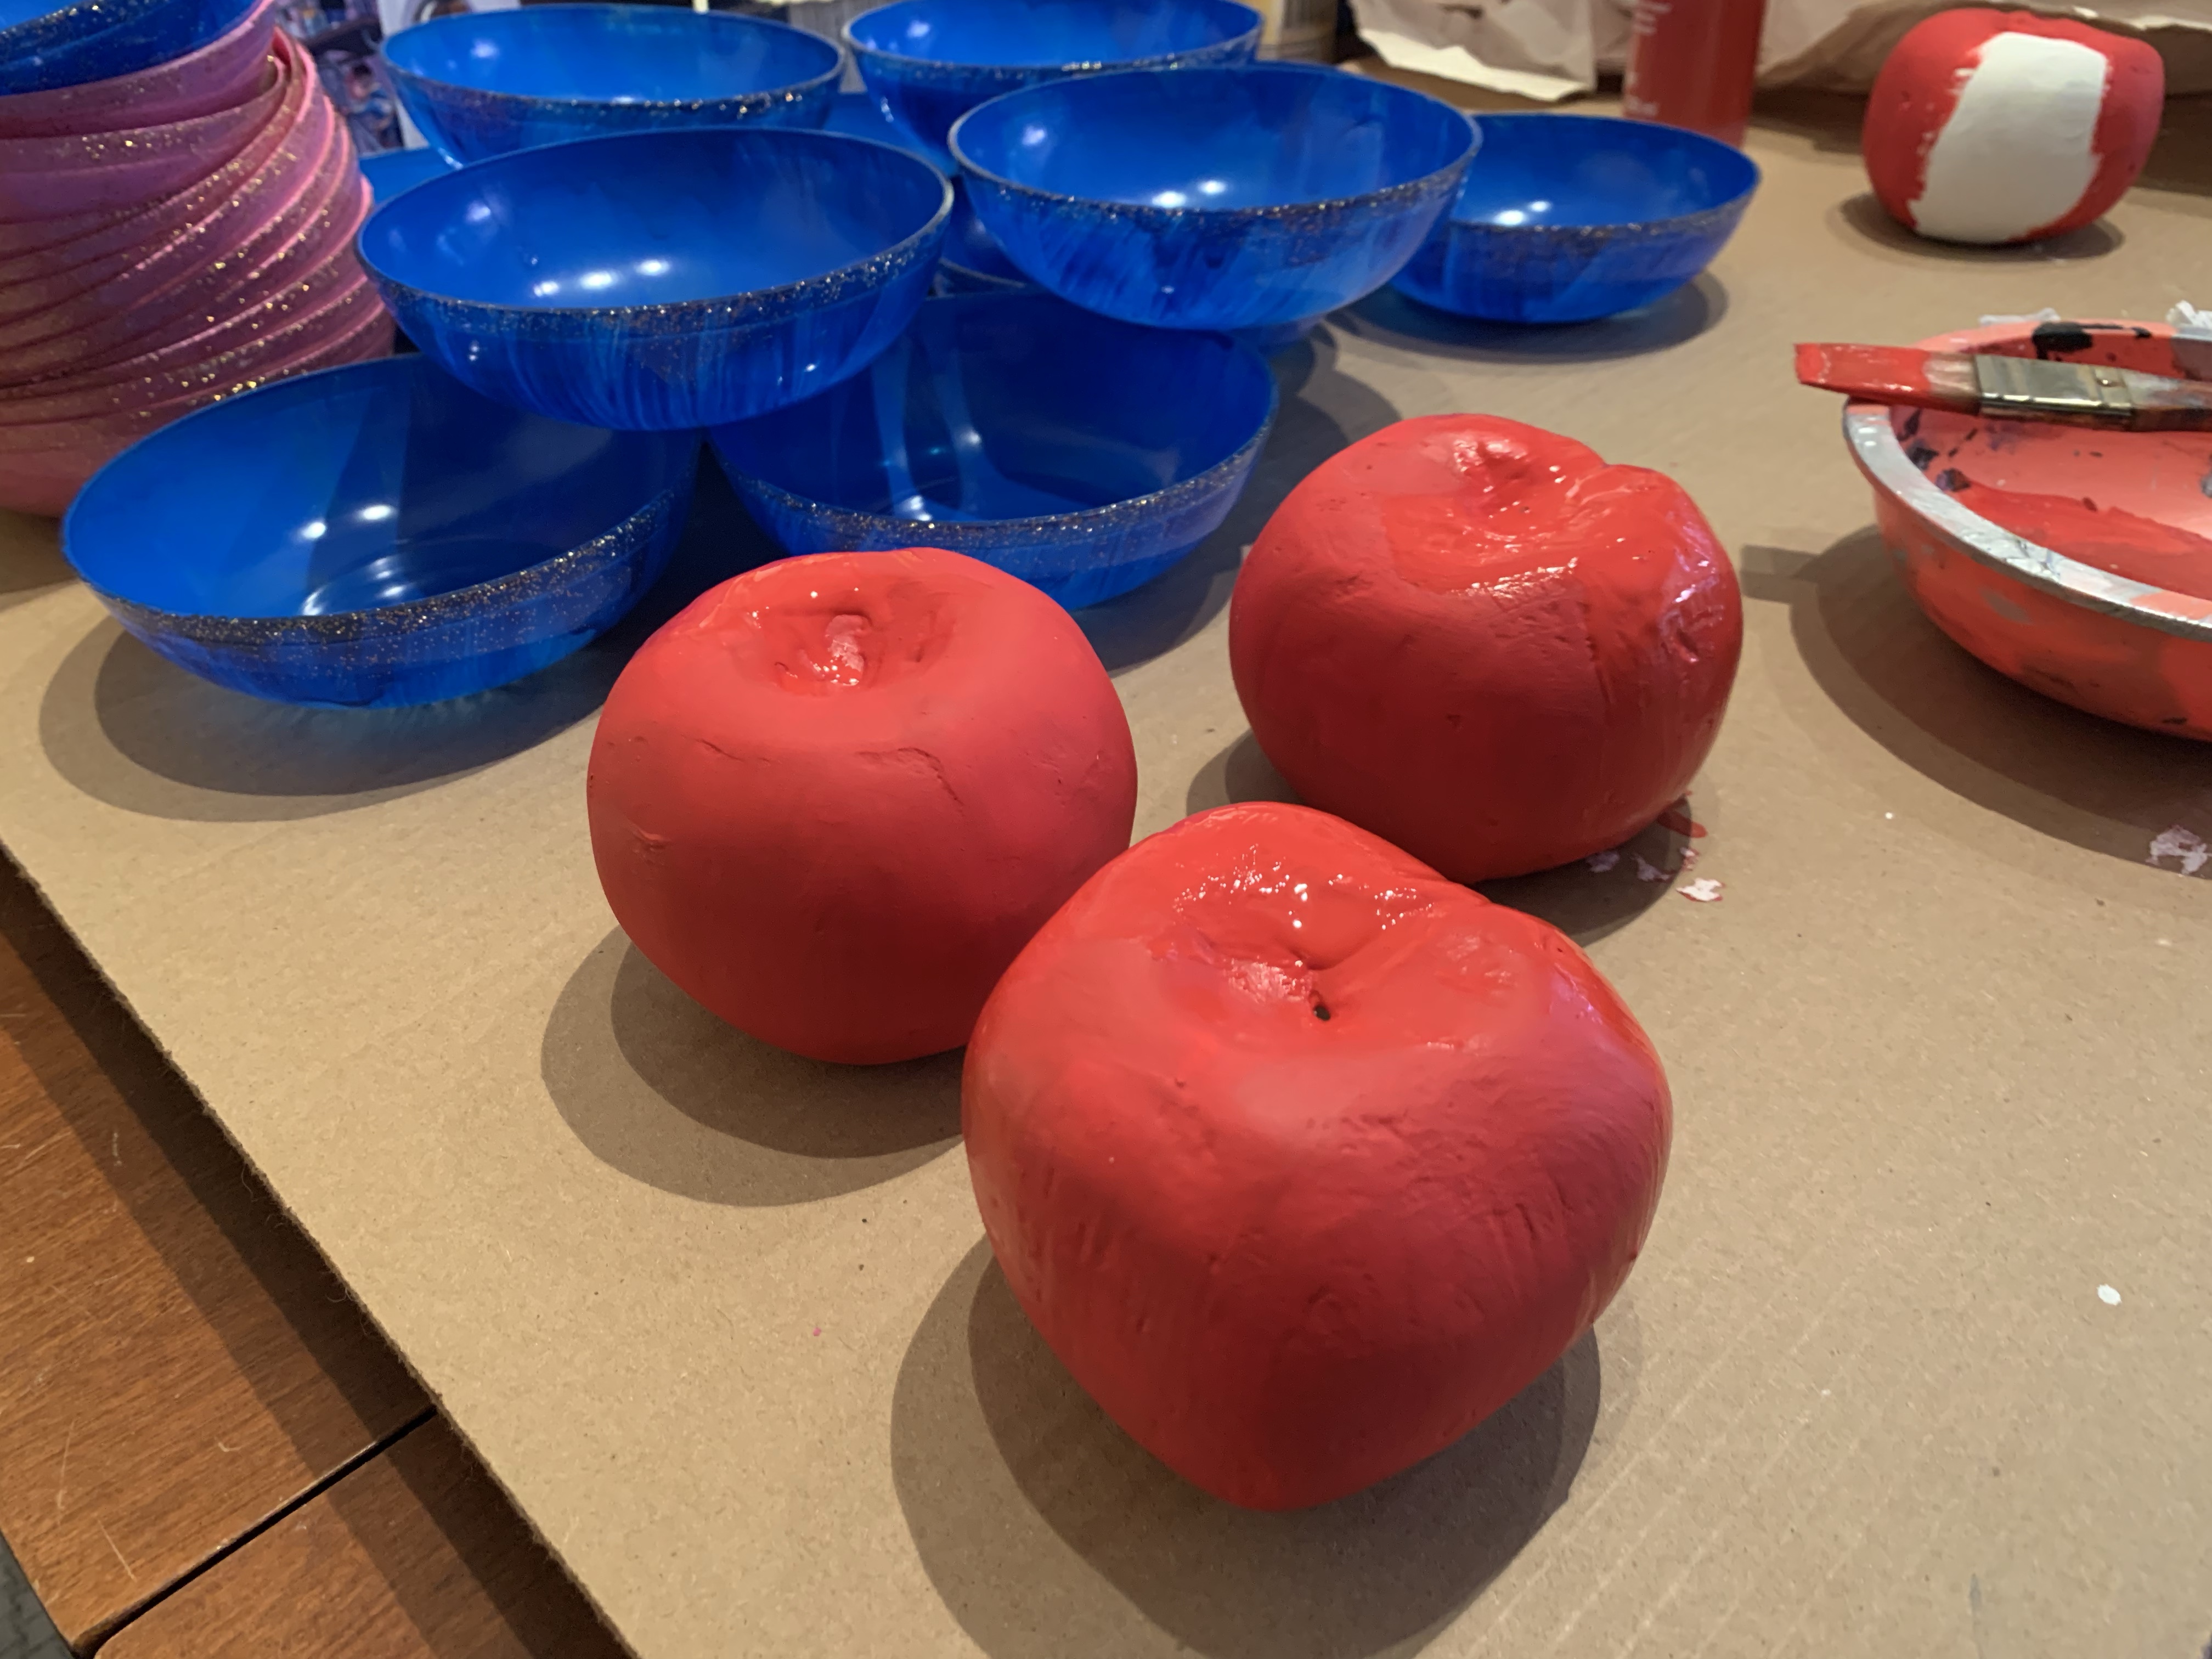
To make the cherry start with a block of green flower arrangement foam (the soft foam) and carve it into the shape of a charry. I started with a pairing knife and then used some Styrofoam tools to smooth out. I have a set of plastic tools I picked up at a craft store years ago. Afterwards she said to coat the foam with a plaster and sand it smooth. I decided to use a joint compound, which probably wasn’t the best choice, but after several applications and sanding I finally got my cherries to look decent. The problem with the joint compound was that it kept coming off the foam leaving divots. I tried to paint over them, but it was still noticeable. Then I found some small joint compound patch, that I was able to use to fill the pocks in my cherries. I painted my cherries with red paint and finished them off with a glossy bright red spray paint. For the stems, Trish had taken a wire and wrapped with masking tape and painted it. I had found these green wrapped flower arrangement wire and decided to use that as my stem. I folded over the ends a little to make them look like the little nubbins on the ends of cherry stems.
For the cupcakes, I bought some dollar store plastic flower pots and covered them in corrugated cardboard sheets. I filled the pots with insulating foam, took about 1 1/2 to 2 cans per pot to fill it up with foam. For the sprinkles, Trish had mad her sprinkles using sculpty clay. I was trying to make my own sprinkles, when I came across these balloon sticks I had bought years ago, so I cut them into pieces, instant sprinkles!
After the foam hardened I used a glue gun to glue the cherry and sprinkles on the cupcakes. I made 6 total. I certainly made some mistakes, and they’re not all awesome. But I think they came out pretty good, overall.
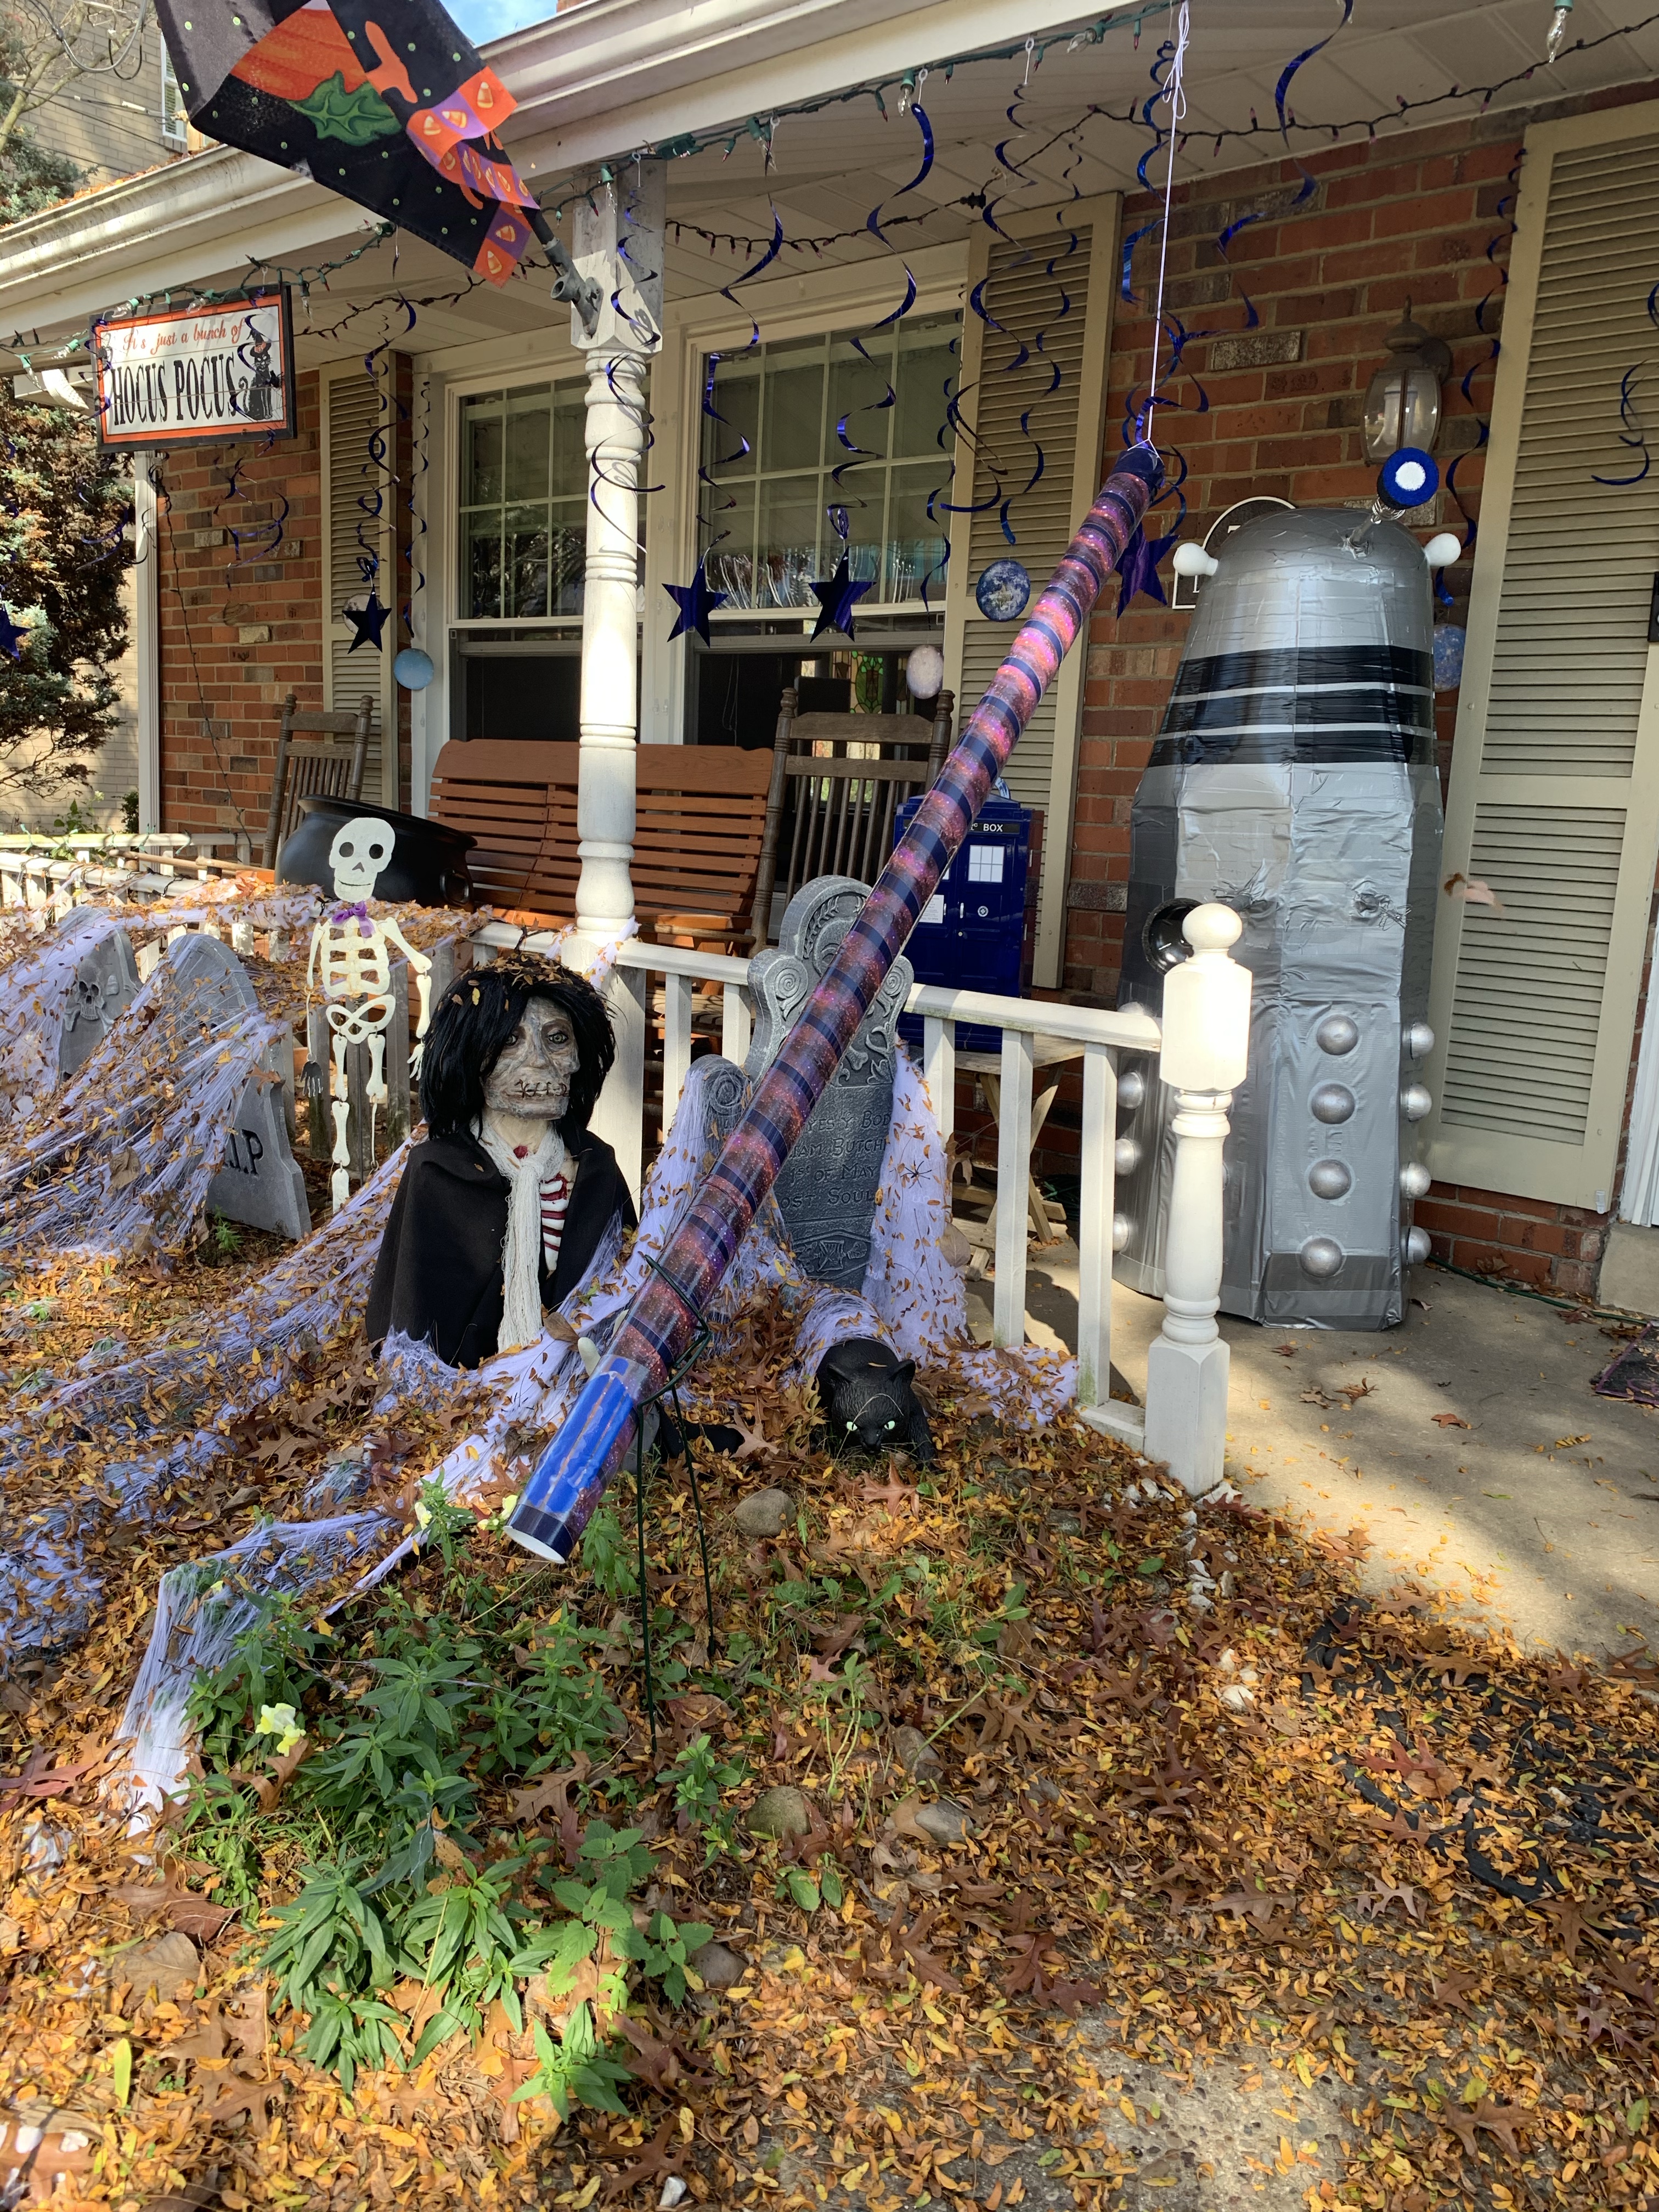
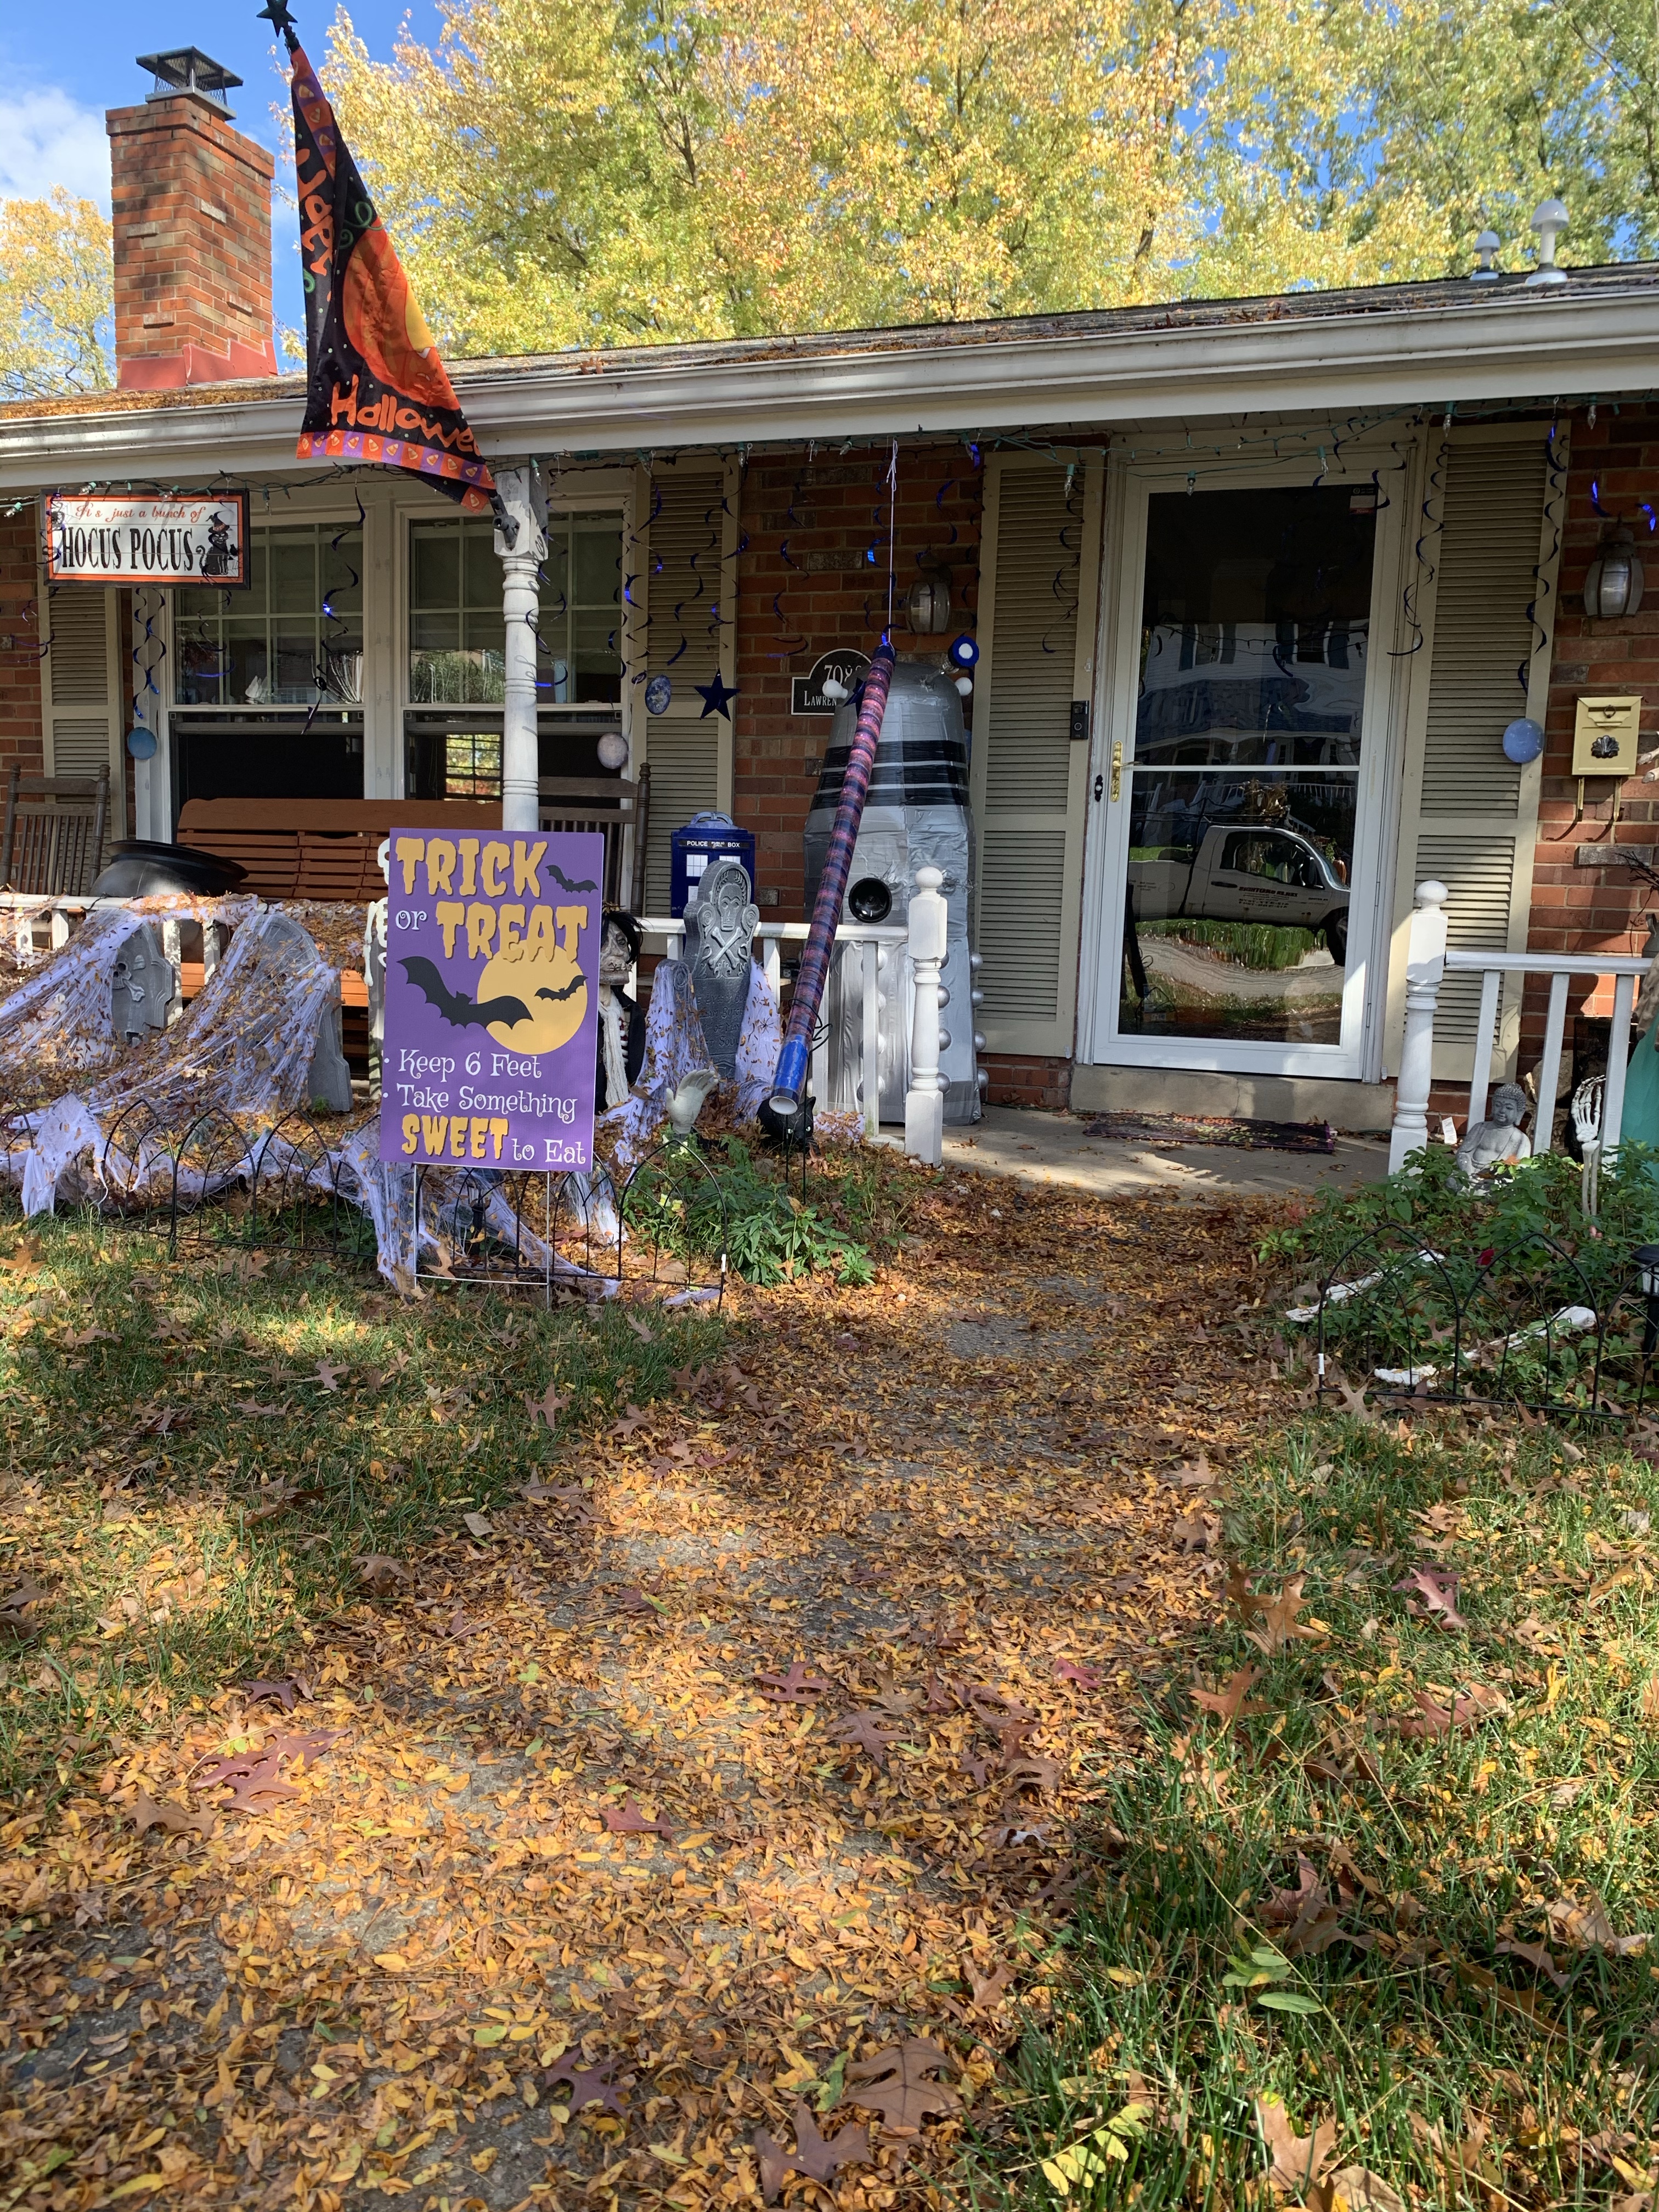
Halloween is my favorite holiday. I love it and I always look forward to it. While COVID-19 has caused a lot of disruption for 2020, I still want to participate for Halloween. Our town is allowing trick or treating for those that want to participate. And they are also providing alternative activities for those that don’t want to participate such as two Halloween parades (fire trucks etc throwing out candy to kids).
Anyway, of course I’m decorating. And I already have a costume (Doctor Who), so I figured I’d give out candy too, if anyone comes around. But, I also want to be safe and cautious due to the pandemic. My one friend is setting up a table with a plastic tablecloth. She plans to keep a bowl filled with candy and at the end of the night, just scoop up the whole table cloth and throw the rest out. That will keep her from getting germs, but that candy bowl will spread germs to the kids.
I saw an idea on the news of a tube to slide the candy to kids. I decided to make my own. The first time I tried it I decided to use toilet paper rolls and paper towel rolls. I taped them together and then with colored duct tape, taped the whole tube. It was ok, but came out a bit crappy, the tape was getting bunched and I wasn’t happy with it.
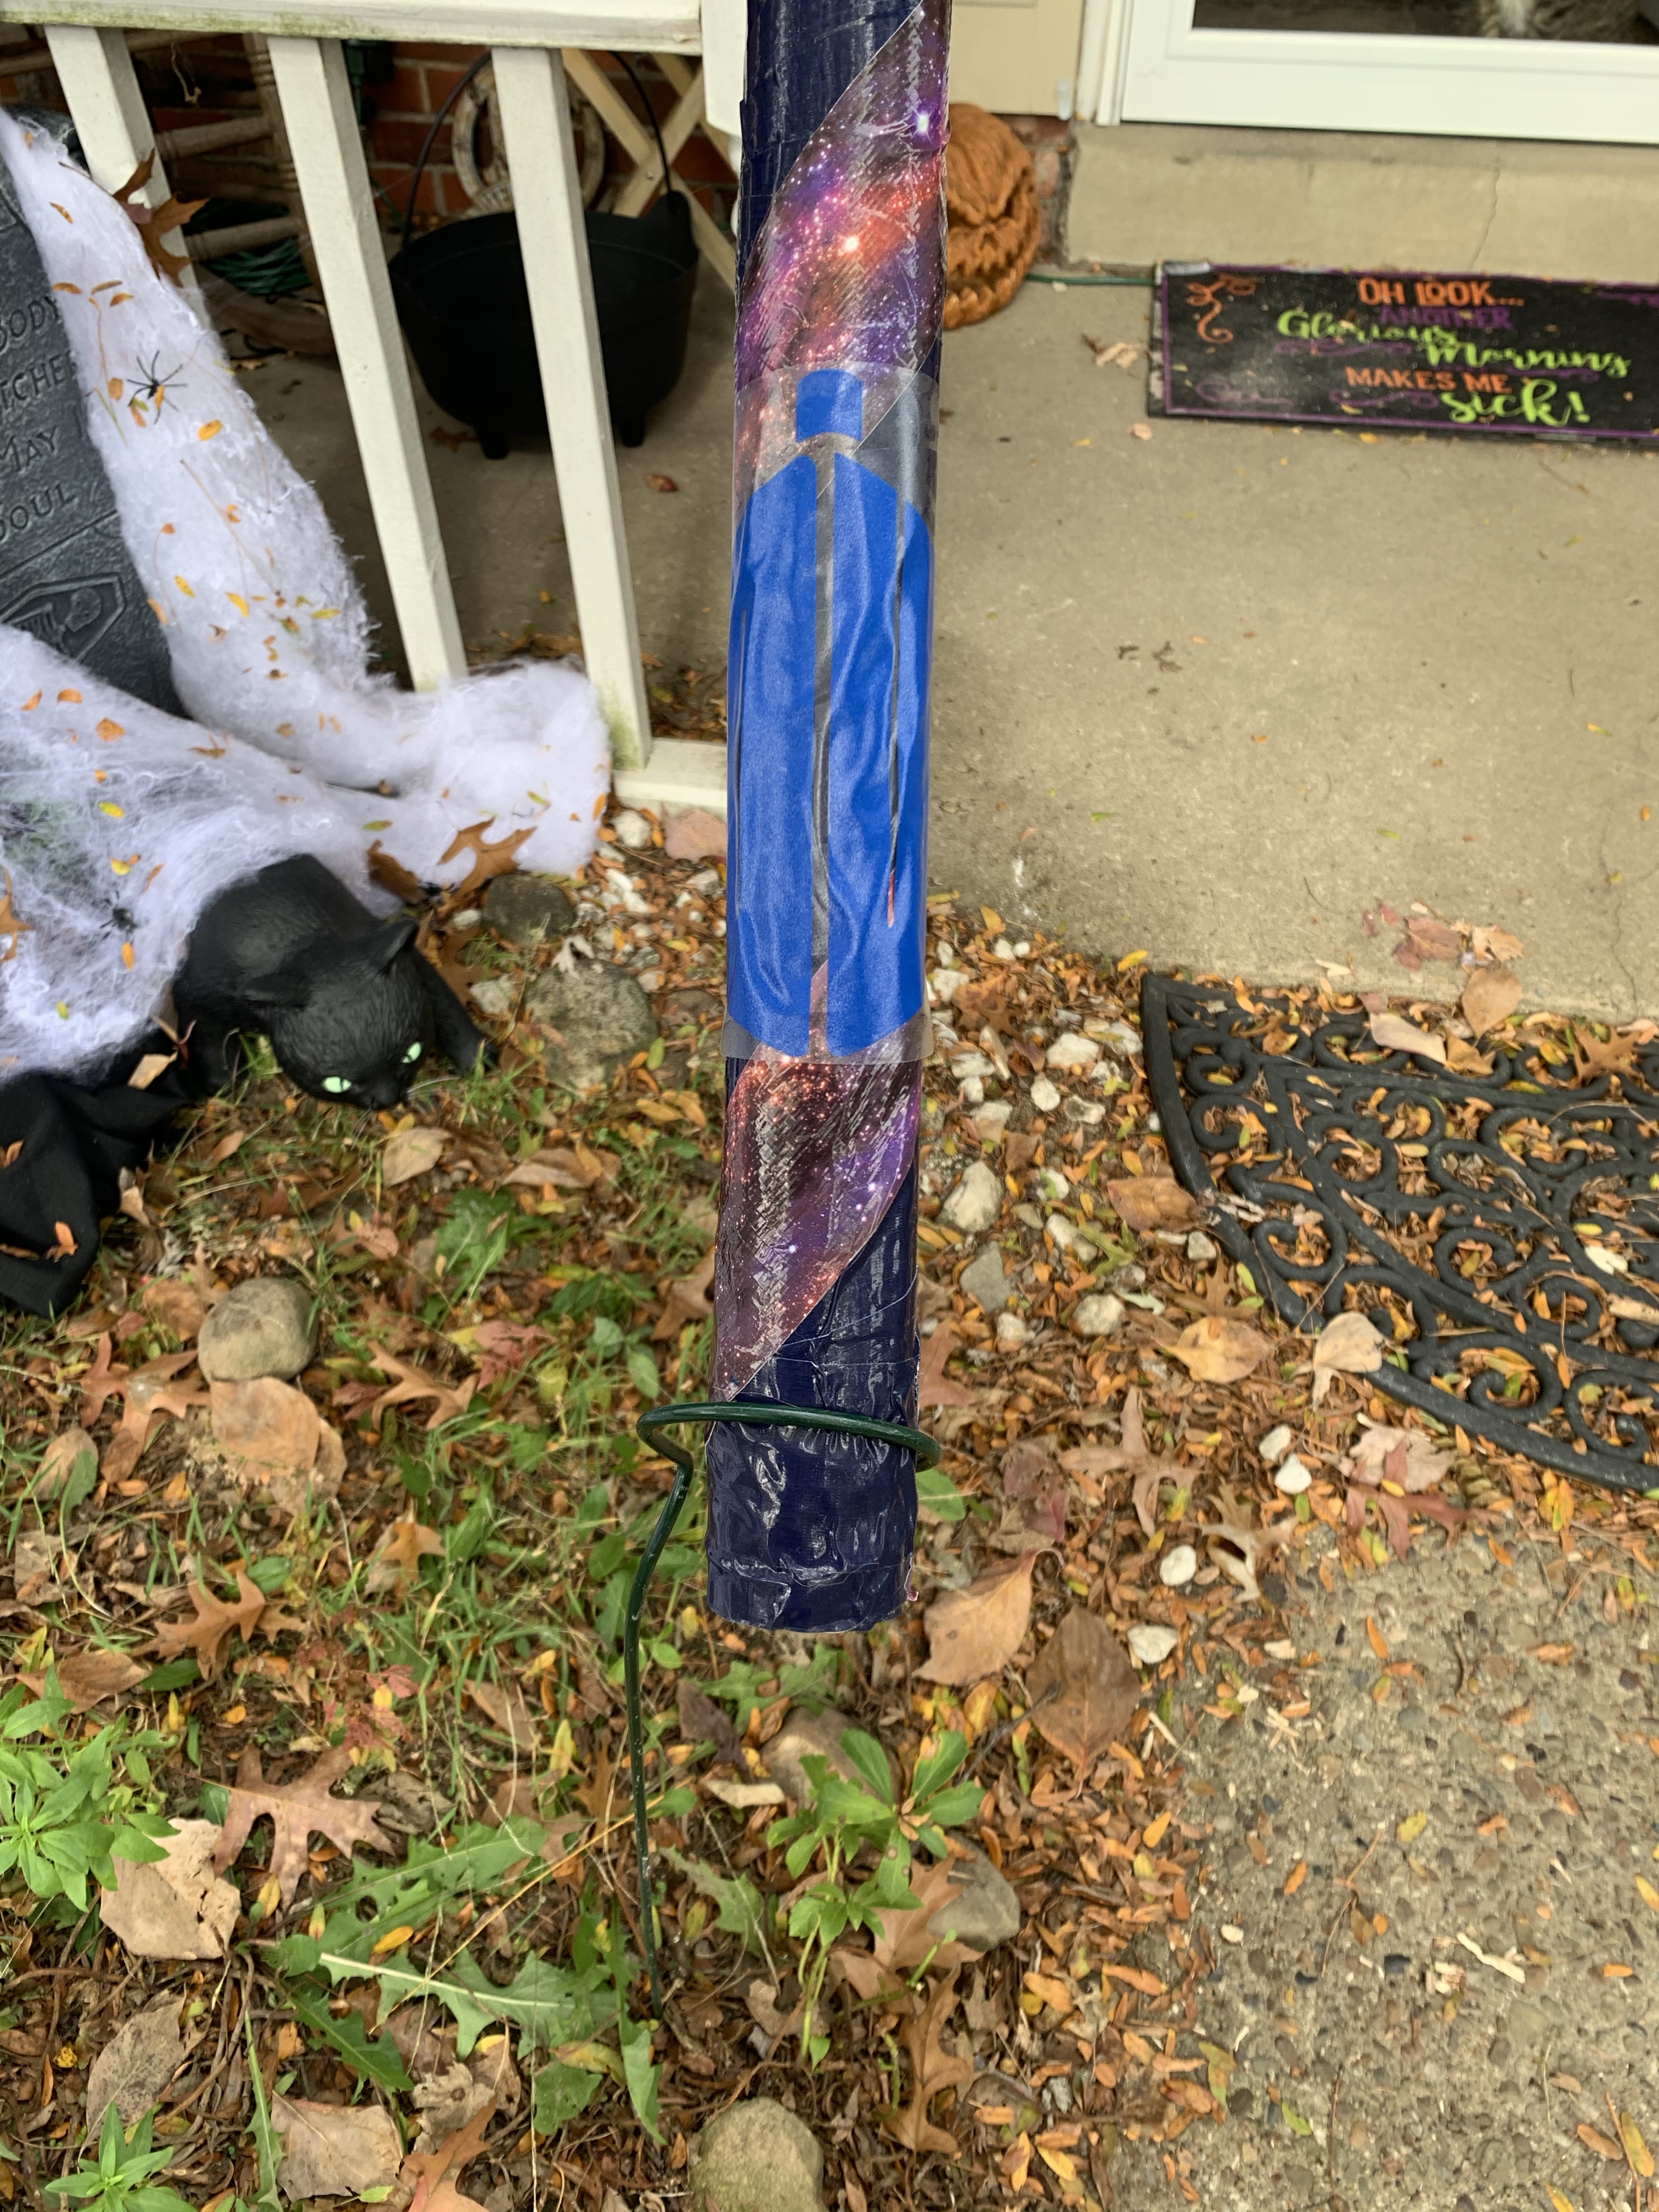
So I went to Lowes and grabbed a 2″ diameter PVC pipe from the plumbing section. Now I taped that up with my colored duct tape and added my Doctor Who sticker. Since I don’t have a staircase, I didn’t have a banister to run the tube down. So I hung it from my porch. It’s a little heavy, but I think it will do the trick. So far it is weather resistant as well.
The original tube was a bit more narrow and a bit half-assed.
The final tube hanging from the porch and a close up of the colored tape.
I also made a Dalek. It was a last minute decision, but he turned out ok, considering he’s mostly cardboard boxes and duct tape.


You must be logged in to post a comment.